Category: Data Backup & Security

  • How I Actually Use a NAS Day to Day After the Setup Phase

    How I Actually Use a NAS Day to Day After the Setup Phase

    When people talk about NAS devices online, it usually falls into two extremes. Either everything is a shiny demo during the first week, or it turns into an over engineered home lab that barely resembles normal use.

    Both miss what actually matters long term.

    This post is about what ownership looks like after the excitement fades. When the NAS stops being a project and starts being part of daily life. What still runs, what quietly disappeared, and which decisions ended up saving time rather than creating more work.

    If you are trying to decide whether a NAS makes sense beyond the initial setup phase, this is the part that usually gets skipped.


    What runs 24 hours a day

    These are the services that stay on permanently because they deliver value without demanding attention.

    Automated backups (local first, cloud as insurance)

    Local backups are the foundation of my setup. Both my MacBook and my wife’s MacBook back up automatically to the NAS, and our iPhone photo libraries are included as well. Once configured, this becomes invisible. Devices back up when they are on the network, and there is nothing to remember or trigger manually.

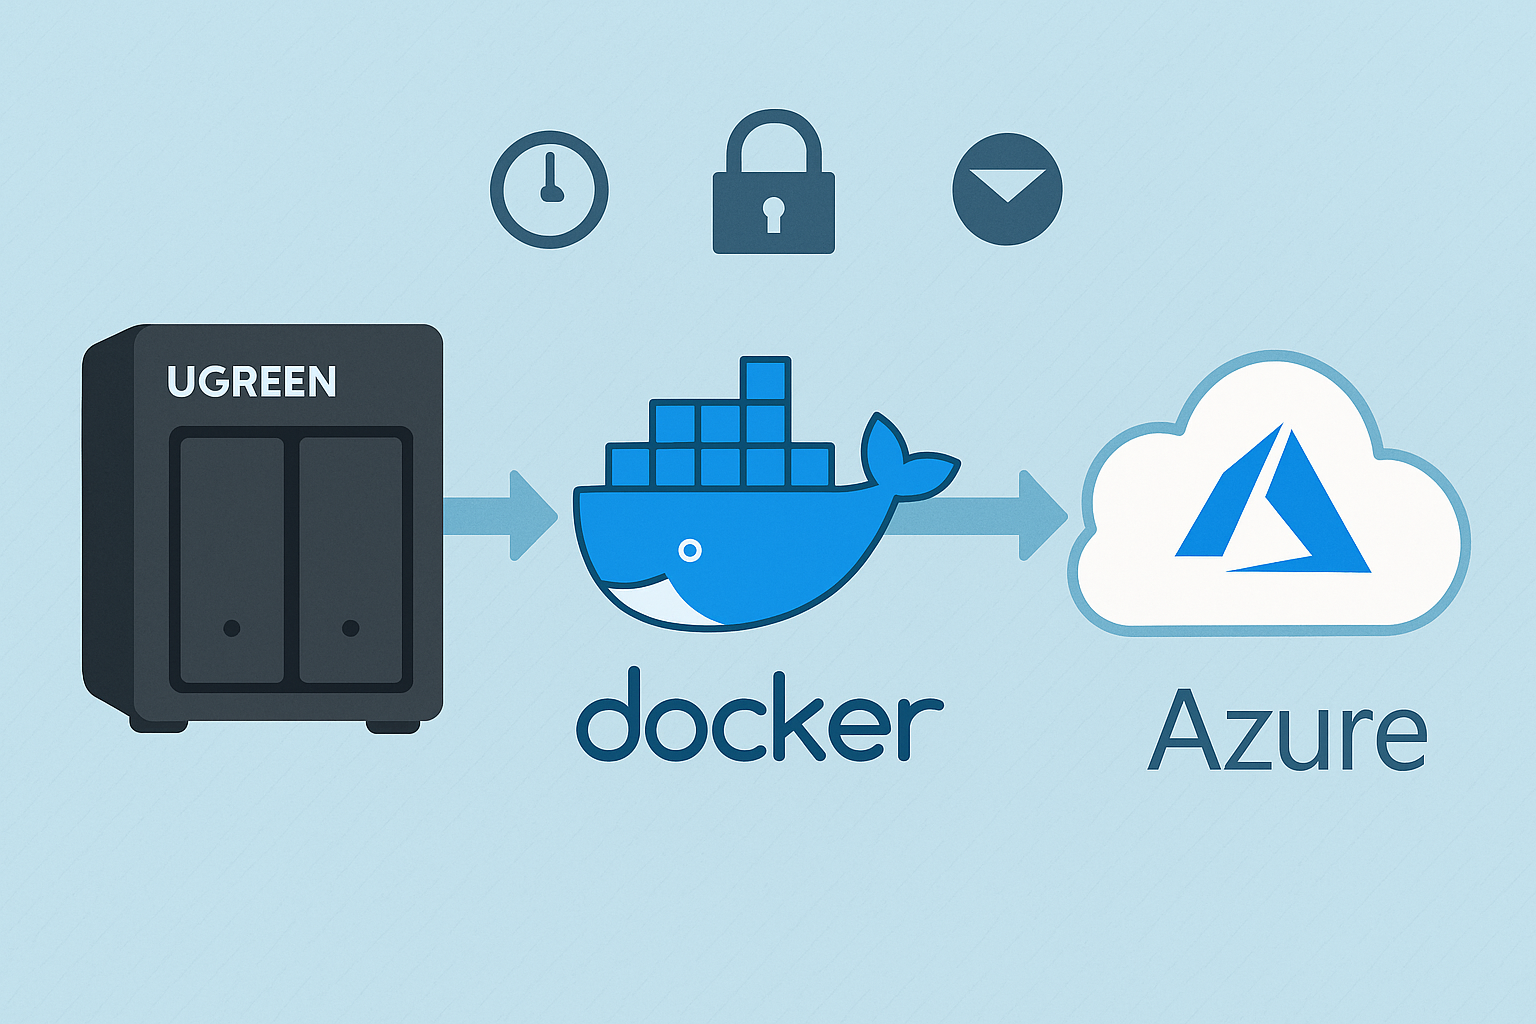
    On top of that, I use Azure Blob Storage as an off site insurance layer, not as a requirement and not as something I would tell everyone to do.

    If you are running a four bay NAS with RAID and your data lives entirely at home, an off site backup is a nice to have rather than a must have. Local redundancy already covers most everyday failures. The cloud layer exists to protect against unlikely but high impact events such as theft, fire, or total hardware loss.

    In my case, I am storing roughly 3TB in the Cool tier with RA GRS enabled, meaning the data is replicated across regions. This currently costs around $65 to $70 per month, and the cost is dominated by geo replication, cool tier storage, and write operations.

    I have not had to restore from this backup yet, which is exactly how I want it to be. It exists purely for peace of mind rather than day to day recovery.

    The backups are handled using rclone, which gives me full control over scheduling, encryption, bandwidth usage, and retention policies. It also avoids vendor lock in. If I ever decide to move away from Azure, the tooling stays the same. I have a full breakdown of how this is set up in my rclone backup guide.


    Core Docker services

    A small number of Docker containers run continuously because they support everything else I rely on.

    Home Assistant is always running. It handles automations, device integrations, and state tracking quietly in the background. I rarely interact with it directly day to day, which is exactly the point. When automations are reliable, they disappear from your attention entirely.

    This pattern repeats across the setup. Anything that needs constant monitoring or manual intervention does not survive long term.


    What runs occasionally

    These are tasks that exist to maintain confidence in the system rather than provide convenience.

    Maintenance and administration

    I do not actively manage the NAS day to day, but I do check in periodically.

    This usually means:

    • Updating Docker containers when meaningful updates are released
    • Applying NAS firmware updates
    • Reviewing SMART data and disk health
    • Confirming backups are still completing as expected

    This happens infrequently, often weeks apart. The goal is not optimisation or performance tuning. It is reassurance. I want to know the system is still healthy and behaving as expected.

    Manual actions

    Some things are intentionally kept manual.

    I occasionally restore files from backups to confirm that restores actually work. This is not something I do often, but it matters. A backup that has never been tested is only theoretical protection.

    Container updates are another example. While critical updates are automated, some applications require manual updates or restarts. I prefer this balance. Automation handles the boring and predictable parts, while I stay in control of anything that could cause disruption.

    These interactions are rare, but deliberate. Over time, they build trust in the system rather than add ongoing work.


    What I am actively planning to add

    This is where the role of the NAS will expand beyond storage and background services.

    PoE security cameras

    I am preparing to move away from battery powered cameras and into a PoE based setup once UGREEN’s native cameras are available.

    At the moment, I use SwitchBot outdoor cameras. They are genuinely good cameras, but battery management is a constant friction point. I have already run USB power to some of them, and in one location that cable is far from ideal. It works, but it is not how I want fixed infrastructure to be installed.

    The plan is to introduce a dedicated PoE switch and run Ethernet to each camera location. CAT5e, CAT6, and even CAT7 will all work for PoE cameras. In practice, CAT6 offers a good balance of reliability, shielding, and future flexibility without chasing specifications that add little real world benefit. The priority here is consistency rather than speed.

    The appeal of the upcoming UGREEN cameras is not just PoE. Features like local AI processing, tight NAS integration, and removing subscription dependencies are exactly what I want. I have already covered those features in detail in my UGREEN SynCare AI Home Security NAS post.

    Once deployed, the NAS shifts from being storage and services into proper local surveillance infrastructure, with recordings kept on site and fully under my control.


    What I use it for beyond storage

    A family recipe web app

    One use case I did not originally plan for is hosting small, purpose built applications.

    I am currently building a simple web app to store and manage family recipes. Rather than paying for another subscription or relying on third party apps, it runs locally in Docker and does exactly what we need. No ads, no accounts, and no recurring costs.

    This is a good example of where a NAS quietly replaces paid services. The value is not complexity, but ownership and flexibility over time.

    Media streaming

    I originally used Plex for media streaming, but over time I moved to Jellyfin.

    Plex increasingly depends on user accounts, cloud services, and paid tiers. Pricing changes, features moving behind subscriptions, and past security incidents eventually made me uncomfortable with the direction of the platform.

    Jellyfin is fully self hosted. There is no account requirement, no cloud authentication, and no external dependency. Everything stays local. The trade off is less polish, but the benefit is full control.

    For my usage, that trade off is worth it. Media playback should not depend on an external service being online, a subscription remaining valid, or an account existing at all. Once everything is local, media becomes another background service rather than something that needs to be managed.


    Built in apps I still use

    While Docker handles most workloads, I do not avoid built in NAS features entirely.

    I actively use:

    • The UGREEN photo app for managing local photo libraries
    • The UGREEN UPS integration in the control panel for monitoring power events and safe shutdowns (US3000 UPS review)

    The difference is intent. I use built in apps where they add value and integrate tightly with the system, and Docker where flexibility matters more.


    What surprised me over time

    Stability changes how you think about performance

    I still care about performance, but I no longer obsess over it. The system has proven itself stable under real workloads, which means I spend less time watching metrics and more time trusting the platform.

    A NAS becomes background infrastructure

    Once configured properly, a NAS fades into the background. That is a good thing. It should feel closer to household infrastructure than a gadget you constantly interact with.

    Simplicity scales better than features

    The setups that lasted were the simple ones. Anything that added complexity without a clear benefit was eventually removed.


    Who this kind of setup is actually for

    This approach works well for people who want reliability first.

    If you enjoy constant tweaking, experimentation, and rebuilding, there is nothing wrong with that. Some people genuinely enjoy running a home lab as a hobby.

    For me, the NAS is not a hobby. It is infrastructure. I want it to work, recover gracefully when something goes wrong, and stay out of the way the rest of the time.


    When something goes wrong

    This is where the setup really earns its keep.

    Things do go wrong occasionally. Files get deleted by mistake. Power drops unexpectedly. A service stops behaving the way it should. The difference now is that these situations are no longer disruptive.

    If a file is deleted, it is a restore job, not a panic. If there is a power cut, the UPS handles shutdown cleanly and everything comes back up without intervention. If something looks off, I already know where to check and what a healthy system looks like.

    Even the worst case scenarios are planned for. Local backups cover day to day mistakes. Off site backups exist for events I hope never happen. Nothing relies on a single point of failure that would force me to scramble.

    That is the real outcome of this setup. Not that failures never happen, but that they stop being stressful when they do.


    Why this setup works long term

    Owning a NAS is not exciting long term, and that is exactly why it is worth having.

    Once the setup phase is over, it becomes dependable infrastructure. Files are protected locally, off site backups exist for worst case scenarios, automations run quietly, and services behave predictably.

    The goal was never to build the most complex setup possible. It was to build something that reduces friction over time.

    A setup like this saves more than money. It saves attention. Fewer batteries to charge, fewer subscriptions to track, fewer dashboards to check, and fewer decisions to revisit.

    That is the real value of a NAS once you stop treating it like a project and start treating it like infrastructure.

    If you’re thinking through a similar setup and want a second opinion, I’m always happy to talk it through!
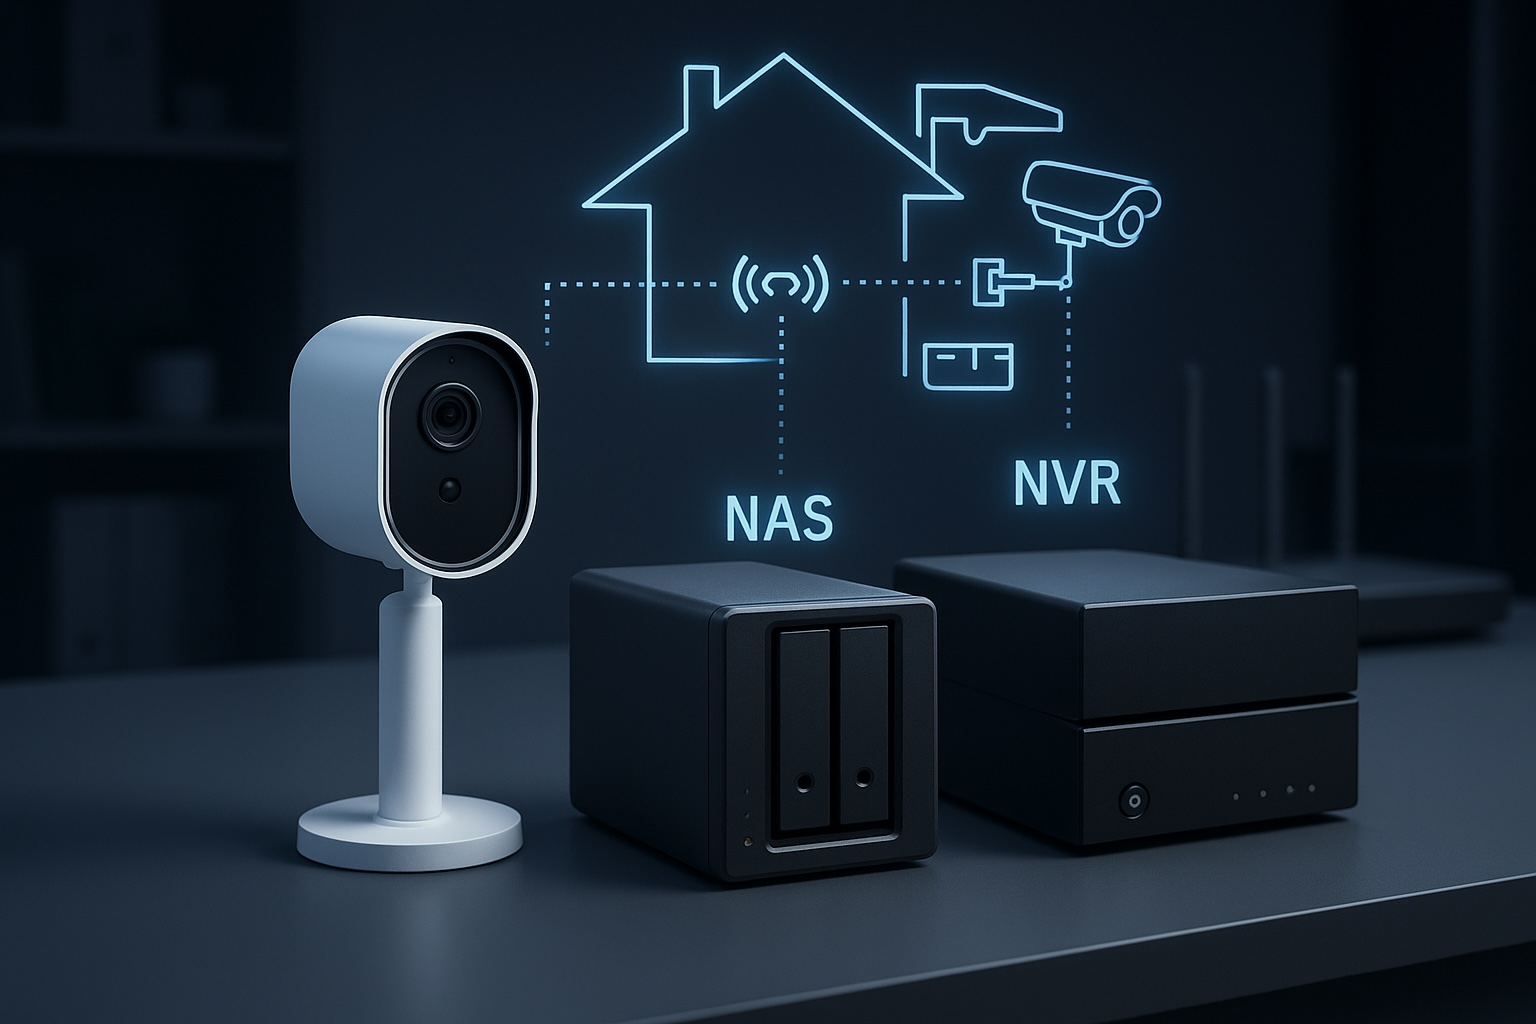
  • How to Store Security Camera Footage at Home using NAS or NVR

    How to Store Security Camera Footage at Home using NAS or NVR

    Security camera systems have become more capable, flexible, and open over the last decade. One of the most significant developments is the shift from closed cloud storage ecosystems to open, standards based recording.

    A Network Attached Storage (NAS) system can serve as a robust central recording point, provided the cameras support open protocols and the NAS is configured to accept, index, and store those recordings properly. When designed correctly, a NAS based workflow offers long term retention, predictable performance, and complete ownership of your data.

    Note: For practical insight into how a modern NAS behaves under these workloads, read my post on UGREEN NASync DXP2800 Review 2 Months Later. For background on why network storage is valuable in the first place, my guide on NAS Network Storage and Why You Need It provides a useful introduction.


    Understanding the NAS Recording Workflow

    A NAS does not record video by itself. It has no built in awareness of surveillance workflows unless specific software is installed. The NAS becomes a recording engine only when three conditions are met.

    1. The camera must send data using an open standard.
    2. The network must provide stable addressing and sufficient sustained throughput.
    3. The NAS must run a service that can receive, process, and index the incoming streams.

    Regardless of the vendor, the workflow operates in stages. The camera encodes the video. The data is transmitted via RTSP or file transfer. The NAS writes it to storage. Retention rules then determine when that data is deleted. While simple on paper, the technical details behind each stage determine reliability.


    Camera Protocols: The Language of Recording

    Marketing descriptions often promise local recording, but this can sometimes refer to SD cards rather than network storage. The technical specification sheet is your authoritative source. A NAS can only record from cameras that support the following open protocols.

    • RTSP (Real Time Streaming Protocol): This is the industry standard for continuous recording. The camera provides a persistent video URL that the NAS connects to. RTSP connections are long lived and highly sensitive to network interruptions.
    • ONVIF Profile S: This protocol allows cameras and recorders to communicate in a standard way. Cameras supporting ONVIF usually expose an RTSP stream and allow the NAS to discover and configure the device automatically. It guarantees a baseline of interoperability.
    • FTP (File Transfer Protocol): Event driven cameras often use this. When motion occurs, the camera creates a specific file and uploads it to a folder on the NAS. This is not suitable for continuous recording, as it would generate thousands of fragmented files per hour.
    • SMB or NFS: Similar to FTP, the camera writes directly to a shared folder. The NAS is unaware that recording is happening. It simply sees files being written.

    The bottom line: If a camera relies on a proprietary cloud app and does not support RTSP, ONVIF, or FTP, it cannot be integrated into a NAS workflow.

    A modern digital illustration showing how a security camera sends video through a home network to different storage systems, with glowing network lines, a router, and cloud backup icons.
    How a security camera sends footage through the home network to different storage options.

    How the NAS Processes Video

    Once the camera is connected, the NAS performs several key tasks that determine recording quality.

    • Stream negotiation: For RTSP workflows, the NAS initiates the session. Data is sent over UDP (efficient but sensitive to interference) or TCP (more resilient to packet loss but higher latency).
    • Indexing versus raw storage: Advanced surveillance software, such as Synology Surveillance Station or Frigate, creates a database index which allows timeline scrubbing and smart playback. Simpler setups just dump raw files, which are easier to back up but harder to review manually.
    • Retention enforcement: Surveillance datasets grow rapidly. The NAS must frequently scan and delete old footage to prevent volume exhaustion. This logic must run efficiently to avoid bogging down the system.

    Encoding Formats: H.264 versus H.265

    The codec you choose determines storage requirements and CPU load.

    • H.264: The most compatible standard. It uses more storage space than newer codecs but requires relatively little processing power to decode and view.
    • H.265 (HEVC): Highly efficient. It can reduce storage needs significantly for the same visual quality, but it requires more processing power to view and is less compatible with older browser based players.

    Bitrate behaviour: You must also choose between Variable Bitrate (VBR) and Constant Bitrate (CBR).

    • VBR saves space by lowering quality during static scenes, but storage usage will fluctuate depending on activity.
    • CBR ensures predictable storage consumption but may sacrifice image quality during high motion scenes.

    Storage Hardware: Why Desktop Drives Fail

    Security camera workloads are unique. Continuous recording generates a constant write workload. Event based recording creates sudden, uneven bursts.

    • HDD: Drives specifically tuned for surveillance or NAS use are strongly recommended. Consumer desktop drives are not designed for twenty four seven write cycles and may suffer rapid mechanical failure or performance degradation.
    • SSD: Solid state drives offer excellent speed, but continuous video recording consumes their write endurance quickly. Only enterprise grade or high endurance NAS SSDs should be used for surveillance.

    Deep dive: For a detailed analysis of suitable storage, read my post on Choosing the Best Drives for Your NAS Setup.

    A side-by-side comparison of PC, NAS, and surveillance hard drives, showing which storage type is suitable for continuous recording and always-on workloads.

    Networking: The Silent Killer of Reliability

    Network quality is the most overlooked factor in surveillance. A fast speed test does not guarantee a stable surveillance network. These are the technical realities that matter.

    1. Stable addressing: RTSP streams rely on fixed IP addresses. If the router assigns a new IP to the camera, recording breaks. Static IPs or DHCP reservations are essential for cameras and the NAS.
    2. Session persistence: Mesh Wi Fi systems often steer devices between nodes. This handover causes a micro outage, which can create corrupted frames or dropped connections in recordings. Cameras should ideally be associated with a single access point.
    3. Airtime congestion: Wi Fi cameras share airtime with every other device on the channel. Even with a strong signal, a congested channel will cause upload failures and inconsistent performance.
    4. Upload saturation: Many home internet connections have limited upload bandwidth. If multiple cameras trigger at once or if you back up footage to the cloud, you can saturate the uplink and cause dropped frames or failed transfers.

    NAS versus NVR: Which Architecture is Right?

    • NVR (Network Video Recorder): A purpose built appliance dedicated to recording. It is straightforward and reliable but focused almost entirely on video.
    • NAS (Network Attached Storage): A general purpose server. It offers flexible retention, open file formats, and the ability to run other applications such as media servers, home automation and backup tools alongside surveillance workloads.

    If you want a dedicated appliance that requires very little ongoing thought, an NVR is usually the better choice. If you want a central hub for data, applications, and cameras, a NAS workflow provides more flexibility and control.


    Conclusion

    A NAS becomes a powerful surveillance tool when the workflow is respected end to end. Cameras must use open standards such as RTSP or ONVIF. The network must provide stable addressing and consistent performance rather than just impressive speed test results. Storage must be chosen for endurance as well as capacity. Surveillance software must be configured to handle streams, indexing and retention without overwhelming the hardware.

    This workflow centric view removes guesswork. By focusing on these technical realities, it becomes possible to build a system that delivers consistent results for years rather than months.

    Next steps:

  • UGREEN US3000 UPS Review – The Perfect NASync Companion

    UGREEN US3000 UPS Review – The Perfect NASync Companion

    Disclosure: As an Amazon Associate, I earn from qualifying purchases. Some links in this article may be affiliate links, which help support the site at no extra cost to you.


    Introduction

    After a week of daily use, the UGREEN US3000 UPS has already proven why it exists. Power protection isn’t glamorous, but even a short outage can corrupt drives or interrupt critical writes on a NAS.

    UGREEN designed the US3000 to prevent that exact risk — not by adding complexity, but by integrating power management directly into UGOS Pro, the same operating system used in the NASync series. (If you want to see how it performs in practice, read my UGREEN NASync DXP2800 two-month review for a deeper look at daily reliability and real-world performance.)

    Unlike most universal UPS units that rely on dated software and manual setup, this compact model is purpose-built for NASync devices. It feels more like a built-in safeguard than an accessory — quietly doing its job in the background.


    Design and Build Quality

    The US3000 is constructed from solid aluminium alloy, finished in the same matte silver-grey as the DXP-series NAS units. It’s small (120 × 80 × 30 mm, 440 g) yet dense, with precise machining and no flex.

    Inside, it houses a 12 000 mAh (43.2 Wh) battery pack made from four SunPower INR18650-3000 cells wired in series. Dedicated circuitry manages charging, discharge rate, and temperature control, while the metal enclosure doubles as a passive heatsink.

    The internal layout is clean and practical: foam-cushioned cells, Mylar-insulated wiring, and reinforced connectors. The supplied DC5525 and USB-C cables are short and tidy — ideal for rack or shelf setups. It’s clear UGREEN designed this as a true companion for its NAS line rather than a generic UPS.


    Setup and Integration with NASync

    Setup takes under five minutes. Connect the US3000 between your NAS and its power supply using the DC5525 lead, then attach the USB-C cable.

    Once powered, UGOS Pro detects the UPS automatically under Control Panel → Hardware & Power → UPS. From there you can view charge status, voltage, and shutdown options — all without installing drivers or third-party software.

    That seamless integration is what separates it from typical UPS units. The US3000 appears in UGOS Pro as a managed device, enabling automatic shutdown and recovery when power returns.

    If you’re just starting out with your NASync, my beginner setup guide for the UGREEN DXP2800 covers this interface step by step.


    Performance and Everyday Use

    The US3000 focuses on one thing: controlled shutdowns. It’s not a long-duration backup — it’s protection done right.

    UGOS Pro offers two response modes:

    1. Standby Mode

    • NAS continues running on battery during an outage.

    • If mains returns quickly, it resumes seamlessly.

    • If power doesn’t return, the NAS shuts down gracefully before the battery is depleted.

    2. Auto Shutdown

    • NAS immediately begins its shutdown sequence.

    • Services stop cleanly and drives park safely.

    • Once power is restored, it restarts automatically.

    I keep mine set to Auto Shutdown — it’s the safest option for unattended use. In testing, both modes worked perfectly. The DXP2800 switched instantly to UPS power and completed its shutdown sequence cleanly, with zero voltage fluctuation.

    Recharge takes about two hours, and because it uses DC-to-DC conversion instead of AC inversion, it runs completely silent and highly efficient.

    If you’d like to see how the DXP2800 performs under typical workloads, the two-month NASync review includes real-world tests on transfer speeds, app stability, and power use.


    Compatibility and Runtime Estimates

    Runtime figures from NASCompares, ChargerLab, and UGREEN show the UPS is tuned for short, controlled operation.

    NAS ModelCPUMax DrawEst. Runtime
    DXP2800Intel N100≈ 35 W≈ 10 min
    DXP4800Intel N95≈ 45 W≈ 8–9 min
    DXP4800 PlusIntel Core i3-N305≈ 55 W≈ 7 min
    DXP8800 PlusIntel Core i5-1235U≈ 70 W≈ 6 min
    DH2600 / DX4600Various< 50 W≈ 8–9 min

    Rated for 120 W DC output (12 V / 10 A, 19 V / 7.9 A, 20 V / 7 A), it easily handles every NASync model. No configuration is needed — UGOS Pro manages detection and shutdown automatically.

    For context on how drive selection affects power usage, see Choosing the Best Drives for Your NAS – HDD vs SSD Recommendations.


    Inside the US3000 (Teardown Insights)

    ChargerLab’s full teardown of the UGREEN 120 W DC UPS shows just how well built this unit is.

    It uses a Chipsea CBM8580KV6NT for battery management and SMBus communication, a Texas Instruments TPS55289 for buck-boost power regulation, and a GigaDevice GD32F303RCT6 microcontroller (Cortex-M4 @ 120 MHz) for logic and protection.

    Each of the four battery cells is individually insulated and cushioned, while the PCB is shielded with Mylar and protected by dual fuses and thermistors. Wiring is reinforced, neatly routed, and the aluminium chassis itself acts as a heatsink.

    It’s a compact, efficient design that would look right at home in professional-grade hardware.


    Highlights

    • Native integration – Full hardware-software link through UGOS Pro; zero configuration.

    • Smart behaviour – Automatic standby and shutdown for controlled response.

    • Premium build – Machined aluminium shell, insulated internals, efficient cooling.

    • Power efficiency – DC-to-DC conversion for silent, stable operation.

    • Effortless ownership – Quick recharge, no maintenance, seamless protection.

    If you’re exploring ways to make your NAS more versatile, try Top 10 Docker Containers to Supercharge Your NAS — it’s packed with apps that complement a NASync setup perfectly.


    Limitations

    • Runtime – ≈ 43 Wh battery provides 6–10 minutes of backup; enough for graceful shutdowns, not long-term use.

    • Device scope – Exclusive to UGREEN NASync systems.

    • Availability – Still limited in retail channels but expected to expand soon.

    For users wanting both on-site and off-site protection, pair this with Automated NAS Backup to Azure via Rclone Guide to create a full-stack backup strategy.


    Final Verdict

    After a week of use, the UGREEN US3000 UPS has become one of those accessories you forget about — until it saves your data. It’s compact, silent, efficient, and integrated so tightly with UGOS Pro that it feels like part of the NAS itself.

    It won’t keep your system running forever, but it ensures it never shuts down the wrong way — and for NAS owners, that’s what really matters.

    If you’re building or upgrading a NASync setup, the two-month UGREEN DXP2800 review offers detailed insights into everyday use and performance, while Best Home Security Cameras for Your NAS (Cloud vs PoE) covers surveillance options that pair perfectly with this UPS.

  • UGREEN U3000 UPS First Look — Small but Mighty

    UGREEN U3000 UPS First Look — Small but Mighty

    The wait is finally over — my UGREEN U3000 UPS has arrived!

    Right out of the box, I was caught off guard by its size. It’s unbelievably compact — almost the same footprint as my UGREEN Magnetic Power Bank, which makes it feel more like a portable charger than a full UPS system.

    This little unit is designed specifically for UGREEN’s NASync lineup, offering 120W of DC backup power with zero-second transfer time. That means if the power cuts out, your NAS keeps running instantly with no delay.

    It’s a clean, modern take on backup power — no bulky fans, no heavy lead-acid batteries, and no cluttered cabling. Just a sleek matte black box that slots quietly beside your NAS.

    I’ve just got it set up with my UGREEN NASync DXP2800, and here’s a quick look at the hardware, the software integration, and why this might be one of the smartest little UPS units around.


    Unboxing & First Impressions

    UGREEN U3000 UPS packaging showing 120W DC backup design.
    Simple, clean packaging that sets the tone for UGREEN’s minimalist design approach

    The box presentation is classic UGREEN — understated and premium. Even before opening it, you get the sense that this is designed to fit neatly into a modern setup rather than dominate it.


    Compact Design

    UGREEN U3000 UPS on desk showing its compact matte finish.
    The matte finish and solid build make it feel far more premium than its size suggests.

    Once unboxed, the size difference really stands out. When placed next to my UGREEN Magnetic Power Bank, they’re nearly identical in dimensions. Seeing them side by side drives home just how compact this UPS truly is — it’s impressive that something this small can output 120W of continuous power.

    UGREEN U3000 UPS compared with UGREEN Magnetic Power Bank.
    Almost pocket-sized — the U3000 looks more like a power bank than a UPS.

    Ports & Connectivity

    Close-up of UGREEN U3000 UPS rear ports including DC IN, DC OUT, and USB-C
    Straightforward port layout — DC IN, DC OUT, and USB-C for monitoring.

    The rear layout is clean and functional, featuring DC input/output and a USB-C port for communication. It runs silently and uses passive cooling, which is a welcome change from traditional UPS fans humming in the background.


    Smart Integration

    PC control panel view of UGREEN US3000 UPS showing connection status, firmware version, and NUT options.
    The U3000 is recognised instantly through the NAS interface with full NUT support.

    Connecting the U3000 to the NAS was completely plug-and-play. It appeared right away under the UPS settings as UGREEN US3000, showing battery capacity, firmware version, and auto-shutdown options.

    The UPS also supports NUT (Network UPS Tools) — an open-source protocol that allows the NAS to detect power changes and automatically shut down safely if the battery runs low. It’s a small but important addition that makes the system much more reliable in real-world conditions.


    Next Steps

    Over the next few days, I’ll see how the U3000 performs under normal NAS workloads — how quickly it switches to battery, how stable it runs during short outages, and how the NUT integration behaves over extended use.

    If you are building out your NAS, check my guide Choosing the Best Drives for Your NAS Setup and my roundup NAS Compatible Security Cameras to see how it all fits together.

    Stay tuned — this compact little unit might be one of the best NAS accessories UGREEN has released so far.

  • NAS Security Best Practices: How to Protect Your Smart Home Storage in 2025

    NAS Security Best Practices: How to Protect Your Smart Home Storage in 2025

    Smart homes are only as strong as their weakest link — and for many people, that link is their NAS. Whether you’re backing up family photos, streaming media, or running Docker apps like Home Assistant, your NAS is central to daily use. But with that convenience comes risk: if left unsecured, it can be a prime target.

    In this post, we’ll look at practical security measures anyone can take, along with real-world examples of how they’re applied.


    Why NAS Security Matters

    Your NAS is more than just storage. It can hold personal documents, sensitive media, or even act as a server for automation. If compromised, you risk data loss, identity theft, or someone using your device as part of a botnet. NAS attacks often involve ransomware, where hackers encrypt your files and demand payment for the key. Others exploit weak passwords or outdated firmware.

    Securing your NAS doesn’t just protect your files. It safeguards your privacy, prevents downtime for your smart home, and ensures your backups are truly reliable.


    Step 1: Enable Two-Factor Authentication (2FA)

    Passwords alone are no longer enough. Attackers often use brute-force attacks or leaked credentials to get into devices. Two-factor authentication (2FA) adds a crucial extra step, requiring both your password and a second code (usually sent to your phone or generated by an authenticator app).

    Why it matters:

    • Protects you if your password is leaked in a data breach.
    • Makes brute-force attacks nearly impossible.
    • Adds security for admin accounts that have full system access.

    On modern NAS platforms like Synology, QNAP, UGREEN, Asustor, and TerraMaster, enabling 2FA takes only a few minutes. It’s one of the simplest but most effective steps you can take.


    Step 2: Secure Remote Access

    One of the biggest mistakes NAS owners make is exposing their system directly to the internet with port forwarding. Hackers constantly scan for open NAS ports, making this extremely risky.

    Safer alternatives:

    • Vendor Remote Access Services: Systems like Synology QuickConnect, QNAP myQNAPcloud, and UGREEN Link let you connect remotely without opening ports. These encrypt your traffic and relay it through secure servers.
    • VPN Access: A VPN connection to your home network gives you direct access to your NAS while keeping it hidden from the wider internet.

    Why it matters:

    • Prevents unauthorised scanning and login attempts.
    • Keeps your NAS invisible to opportunistic attacks.
    • Ensures encrypted communication when you’re away from home.

    If you value convenience, stick with the vendor’s remote access app. If you want maximum control, set up a VPN on your router.


    Step 3: Keep Firmware and Apps Updated

    Outdated firmware and apps are one of the most common ways attackers break into devices. Security patches fix vulnerabilities, but only if you install them.

    Why it matters:

    • New exploits are constantly discovered and shared online.
    • Running old firmware is like leaving your front door unlocked.
    • Updates also improve stability and sometimes add new features.

    Best practice:

    • Enable auto-updates where possible.
    • Manually check for firmware or Docker container updates once a month.
    • Subscribe to vendor newsletters or RSS feeds to stay aware of security advisories.

    Step 4: Backups Beyond RAID

    A common misconception is that RAID = backup. It doesn’t. RAID only protects against drive failure, not against ransomware, accidental deletions, or theft. To keep data truly safe, you need a separate copy stored elsewhere.

    Backing up NAS data to Azure Blob storage ensures off-site redundancy and protection against disasters.

    There are several approaches:

    • External HDDs: Rotate them regularly and keep one off-site.
    • Cloud storage: Services like Backblaze B2, Google Drive, or Dropbox can work well with NAS sync tools.
    • Hybrid setups: Use both local and cloud storage for maximum redundancy.

    In my case, I use Azure Blob Storage as my off-site backup. It integrates with my NAS through rclone, a powerful command-line tool for syncing files to cloud storage providers. Once configured, it allows my NAS to automatically copy critical folders to Azure, giving me a secure, off-site backup that isn’t affected by local issues like drive failure, ransomware, or even physical damage.

    🔗 For a full walkthrough, check out my dedicated post on Automating NAS Backups to Azure with rclone.

    Why this matters:

    • Protects against ransomware wiping out your NAS data.
    • Provides recovery if your house suffers fire, flood, or theft.
    • Gives peace of mind knowing you have a copy far away from your home setup.

    Step 5: Strengthen Your Network

    Your NAS security depends heavily on your network. Weak Wi-Fi or outdated routers leave doors open for attackers, and insecure IoT devices can be an easy way in.

    What to do:

    • Use WPA3 or WPA2 encryption with a long, unique passphrase to secure your Wi-Fi.
    • Segment IoT devices (cameras, bulbs, sensors) onto a separate VLAN or guest Wi-Fi so they can’t directly reach your NAS. This prevents a compromised smart bulb or camera from giving access to your storage.
    • Update router firmware and disable unused services like UPnP, which can automatically open ports without your knowledge.
    • Enable firewall rules on your router if available, restricting which devices can talk to your NAS.

    In my own home, I’ve segmented IoT devices onto a separate network, keeping them isolated from my NAS and main devices. This way, even if a low-cost smart plug is compromised, it can’t talk directly to my storage or other critical systems.

    Why it matters:

    • Prevents weaker IoT devices from being exploited as entry points.
    • Stops attackers from using compromised devices to pivot to your NAS.
    • Improves overall network hygiene and peace of mind.

    For more detail and a step-by-step breakdown, check out my guide on How to Set Up a Secure Home Network the Right Way.


    Step 6: Control User Access

    Not every account needs admin rights. Many breaches cause maximum damage because compromised accounts had unnecessary privileges.

    Best practice:

    • Create a separate admin account you rarely use.
    • Use standard accounts for day-to-day access.
    • Restrict shared folder permissions so each user only sees what they need.

    Why it matters:

    • Limits the scope of damage if one account is compromised.
    • Prevents malware from spreading across all shares.
    • Keeps sensitive data private even within households or teams.

    Step 7: Monitor Logs and Alerts

    Most NAS systems include logs and alert systems — but many users ignore them. Checking them regularly gives early warning of issues, but you can go further by enabling real-time notifications.

    What to watch:

    • Repeated failed login attempts
    • Unknown IP addresses trying to connect
    • Unexpected spikes in CPU or network activity

    How to stay on top of it:

    • Enable email or mobile app notifications for login failures, drive health problems, or service errors.
    • Configure thresholds for CPU, memory, and storage so you’re warned before problems escalate.
    • Use push notifications from your NAS app for immediate alerts.

    Why it matters:

    • Lets you respond before an attack succeeds.
    • Helps identify misconfigured devices or apps.
    • Reduces the need for constant manual log checks.

    Challenges and Trade-Offs

    Securing your NAS brings major benefits, but it isn’t without compromises. Understanding these trade-offs helps set realistic expectations:

    Convenience vs Security
    Extra steps like VPN logins or 2FA make systems safer but can feel less convenient. Vendor apps are easier but require trusting their infrastructure.

    Performance Costs
    Features such as drive encryption or real-time virus scanning can reduce speeds, especially on lower-powered NAS units.

    Compatibility Issues
    Older devices may not support WPA3 Wi-Fi, 2FA, or stricter firewall rules, which could limit some security options.

    Financial Costs
    VPN subscriptions, higher-end routers, and cloud backups like Azure or Backblaze all add to running expenses. External drives or UPS units also add to the budget.

    Learning Curve
    Configuring VLANs, VPNs, or tools like rclone takes technical know-how. Beginners may want to start with basics such as updates, strong passwords, and vendor apps before moving to advanced setups.


    Final Thoughts

    Securing your NAS isn’t about making it complicated. It’s about layering simple, practical defences that drastically reduce risk. With 2FA, safe remote access, regular updates, strong backups, and basic network hygiene, you can protect your files and your smart home from the most common threats.

    I’ve applied these measures to my own NAS setup, and the peace of mind is well worth the effort. Whether you’re using a Synology, QNAP, UGREEN, or another brand such as Asustor or TerraMaster, the principles remain the same — a little preparation now avoids much bigger problems later.


    💡 If you’re just getting started with NAS, check out my post on Setting Up the UGREEN NASync DXP2800: A Beginner-Friendly Guide. For a longer-term perspective, I also reviewed it after 2 months of daily use here.

  • How I’m Choosing the Right PoE Security Camera for My NAS in 2025

    In my last post, I explored several great security cameras compatible with NAS setups—particularly Reolink’s models, known for solid RTSP and ONVIF support. Since then, I’ve been digging deeper into my camera choices, evaluating specific brands, features, and compatibility.

    I haven’t pulled the trigger just yet, but since many of you are probably going through a similar selection process, I thought I’d share exactly what’s guiding my decision-making.

    Some of the links in this post are affiliate links. If you buy something through them, I may earn a small commission — it doesn’t cost you anything extra, and it helps support the site.


    My Current Home Setup

    Here’s a quick overview of what I have today:

    • NAS: UGREEN NASync DXP2800 (2-bay NAS, RAID1, NVMe SSDs)
    • Software: Docker with Home Assistant, Pi-hole, and several self-hosted apps
    • Existing Cameras: Two SwitchBot outdoor cameras (USB-powered, each with built-in 10,000mAh battery backup)
    • Camera locations:
      • Front door camera: Covers people approaching the house
      • Driveway camera: Covers the front area of my home, including mailbox, car, and motorcycle
    • Cabling: USB cables (8–10 metres each), neatly routed through trunking to keep everything tidy
    • Storage: Local recording to NAS only—avoiding cloud storage for privacy reasons

    Reflecting on My Current Setup

    My current USB-powered SwitchBot outdoor cameras have a real advantage with built-in batteries, ensuring they keep working even during a power outage. This provides peace of mind, knowing I’ll maintain video coverage in emergencies.

    However, despite neatly routed cables through trunking, the setup isn’t ideal. The main issue is cable length: each USB cable runs approximately 8–10 metres, which is right at the top end of USB power delivery limits. Although significant reliability issues rarely occur, the long cables occasionally result in slow charging times for the cameras, especially at the front door due to higher usage.

    The biggest frustration with my current setup is motion detection. Even though the SwitchBot cameras claim human-only detection, they regularly produce false positives, especially at night due to dust, spider webs, and minor movements. This issue significantly impacts the usefulness and reliability of my security system.


    Why Upgrading to PoE Makes Sense

    Switching to Power over Ethernet (PoE) cameras addresses these reliability issues. Each camera will still have its own cable, just like my USB setup—but the critical advantage of PoE is combining power and stable high-speed data over a single Ethernet cable. Ethernet comfortably supports cable lengths up to 100 metres without voltage drops or data issues, easily covering the longest cable runs around any typical home. Commonly recommended PoE switches include models from TP-Link, Netgear, and Ubiquiti, which are known for reliability, ease of use, and good compatibility with a wide range of PoE cameras.

    Additionally, a centralised PoE switch simplifies management, improving scalability and overall system stability. When combined with smart NAS integration and better software support, this represents a big upgrade over USB-powered Wi-Fi cameras.

    If you’re in an apartment or smaller home, these benefits still apply—especially if you’re dealing with weak Wi-Fi signals or want something more reliable without relying on battery charging cycles. Even one or two well-placed PoE cameras can provide significantly better results with less hassle long term.


    Key Features I’m Prioritising

    These are the most important factors influencing my camera choice:

    1. PoE Support

    PoE delivers both power and reliable high-speed data over Ethernet cable runs up to 100 metres without signal or voltage drop. Perfect for my home, even at longer distances.

    2. RTSP and ONVIF Compatibility

    Essential for smooth integration with my NAS and smart home software like Home Assistant or Frigate, offering flexible, powerful video management.

    3. Superior Infrared (IR) Night Vision

    I’m specifically looking for strong infrared performance for my outdoor cameras. Colour night vision typically requires additional lighting—which I’d prefer to avoid to respect my neighbours’ privacy and comfort. IR performance stronger than my current SwitchBot cameras is a must.

    4. Effective AI-Based Motion Detection

    My current SwitchBot cameras claim human detection, but the reality is frequent false alarms—like spiders or dust particles triggering motion alerts multiple times per night. Reliable AI-powered detection, specifically tuned to distinguish humans, vehicles, and important events—is a big priority to reduce false positives.

    5. Local Availability (Japan)

    Being based in Japan, I prefer to purchase locally to avoid hassles with returns, warranty issues, and shipping. Accessibility and local support matter to me, so I typically check well-known local retailers like Amazon Japan, Rakuten, or Yodobashi Camera. However, these cameras are widely available internationally through major online stores as well.
    Being based in Japan, I prefer to purchase locally to avoid hassles with returns, warranty issues, and shipping. Accessibility and local support matter to me.


    Cameras I’m Considering Right Now

    Below are the four cameras currently on my shortlist. I’ve included a deeper look at each one to help others who may be weighing similar options.

    Reolink RLC-810A

    • Price Range: $55–$80
    • Resolution: 4K Ultra HD
    • Smart Detection: Built-in human and vehicle detection
    • NAS Compatibility: RTSP and ONVIF supported, works well with most NVR and NAS setups
    • Pros: Excellent value for money, strong community support, widely available, simple setup
    • Cons: Detection performance may vary depending on whether you’re using a Reolink NVR or third-party NAS software
    • Use Case Fit: This is my leading candidate. It offers a great mix of reliability, smart detection, and direct NAS recording. It’s also widely supported in Japan and abroad. Reolink also offers several dome-style cameras if I decide to go with that format for front door coverage.
    • Visual Placement: Best suited for covering driveways or home fronts with a clear line of sight.
    Reolink RLC-810A PoE security camera with 4K resolution, ideal for NAS recording and driveway surveillance.

    TP-Link VIGI C340 / C540

    • Price Range: $70–$110
    • Resolution: Up to 4K depending on model
    • Smart Detection: Person and vehicle detection (varies by model)
    • NAS Compatibility: RTSP stream supported for use with NVRs and NAS systems
    • Pros: Solid specs at an affordable price, increasingly available, backed by TP-Link’s reputation
    • Cons: Ecosystem still maturing, some models lack smart detection entirely
    • Use Case Fit: A strong alternative to Reolink, particularly if pricing or availability is more favourable at time of purchase.
    • Visual Placement: Great for perimeter coverage or front yard monitoring.
    TP-Link VIGI C340 PoE security camera with up to 4K resolution and smart detection features.

    UniFi G4 Bullet

    • Price Range: $180–$250
    • Resolution: 4MP (1440p)
    • Smart Detection: Advanced analytics via UniFi Protect (not all features available with RTSP)
    • NAS Compatibility: Partial – RTSP available but full functionality requires UniFi Protect NVR
    • Pros: Premium build, clean design, exceptional image quality, long-term support
    • Cons: Expensive, best used with UniFi ecosystem, availability limited in some regions
    • Use Case Fit: A future-proof, high-end option if I decide to go all-in on UniFi. Less likely as a mixed system.
    • Visual Placement: High-visibility areas or integrated with UniFi-managed homes.
    UniFi G4 Bullet 4MP PoE camera with premium metal housing and support for UniFi Protect analytics.

    Eufy E40 PoE

    Visual Placement: Ideal for wall or eave mounting at entry points like front doors or side paths where human movement is the key concern.

    Price Range: $100–$150

    Resolution: 2K (2560 x 1440)

    Smart Detection: AI-powered person detection built into the camera

    NAS Compatibility: Supports RTSP for local recording to NAS systems (including Synology, QNAP, and others)

    Pros: No monthly subscription, excellent privacy stance, clean design, local AI with good accuracy

    Cons: No vehicle or pet detection, limited to person-only alerts, ecosystem not as mature as Reolink or UniFi

    Use Case Fit: A promising option for users who want strong privacy and basic AI detection without relying on cloud storage or ongoing fees. If you’re looking for a simple, effective PoE solution that integrates with your NAS and covers standard entryways or paths, this is worth considering.

    Eufy E40 PoE 2K security camera with built-in AI person detection and RTSP support for NAS integration.

    Prefer a complete system that works out of the box? If you’re looking for a plug-and-play PoE setup with local recording, Eufy’s NVR system offers a solid alternative. It includes four wired cameras, a 2TB drive, and AI person detection—perfect if you want to skip piecing together individual components.

    Next Steps

    With my honeymoon coming up soon, I’m holding off on any major purchases for now. I expect to make a final decision and start testing by the end of the year.

    My current plan is to start with one Reolink RLC-810A camera, testing its integration, reliability, and feature set in my home environment. If it performs well, I’ll likely stick with Reolink for consistency across the system. That said, I’m still considering using a dome-style camera above the front door, as the ceiling above it could benefit from a wider field of view for better coverage.

    Once the system is fully set up, I’ll publish a detailed guide covering:

    • Direct NAS recording setup (using RTSP/ONVIF)
    • Optimising motion detection and AI analytics for fewer false alerts
    • Secure remote access without risking my network

    If you’ve already made a similar upgrade—or you’re using PoE cameras in a similar NAS-based setup—I’d love to hear about your experiences, good or bad. Drop a comment below or use the contact form to get in touch.


    Related Posts You Might Like:

    Looking forward to sharing more once I start testing!

  • Best Security Cameras That Work Seamlessly with Your NAS

    When it comes to home security, pairing your camera system with your NAS (Network Attached Storage) can offer unbeatable advantages like local recording, improved privacy, and easy video management. If you’ve already invested in a NAS system, it makes sense to choose security cameras that integrate seamlessly. Personally, I use the UGREEN NASync DXP2800, so I’ll be highlighting options that work well with it throughout this guide. This guide covers the best NAS-compatible camera brands and models, highlighting why NAS compatibility matters and how it simplifies your home security setup.

    Why NAS Compatibility Matters

    Having a NAS-compatible security camera means:

    • Enhanced privacy: Videos stored locally mean no subscription fees or worries about cloud privacy. For instance, your home’s front door footage won’t be stored on a remote server, reducing the risk of unauthorized access.
    • Reliable storage: Continuous recording ensures you don’t miss important events, scheduled backups prevent data loss, and easy management helps you quickly review footage in case of incidents.
    • Integration: Cameras that support protocols like RTSP or ONVIF easily integrate with NAS systems, allowing seamless management through third-party apps or direct NAS interfaces, simplifying your overall workflow.

    For example, imagine a scenario where your Wi-Fi temporarily drops. With cloud-dependent cameras, you might lose critical footage. However, NAS-compatible cameras continue recording locally, ensuring continuous surveillance without interruptions.

    Top Camera Brands That Support NAS

    BrandRecommended ModelsResolutionConnectionPrice RangeKey Features
    ReolinkRLC-833A, RLC-511WA4K/5MPPoE/Wi-Fi\$\$Affordable, reliable, excellent NAS support
    HikvisionDS-2CD2043G0-I, DS-2CD2385G1-I4MP/8MPPoE\$\$\$Professional-grade quality, robust build
    Eufy SecurityEufyCam 2C, EufyCam 31080p/2KWi-Fi\$\$User-friendly, wireless convenience

    1. Reolink

    • Strengths: Reliable, excellent NAS compatibility, budget-friendly.
    • Best For: Users looking for excellent video quality, reliability, and easy NAS integration at a good price.

    2. Hikvision

    • Strengths: Professional-grade quality, advanced configuration, robust build.
    • Best For: Advanced users or those with complex setups requiring high-quality professional cameras.

    3. Eufy Security

    • Strengths: User-friendly, high-quality wireless cameras, no subscription required.
    • Best For: Users who prefer wireless flexibility with easy NAS integration and simple mobile app control.

    Quick Setup Experience with UGREEN NASync

    If you’re just getting started with Docker apps on your NAS, check out my post on must-have Docker containers for NAS beginners.

    UGREEN NASync doesn’t offer a native surveillance app like Synology’s Surveillance Station, but it supports Docker, allowing you to easily install lightweight NVR solutions. Here’s a simplified step-by-step overview to help you get started:

    1. Access Docker on your NAS: Open your UGREEN NASync web interface and navigate to the Docker application.
    2. Choose and Deploy Your NVR Solution: Search for “Frigate,” “Shinobi,” or “MotionEye” within Docker Hub and pull the image to your NAS.
    3. Configure Container Settings: Set the container’s environment variables, assign storage volumes for recordings, and map required ports.
    4. Launch and Access the Application: Start the container and access your chosen NVR via your browser using the assigned port (e.g., http://NAS_IP:port).
    5. Integrate Your Camera: Add your camera’s RTSP or ONVIF stream using its IP and login credentials within the app.

    Consider including screenshots of each stage to visually guide readers through the process, especially if they’re new to Docker setups.

    Local Storage vs. Cloud Storage Recap

    Local storage offers several clear advantages over cloud storage, especially in scenarios such as:

    • Network outages: If your internet connection goes down, local storage continues to function normally, recording and storing your footage without interruptions. In contrast, cloud-based systems might lose critical footage during outages.
    • Privacy-sensitive situations: If you’re concerned about data privacy or security breaches, local storage eliminates the risks associated with third-party cloud providers potentially mishandling your footage.
    • Long-term cost savings: While cloud storage often involves recurring subscription fees, investing in local storage via NAS means a one-time expense. For example, a household that runs multiple cameras continuously can save significantly in subscription fees over several years.
    • Customized storage management: You have full control over storage allocation, data retention periods, and backups, allowing for greater flexibility tailored specifically to your personal or business requirements.

    Best Use Cases

    • Home Entrances & Garages: Cameras from Reolink or Hikvision offer exceptional reliability and high-quality footage ideal for entryways and garages. For instance, the Reolink RLC-833A captures clear facial details even in low-light scenarios, significantly aiding in identification if an incident occurs.
    Example top-down layout showing various camera placements, including corridor mode on the side path and wide-angle coverage across driveways and entrances.
    • Baby Monitors & Indoor Surveillance: Eufy’s wireless cameras provide unmatched ease of use with mobile integration, perfect for parents monitoring babies or pets remotely.
    • Outdoor Surveillance: Hikvision and Reolink cameras are known for robust, weather-resistant construction.
    Reolink Standard View vs Corridor Mode: A side-by-side comparison showing how traditional 16:9 viewing (left) wastes vertical space in narrow areas, while corridor mode (right, 9:16) maximises coverage down long hallways or side paths.

    PoE vs. Wi-Fi Cameras: Which Should You Choose?

    • PoE (Power-over-Ethernet): Reliable wired connection, ideal for permanent installations, simpler cable management, highly recommended for outdoor setups.
    • Wi-Fi Cameras: Easier installation, ideal for renters or temporary setups, flexible camera placement but dependent on strong Wi-Fi.

    Choose PoE for reliability and Wi-Fi for flexibility based on your specific setup needs.

    What’s Next for My Setup

    I may also look at integrating object detection with Home Assistant on my NAS in the future. Beyond that, I plan to explore smart alerts, secure remote access, and making the most of corridor mode for tighter, vertical spaces — like a narrow side alley — where traditional wide-angle views aren’t efficient. These refinements aim to build a smart security system that’s both effective and privacy-conscious, without revealing sensitive home layout details.

    Common Mistakes to Avoid

    • Ignoring storage capacity needs.
    • Overlooking camera resolution compatibility with your NAS.
    • Improper network setup leading to bandwidth issues.

    Personal Insight: My Camera Journey

    If you’re not familiar with the UGREEN NASync, I reviewed it in detail here to help you understand what it’s capable of.

    I’m currently using Switchbot Wi-Fi cameras, which have served well for basic home monitoring, but I’ve experienced occasional connectivity drops and limitations in managing footage efficiently. Given my setup, which prioritises reliability, high-quality video, and seamless integration with my UGREEN NASync NAS, I’m strongly considering transitioning to Reolink PoE cameras.

    Specifically, I’m looking at the Reolink RLC-833A for front-facing or driveway monitoring due to its impressive 4K resolution, person and vehicle detection, and spotlight features. For areas like the backyard, where running Ethernet cables might be more difficult, the RLC-511WA seems like a perfect fit. I’ll be documenting this upgrade in future posts, including setup tips, integration steps, and performance insights. I’m also planning to use a camera with corridor mode for the narrow side path of my house — this setting optimises vertical viewing angles, making it ideal for covering long, narrow spaces without wasting frame area on walls or empty ground.


    By choosing NAS-compatible security cameras, you’re taking control of your home’s safety and enjoying seamless integration with your existing NAS setup. I’d love to hear your thoughts and experiences—feel free to comment below!

  • UGREEN NASync DXP2800 Review After 2 Months of Daily Use

    UGREEN NASync DXP2800 Review After 2 Months of Daily Use

    When I first picked up the UGREEN NASync DXP2800, I was looking for a cost effective, quiet, and beginner friendly way to run containers and back up devices around the house. Two months later, it’s fair to say this NAS has earned its place in my setup, but it’s also time to move on.

    This will be my last post dedicated to the DXP2800. Not because it’s failed me, but because I’ve reached a point where the NAS is no longer the centrepiece. It’s now just one part of a much larger smart home and self hosting ecosystem. So before I pivot to new topics, here’s my final verdict on the DXP2800.

    Key Specs (Quick Overview)

    • CPU: Intel N100 (4 cores)
    • RAM: 8GB DDR5 (upgradeable)
    • Drive Bays: 2 (3.5/2.5 inch)
    • Networking: 2.5GbE
    • Expansion: Dual M.2 NVMe slots
    • Video Output: HDMI
    • OS: UGOS (Linux based)

    🛒 Looking to buy the NAS featured in this review?

    💡 Need more bays?

    These are affiliate links — if you purchase through them, I may earn a small commission at no extra cost to you. Thanks for supporting the blog!

    Build Quality and Noise

    The DXP2800 is solidly built and looks great on a desk. It runs quietly if you’re using SSDs instead of HDDs, but when using spinning drives, the noise is noticeable, though not awful. All NAS systems will face the same reality with HDDs, so it’s not a unique issue to this model.

    Reviewers across several tech sites have praised the DXP2800’s design. The aluminium alloy chassis gives it a premium feel, and the magnetic dust filter and tool less drive bays are practical and appreciated. For a 2 bay system, it punches above its weight in design quality.

    Performance

    I’ve tested a range of Docker containers like Home Assistant, Pi hole, and others, and the NAS handled everything I tried smoothly. The Intel N100 and 8GB of DDR5 RAM offer more than enough headroom for most home lab needs, especially if you’re not using heavy VM workloads.

    While I don’t run Portainer, Plex, or Jellyfin myself, I recommended them in a previous post based on community feedback and ease of use. Docker itself runs reliably, and containers have been easy enough to deploy manually without needing a GUI.

    The inclusion of a 2.5GbE port and dual M.2 NVMe slots is another bonus, especially for users who want SSD caching or faster read/write operations. Some reviewers noted the lack of a second Ethernet port, but for most home users, it’s not a dealbreaker.

    Software (UGOS)

    UGOS is still developing, but I’ve personally had no issues with it. Everything works as expected. While some reviewers have pointed out that it’s not as polished as Synology’s DSM or QNAP’s QTS, I’ve found it stable and reliable for my needs.

    Once Docker was installed and configured, I rarely needed to interact with UGOS directly. It stays out of the way and hasn’t caused any crashes, slowdowns, or compatibility issues.

    Interestingly, users of the larger DXP4800+ model have echoed this sentiment. One community member reported using it to run Home Assistant in a VM, stream music and video, back up mobile photos automatically, and edit documents via ONLYOFFICE. They were particularly impressed with the unified web portal and mobile app, which simplified access and syncing across devices. They also noted that UGOS receives frequent updates and has continued to evolve, with features like object recognition, OCR, and AI tagging in the photo app.

    While there are still some gaps like limited mobile document editing and occasional network filtering issues when accessing remotely, it’s clear UGOS is heading in a promising direction.

    Real World Use

    Currently, I use the DXP2800 for:

    • Running Home Assistant to manage smart home devices
    • Hosting some personal files and containers

    I also installed Pi hole, but haven’t directed network traffic through it yet due to limitations with my router hardware.

    While I’ve recommended other containers in my previous post like Navidrome, Frigate, WireGuard, and media servers, I’m not using those myself. They’re great options depending on your needs and future plans.

    I’m also exploring PoE camera setups and considering Frigate as part of that project, so the NAS may take on a bigger role in home surveillance later down the line.

    Recent discussions suggest that Frigate does in fact run well on these NASync models. One user reported it handled four IP cameras with total CPU usage sitting around twenty percent. Others have noted ffmpeg can push CPU load higher, especially on older or lower power chips, but the Intel N100 in the DXP2800 should handle light to moderate workloads comfortably. Using a Coral TPU is also being explored in the community to offload object detection, which could be worth looking into if I go that route.

    Protecting Your NAS with the UGREEN US3000 UPS

    After two months of non-stop uptime, it’s clear that stable power is just as important as good hardware. A brief outage can interrupt writes or risk drive corruption — something no NAS owner wants to deal with. That’s why I’ve added the UGREEN US3000 UPS to my setup.

    This compact 120 W DC UPS is designed specifically for NASync devices and integrates directly with UGOS Pro. Once connected via DC and USB-C, it’s detected automatically and lets you configure auto-shutdown or short standby modes under Control Panel → Hardware & Power → UPS. Setup takes just a few minutes and adds complete peace of mind for unattended operation.

    It runs silently, provides around ten minutes of backup for the DXP2800, and ensures a clean, controlled shutdown every time. If you’d like a deeper look at performance, build quality, and teardown details, check out my full UGREEN US3000 UPS Review.

    Would I Still Recommend It?

    Yes, with a few caveats.

    If you want to run Docker apps, manage your own services, and don’t mind using community resources for support, the DXP2800 is a solid deal for the price. If you prefer a more polished software experience, plug and play apps, or long term vendor support, Synology might be a better fit.

    That said, I’ve been impressed by how far UGREEN have come in a short time. Their software updates have been consistent and meaningful, and the platform feels like it’s improving month by month. Compared to Synology’s latest hardware restrictions, like requiring branded drives, UGREEN’s more open approach could be a major draw for anyone looking to build a flexible and affordable home setup.

    For me, it’s hit the sweet spot. Powerful enough to do what I want, flexible enough to grow with me, and affordable enough that I didn’t feel like I was buying into an overkill system.

    What’s Next?

    This will be my last focused post on the DXP2800. Moving forward, I’ll be looking at:

    • Choosing PoE cameras for home security
    • Setting up Frigate properly with Coral or NPU support (if needed)
    • Automating alerts and recordings with Home Assistant
    • Managing local and cloud storage for recordings

    The NAS will still be a part of that, but it’s no longer the star.

    If you’re following along for the self hosting journey, the next few posts should be right up your alley. If you’re curious about camera compatibility, Frigate setups, or how this NAS holds up as an NVR, stay tuned — that’s what’s next.

    Want to stay in the loop? Follow the blog or drop a comment if there’s a specific setup you’re curious about. I’ll be diving into smart security next.

  • Automated NAS Backup to Azure with rclone: UGREEN NAS Guide

    Automated NAS Backup to Azure with rclone: UGREEN NAS Guide

    Backing up your NAS is essential to protect against data loss from hardware failure, theft, or natural disasters. In this guide, I’ll walk you through how I set up a backup from my UGREEN NASync DXP2800 to Azure using rclone, based on the exact process I followed. Each step includes context so you understand not just how to do it, but why.

    Why Azure?

    Azure is a robust cloud storage option offering high reliability, excellent redundancy, and flexible access tiers specifically designed for backup and archiving. While Azure doesn’t provide a permanent free tier (unlike services such as Google Drive), it does offer generous trial credits to new users. To minimise ongoing storage costs without these credits, I recommend using the Cool or Archive storage tiers—both ideal for backups that don’t require frequent access.

    Other options: rclone supports a wide range of cloud providers. Here are a few great alternatives:

    • Backblaze B2 – Very affordable, especially for large backups. Well-supported by rclone.
    • Google Drive – Great for personal backups. Offers 15GB free and integrates easily.
    • Wasabi – Flat-rate pricing and no egress fees. A strong S3-compatible choice.
    • Dropbox – Easy to use with good syncing capabilities, though pricing can be high for large storage needs.
    • Amazon S3 – Enterprise-grade option, scalable but more complex to configure and can get expensive.

    You can easily substitute Azure in this guide with one of the above by changing the remote configuration step.

    Step 1: Generate rclone Configuration File

    To make rclone work from Docker, I first created a persistent config file using a temporary container:

    docker run -it --rm \
      -v /mnt/data/rclone-config:/config \
      --env XDG_CONFIG_HOME=/config \
      rclone/rclone config

    Walk through the prompts:

    • Select n to create a new remote.
    • Name it something like myremote (avoid using your NAS or personal name).
    • Select storage type 34 for Azure Blob Storage.
    • Enter your Azure Storage Account Name for account.
    • Enter your Access Key for key.
    • Leave endpoint blank.
    • Skip advanced config and auto config by selecting n.

    Once complete, the config will be saved as /mnt/data/rclone-config/rclone.conf on your NAS, ready for Docker containers to use.

    🛠️ Tip: To test that it works:

    docker run --rm \
      -v /mnt/data/rclone-config:/config \
      --env XDG_CONFIG_HOME=/config \
      rclone/rclone:latest lsd myremote:mycontainer \
      --config="/config/rclone.conf"

    Step 2: Create the Backup Script

    This script is broken into three parts: syncing data, deleting older backups, and emailing on failure. Each part is explained below.

    I wanted versioned backups and automatic cleanup of older ones. Here’s the exact script I used:

    #!/bin/sh
    
    LOG_FILE="/mnt/data/rclone-config/monthly_backup.log"
    CONFIG="/mnt/data/rclone-config/rclone.conf"
    REMOTE="myremote:mycontainer"
    BACKUP_NAME="nas-backup-$(date +%Y-%m)"
    DELETE_DATE=$(date -d "4 months ago" +%Y-%m)
    OLD_BACKUP_NAME="nas-backup-$DELETE_DATE"
    
    # 🔁 Sync Step – Copy /volume1 to a dated backup folder
    docker run --rm \
      -v /volume1:/data \
      -v /mnt/data/rclone-config:/config \
      --env XDG_CONFIG_HOME=/config \
      rclone/rclone:latest sync /data "$REMOTE/$BACKUP_NAME" \
      --config="/config/rclone.conf" \
      --log-file="/config/monthly_backup.log" \
      --log-level INFO \
      --exclude "@tmp/**"
    
    # 🧹 Retention Step – Delete backups older than 4 months
    docker run --rm \
      -v /mnt/data/rclone-config:/config \
      --env XDG_CONFIG_HOME=/config \
      rclone/rclone:latest purge "$REMOTE/$OLD_BACKUP_NAME" \
      --config="/config/rclone.conf"
    
    # 📧 Notification Step – Email if backup fails
    if [ $? -ne 0 ]; then
      echo "NAS Backup failed. See log below:" | mail -s "NAS Backup FAILED" you@example.com < "$LOG_FILE"
    fi

    📌 Note: Replace myremote and mycontainer with your rclone remote and Azure Blob container name. Avoid using identifiable names like your NAS hostname.

    Step 3: Enable Email Reporting on Your NAS

    To enable email alerts for failed backups, I used the built-in mail command entirely through SSH — no GUI or additional packages were needed.

    What I did:

    1. SSH into your NAS:
       ssh your-nas-username@your-nas-ip
    1. Test email functionality:
       echo "Test message" | mail -s "Test Email" you@example.com

    If you receive the test email, your NAS is already configured to send system emails.

    1. Check your mail config (if test mail fails):
      The system uses msmtp under the hood on many embedded NAS environments. Create or edit the config:
       vi /opt/etc/msmtprc

    Example configuration (for Gmail):

       defaults
       auth           on
       tls            on
       tls_trust_file /etc/ssl/certs/ca-certificates.crt
    
       account default
       host smtp.gmail.com
       port 587
       from your.email@gmail.com
       user your.email@gmail.com
       password your_app_password
       logfile /opt/var/log/msmtp.log
    1. Make sure permissions are correct:
       chmod 600 /opt/etc/msmtprc
    1. Export the config path if needed (some systems require this):
       export MSMTP_CONFIG=/opt/etc/msmtprc
    1. Retry your test email:
       echo "Test message" | mail -s "Test Email" you@example.com
    1. Add to your script:
      Make sure your backup script includes:
       if [ $? -ne 0 ]; then
         echo "NAS Backup failed. See log below:" | mail -s "NAS Backup FAILED" you@example.com < "$LOG_FILE"
       fi

    ✅ If your provider uses two-factor authentication, use an app-specific password. Most mail issues come down to wrong SMTP server, port, or missing trusted certs.

    Step 4: Schedule the Script with Cron

    To automate your backups, schedule the script using cron:

    Edit your crontab by running:

    crontab -e

    Then, add the following line:

    30 2 1 * * /volume1/scripts/backup_to_azure.sh

    Here’s what these numbers mean:

    • 30: Minute (0-59)
    • 2: Hour (0-23, where 2 is 2:00 AM)
    • 1: Day of the month (1-31)
    • *: Month (1-12, * means every month)
    • *: Day of the week (0-6, Sunday=0, * means every day)

    In this example, the backup script runs automatically at 2:30 AM on the 1st day of every month. Adjust these numbers according to your preferred backup schedule.

    ✅ Why this schedule? Monthly snapshots avoid daily clutter and keep backups manageable.

    Step 5: Verify Your Backups

    Confirm everything’s working with:

    cat /mnt/data/rclone-config/monthly_backup.log

    And list current backup folders:

    docker run --rm \
      -v /mnt/data/rclone-config:/config \
      --env XDG_CONFIG_HOME=/config \
      rclone/rclone:latest lsd myremote:mycontainer \
      --config="/config/rclone.conf"

    🔄 Optional Enhancements

    🔐 Encrypt Your Backups

    Want extra protection? Add a second rclone remote (type crypt) that wraps your Azure remote:

    rclone config
    • Create new remote myremote-crypt
    • Type: crypt
    • Remote: myremote:mycontainer
    • Set a strong password and salt

    Then replace the backup target in your script with:

    myremote-crypt:$BACKUP_NAME

    🔍 Restore Test

    Try restoring a test file from Azure to confirm you can actually recover data if needed:

    docker run --rm \
      -v /volume1/test-restore:/restore \
      -v /mnt/data/rclone-config:/config \
      --env XDG_CONFIG_HOME=/config \
      rclone/rclone:latest copy myremote:mycontainer/nas-backup-2025-05/testfile.txt /restore \
      --config="/config/rclone.conf"

    🧩 Troubleshooting & FAQ

    Q: My backup failed with a permissions error—how do I fix it?

    A: Make sure your Docker container has read permissions for /volume1 and that the rclone configuration (rclone.conf) is properly mounted. Also, confirm file permissions with chmod 600.

    Q: I received a network error during my backup—what can I do?

    A: Add retry options to your rclone sync command to enhance resilience against temporary network issues:

    --retries 5 --low-level-retries 10

    Q: My email notifications aren’t being sent—how do I troubleshoot this?

    A: Ensure the built-in mail command on your NAS works by testing from SSH:

    echo "Test Email" | mail -s "Test" you@example.com

    If it doesn’t, verify SMTP configuration (see Step 3 above).

    Q: How can I avoid hitting Azure bandwidth or cost limits?

    A: Use bandwidth limiting during uploads with:

    --bwlimit=8M

    Additionally, choose the “Cool” or “Archive” Azure tiers for cost efficiency.

    Q: Can I use another cloud provider instead of Azure?

    A: Absolutely! rclone supports many services like Backblaze B2, Google Drive, Dropbox, Wasabi, and Amazon S3. You simply adjust the remote setup step accordingly.

    Final Thoughts

    You now have automated, secure, and reliable backups ready to protect your valuable data. Have you tried setting this up yourself yet? I’d love to hear your experiences, challenges, or ideas for enhancements in the comments below. Happy backing up!

    If you’re interested in other NAS setups and configurations, you might find these previous posts helpful:

    Let me know if there are other topics you’d like to see covered!

  • Setting Up the UGREEN NASync DXP2800: Step-by-Step Initial Configuration Guide

    Setting Up the UGREEN NASync DXP2800: Step-by-Step Initial Configuration Guide

    The UGREEN NASync DXP2800 is one of the most accessible NAS options for first-time users, and setting it up is refreshingly simple. In this post, I’ll walk you through the initial setup steps I took — from powering on to creating a storage pool — with commentary on RAID choices and a few tips I picked up along the way.


    What’s Included in the Box

    • UGREEN NASync DXP2800 unit
    • Power adapter
    • Ethernet cable
    • Screws (for 2.5″ drives)

    The NAS has the following ports:

    • 1x 2.5GbE LAN port (back)
    • 2x USB 3.2 Gen1 ports (back)
    • 1x USB-C 3.2 Gen1 port (front)
    • 2x USB 2.0 ports (back)
    • 1x HDMI (currently not in use)
    • Power button and reset button

    Make sure to connect the NAS using the included Ethernet cable for the most stable setup experience.

    Looking to pick up the NAS I used in this guide?

    💡 Need more bays? UGREEN also offers higher-capacity models:

    These are affiliate links — if you decide to buy through them, it supports the blog at no extra cost to you. Thanks for your support!


    Step 1: Power On and Detect the NAS

    Before you start, make sure your NAS is connected via Ethernet for the most reliable connection. It’s also worth checking for any available system updates once you’re in the dashboard — UGREEN recommends updating UGOS Pro early on to avoid compatibility issues, especially if you plan to use SSD caching or Docker later.

    As soon as the NAS is powered on and connected to your network, it appears in the UGREEN NAS app. It can take a few minutes for the device to be detected. However, if it doesn’t show up automatically, you can register it manually by scanning the QR code located on the bottom of the device.

    If it doesn’t appear straight away, you can scan the QR code on the bottom of the NAS to register it manually.

    Step 2: Name Your NAS & Accept Terms

    Once detected, the app prompts you to name your NAS and accept the standard user agreement and privacy terms.

    Give your device a unique name to help distinguish it on the network.

    Step 3: Register Your Email (Recommended)

    While you can skip this, I recommend linking your email for access to UGREENlink and system alerts.

    Registering your email enables remote access and alerts for any system issues.

    Step 4: Enable Remote Access

    I enabled UGREENlink, which gives you remote access to your NAS — useful if you want to monitor or transfer files while away.

    Remote access lets you securely manage your NAS from anywhere.
    UGREENlink remote access lets you securely manage your NAS over the internet. Your NAS name becomes your UGREENlink ID, which you can use from the web or mobile app.

    Step 5: Create Your Storage Pool

    Before you begin, ensure the NAS is powered off when inserting any drives. The DXP2800 uses a tool-less tray system for 3.5″ drives, which makes installation quick and simple. For M.2 SSDs, be cautious as they slot in internally and require careful handling.

    Here’s where you’ll select the drives you installed. I had two 7.2TB HDDs and two 1TB NVMe SSDs.

    You can mix drive types, but it’s best to separate HDDs and SSDs into different pools.

    I opted to configure my HDDs into a single RAID 1 array for redundancy. RAID 1 mirrors the data between the two drives, so if one fails, the other still has all your files. It’s not the most space-efficient, but it offers peace of mind.

    For the SSDs, I chose a Basic (non-RAID) setup for now — mainly because I plan to use them for apps or caching later. I didn’t see much benefit to mirroring them at this stage, especially since I’m not storing critical data there yet.

    RAID 1 for HDDs and a basic SSD pool gives a good mix of reliability and flexibility.

    Step 6: Format and Create Volume

    Once your storage pool is created, the next step is formatting the drives and setting up a volume. This is where you choose between Btrfs and ext4, the two available file systems.

    I chose Btrfs for my HDDs because it supports advanced features like snapshots, built-in data integrity checks, and efficient storage management — all of which are helpful if you’re storing lots of data or want more control over versioning and recovery. It’s especially useful in a home NAS setup where accidental deletion or corruption is a concern.

    For the SSD pool, I went with ext4. While it lacks the bells and whistles of Btrfs, it’s lighter on resources and has a long-standing reputation for reliability and performance. Since I’m planning to use the SSDs for running apps and temporary data, ext4’s speed and lower overhead made more sense.

    Here’s a quick breakdown:

    • Btrfs Pros: Snapshots, checksums, automatic error correction, efficient disk usage
    • Btrfs Cons: Slightly more system overhead, slower write performance than ext4 in some cases
    • ext4 Pros: Fast, low overhead, extremely stable
    • ext4 Cons: No native snapshots, no checksumming or automatic correction
    Btrfs is great for snapshots and folder-level protection. ext4 is a better fit for app containers or temporary storage.

    Before confirming, the system will warn you that all existing data on the drives will be erased.

    Once confirmed, your drives will be formatted and the volume created.

    Step 7: Review System Usage

    After setup, you’ll be shown a breakdown of how your drives are being used. In my case, the system reserved about 15.2GB on one of the SSDs — this includes operating system files and essential services needed to run UGOS Pro.

    This is completely normal, especially on Btrfs volumes where a bit more space is allocated for things like snapshots, metadata, and system overhead. You may also notice:

    • Slightly less available capacity than expected
    • Reserved space depending on your file system and RAID choice

    This screen is a great checkpoint to understand how your storage will behave moving forward:

    • Btrfs can accumulate snapshots and logs, so it’s worth checking the system status occasionally
    • SSDs used for apps (e.g. Docker) may fill quickly if large containers or image caches build up

    You can always check system usage later under the Storage section of the dashboard for a more detailed view.

    Storage overview shows space used by the system, available space, and reserved capacity.

    Final Thoughts

    The DXP2800 offers one of the smoothest NAS setup experiences I’ve used. From unboxing to configuring storage pools, everything was laid out in a way that’s friendly for first-time users. The guided setup process is clear and surprisingly quick.

    I’d recommend enabling two-factor authentication early on to help secure your admin account — it works with any standard authenticator app, and I opted for Microsoft Authenticator since I already use it elsewhere.

    If you’re planning to share the NAS, take advantage of personal folders or set up user-specific access permissions. It’s an easy way to protect privacy and organise data effectively.

    While RAID 1 is a great way to add redundancy, don’t rely on it as your only backup. It’ll help if a drive fails, but it won’t protect you from accidental deletion or file corruption.

    Finally, take note of the reset button behaviour: a short press restarts the system, while holding it down for 10 seconds resets it to factory settings — useful if you ever run into serious issues.

    Next time, I’ll walk through installing Docker and setting up lightweight apps like Pi-hole and Plex to unlock more potential from the NAS.

    Have questions or planning your own setup? Drop them in the comments — always happy to help!