Category: Tech Comparisons

  • TP-Link BE85 Review: Why I Chose It Over Other Wi-Fi 7 Mesh Systems

    TP-Link BE85 Review: Why I Chose It Over Other Wi-Fi 7 Mesh Systems

    When I upgraded to a detached home with 10G fibre, I wanted a mesh system that could actually keep up — without costing a fortune. After researching TP-Link’s full Wi-Fi 7 lineup, I settled on the BE85. This post breaks down what I learned comparing the BE63, BE75, BE85, and BE95 — and why the BE85 came out on top for my setup.

    Note: Some links in this post are affiliate links. If you buy something through them, I may earn a small commission — it doesn’t cost you anything extra, and it helps support the site. As an Amazon Associate, I earn from qualifying purchases.


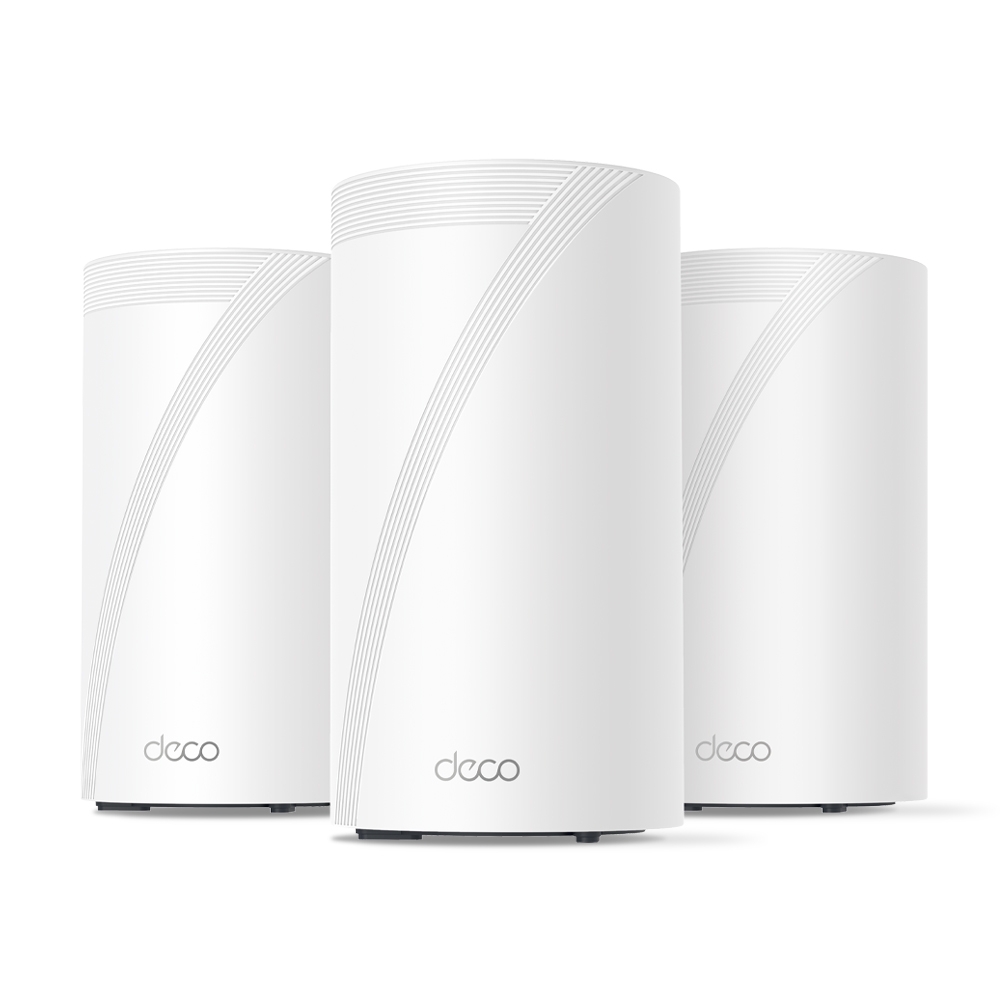
    🚨 Limited-Time Deal: TP-Link Deco BE63 (3-Pack)

    Buy the TP-Link Deco BE63 (3-Pack) on Amazon →
    🟢 Deal Price: $398.99 (was $599) — Offer valid through July 11
    💳 Bonus: 25% back in Amazon Prime Card rewards (if applicable)

    🛜 BE10000 Tri-Band Wi-Fi 7 Speeds:

    • 5188 Mbps on 6 GHz
    • 4324 Mbps on 5 GHz
    • 574 Mbps on 2.4 GHz

    📦 What You Get: Covers up to 7,600 sq ft, supports 200+ devices, and includes 4× 2.5G LAN/WAN ports + 1× USB 3.0 port per unit.

    🧠 Features:

    • Simultaneous wired + wireless backhaul
    • AI-driven seamless roaming
    • Full backwards compatibility with any ISP or Wi-Fi generation

    Why I Went Mesh

    When I moved into a detached townhouse, one of my priorities was ensuring stable Wi-Fi coverage across all floors and rooms. Thick internal walls and a slightly larger footprint than a typical apartment made single-router setups unreliable — especially toward the edges of the house.

    Rather than run cables through walls or deal with signal dropouts, I opted for a mesh Wi-Fi solution. A multi-node system gave me full coverage with seamless handoffs between access points, eliminating dead zones and ensuring solid speeds everywhere from the bedroom to the garden.


    TP-Link BE Series Compared: BE63 vs BE75 vs BE85 vs BE95

    TP-Link’s Wi-Fi 7 mesh lineup (BE series) includes four main models: BE63, BE75, BE85, and BE95. While all support Wi-Fi 7, their specs and use cases differ significantly.

    🔹 TP-Link Deco BE63

    • Bands: Tri-band (2.4GHz + 5GHz + 6GHz)
    • Speeds: Up to 11Gbps combined
    • Ethernet:
    • 1× 2.5G WAN/LAN port
    • 3× 1G LAN ports
    • Coverage (2-pack): ~5,500 sq ft
    • Backhaul: Wireless only (no 10G or dedicated backhaul port)
    • Use Case: Budget Wi-Fi 7 for small to medium homes
    • Pros: Most affordable Wi-Fi 7 mesh option, good performance for the price
    • Cons: Lacks 10G ports, weaker wired backhaul support

    🔹 TP-Link Deco BE75

    • Bands: Tri-band (2.4GHz + 5GHz + 6GHz)
    • Speeds: Up to 17Gbps combined (11,530 Mbps on 6GHz, 4,324 Mbps on 5GHz, 688 Mbps on 2.4GHz)
    • Ethernet:
    • 1× 10G RJ45/SFP+ WAN/LAN combo port
    • 3× 2.5G WAN/LAN ports
    • Coverage (2-pack): ~6,000–6,300 sq ft
    • Backhaul: Supports simultaneous wired + wireless Multi-Link Operation (MLO)
    • Use Case: Mid-tier Wi‑Fi 7 mesh with flexible wired and wireless backhaul—great for users with multi-gig (up to 10G) internet but not requiring full BE85/BE95 performance.
    • Pros: Future-proof 10G port, strong throughput and coverage, 8‑stream Wi‑Fi 7
    • Cons: Only one 10Gbps port (others are 2.5G), no dedicated backhaul band

    🔹 TP-Link Deco BE85

    • Bands: Tri-band (2.4GHz + 5GHz + 6GHz)
    • Speeds: Up to 22Gbps combined
    • Ethernet:
    • 2× 10G ports (1× SFP+ combo, 1× RJ45)
    • 2× 2.5G LAN ports
    • Coverage (2-pack): ~9,600 sq ft
    • Backhaul: Supports 10G wired backhaul
    • Use Case: Large homes, power users, multi-device households
    • Pros: Great performance, future-proof ports, excellent coverage
    • Cons: Pricier than BE63/BE75 but offers much more

    🔹 TP-Link Deco BE95

    • Bands: Quad-band (2.4GHz + 5GHz-1 + 5GHz-2 + 6GHz)
    • Speeds: Up to 33Gbps combined
    • Ethernet:
    • 2× 10G ports
    • 2× 2.5G LAN ports
    • Coverage (2-pack): ~9,600–10,000 sq ft
    • Backhaul: Dedicated band for wireless backhaul + full 10G support
    • Use Case: Power users, wired smart homes, 2G/10G+ multi-gig setups
    • Pros: Absolute top-end performance, dedicated backhaul band, fastest speeds
    • Cons: Very expensive — overkill for most homes

    Why I Chose the TP-Link BE85

    After reviewing all the options, the BE85 hit the sweet spot for my needs. My ISP provides 10G fibre to the home, and I wanted to actually make use of it — not bottleneck it with a 1G router. The BE85 offered:

    • ✔ Full 10G WAN + LAN support
    • ✔ Fast, reliable tri-band Wi-Fi 7
    • ✔ Wired backhaul with 10G performance
    • ✔ Substantially lower cost than the BE95, without sacrificing much

    Another key reason I went with TP-Link over brands like Netgear, Asus, or Eero was price-to-performance. The BE85 delivers comparable (and in many cases better) real-world throughput and coverage than competing systems, while undercutting them significantly on cost. According to performance tests like those from Dong Knows Tech, the BE85 actually outperformed more expensive options — even the Netgear Orbi RBKE963 — in both speed and range.

    Combined with the ease of use, clean app, and rapid firmware support from TP-Link, it made the BE85 one of the best-value Wi-Fi 7 mesh systems available — and still one of the top performers months after release.


    Hands-On Impressions with the BE85

    From the moment I unboxed it, setup was quick and painless using the TP-Link Deco app. The two units synced easily, and firmware updates were done within minutes. Here’s how it’s performed over several months:

    🔹 Coverage & Range

    I get full signal across the house — no buffering, no dropouts. Even in the furthest room on the second floor, I still get over 1.5 Gbps download — most recently clocking in at 1567 Mbps down / 742 Mbps up via Speedtest.

    🔹 Speed Testing

    Using a wired backhaul and 6GHz-capable devices, I regularly see speeds over 1.5 Gbps. More impressively, I’ve tested the connection multiple times with my 10G fibre line and reached as high as 7.58 Gbps down / 7.39 Gbps up during off-peak hours.

    Even during peak usage times, I’ve seen 3.87 Gbps down / 1.64 Gbps up, which is still miles ahead of most home connections.

    🔹 Stability

    The system has been rock-solid. No node drops, no weird disconnects. I’ve only rebooted it once since installation — and that was due to a firmware update.

    🔹 App Control

    The Deco app is simple, but has most of what you need: device prioritisation, QoS, basic firewalling, guest network, and remote access.

    🔹 Downsides?

    Very few. It’s large compared to budget routers, and some advanced users might find the lack of granular settings (like VLAN tagging or deeper DHCP options) limiting — but for 99% of homes, it’s a premium experience.


    Should You Buy the BE63, BE75, BE85, or BE95?

    Choosing the right mesh system depends on your home size, internet speed, and how future-proof you want your setup to be. Here’s a quick guide based on everything covered:

    ✅ Go with the BE63 if:

    • You’re upgrading from an older Wi-Fi 5 or early Wi-Fi 6 setup
    • You want basic Wi-Fi 7 support at the lowest possible cost
    • Your home is small to medium-sized and you’re not using multi-gig internet

    Get the BE63 on Amazon →

    ✅ Consider the BE75 if:

    • You want more bandwidth and coverage than the BE63
    • You still don’t need 10G ports or wired backhaul
    • You’re in a medium to large home with many devices

    Get the BE75 on Amazon →

    ✅ Choose the BE85 if:

    • You have a multi-gig or 10G internet connection
    • You want wired backhaul support with 10G LAN/WAN
    • You plan to run NAS, streaming, cloud backups or a smart home with heavy traffic
    • You want premium performance without BE95 pricing

    Get the BE85 on Amazon →

    ✅ Go for the BE95 only if:

    • You absolutely need the best possible performance
    • You’re in a very large home or smart home ecosystem with dozens of demanding devices
    • You need quad-band Wi-Fi 7 and a dedicated wireless backhaul

    Get the BE95 on Amazon →


    Final Thoughts

    The TP-Link BE series offers something for everyone, but the BE85 stands out as the true sweet spot. It’s powerful enough to make full use of 10G internet, provides rock-solid mesh coverage, and still comes in far cheaper than flagship systems from other brands.

    For detached homes, users with demanding network setups, or anyone wanting to build around Wi-Fi 7 — this is one of the best options available.

    If you’re considering the BE63 as a budget-friendly alternative, it’s a solid pick too — just be aware of its backhaul and port limitations.

    Still deciding if Wi-Fi 7 is worth the leap? This breakdown of Wi-Fi 6, 6E, and 7 can help you figure out what’s best for your setup.

  • How I’m Choosing the Right PoE Security Camera for My NAS in 2025

    In my last post, I explored several great security cameras compatible with NAS setups—particularly Reolink’s models, known for solid RTSP and ONVIF support. Since then, I’ve been digging deeper into my camera choices, evaluating specific brands, features, and compatibility.

    I haven’t pulled the trigger just yet, but since many of you are probably going through a similar selection process, I thought I’d share exactly what’s guiding my decision-making.

    Some of the links in this post are affiliate links. If you buy something through them, I may earn a small commission — it doesn’t cost you anything extra, and it helps support the site.


    My Current Home Setup

    Here’s a quick overview of what I have today:

    • NAS: UGREEN NASync DXP2800 (2-bay NAS, RAID1, NVMe SSDs)
    • Software: Docker with Home Assistant, Pi-hole, and several self-hosted apps
    • Existing Cameras: Two SwitchBot outdoor cameras (USB-powered, each with built-in 10,000mAh battery backup)
    • Camera locations:
      • Front door camera: Covers people approaching the house
      • Driveway camera: Covers the front area of my home, including mailbox, car, and motorcycle
    • Cabling: USB cables (8–10 metres each), neatly routed through trunking to keep everything tidy
    • Storage: Local recording to NAS only—avoiding cloud storage for privacy reasons

    Reflecting on My Current Setup

    My current USB-powered SwitchBot outdoor cameras have a real advantage with built-in batteries, ensuring they keep working even during a power outage. This provides peace of mind, knowing I’ll maintain video coverage in emergencies.

    However, despite neatly routed cables through trunking, the setup isn’t ideal. The main issue is cable length: each USB cable runs approximately 8–10 metres, which is right at the top end of USB power delivery limits. Although significant reliability issues rarely occur, the long cables occasionally result in slow charging times for the cameras, especially at the front door due to higher usage.

    The biggest frustration with my current setup is motion detection. Even though the SwitchBot cameras claim human-only detection, they regularly produce false positives, especially at night due to dust, spider webs, and minor movements. This issue significantly impacts the usefulness and reliability of my security system.


    Why Upgrading to PoE Makes Sense

    Switching to Power over Ethernet (PoE) cameras addresses these reliability issues. Each camera will still have its own cable, just like my USB setup—but the critical advantage of PoE is combining power and stable high-speed data over a single Ethernet cable. Ethernet comfortably supports cable lengths up to 100 metres without voltage drops or data issues, easily covering the longest cable runs around any typical home. Commonly recommended PoE switches include models from TP-Link, Netgear, and Ubiquiti, which are known for reliability, ease of use, and good compatibility with a wide range of PoE cameras.

    Additionally, a centralised PoE switch simplifies management, improving scalability and overall system stability. When combined with smart NAS integration and better software support, this represents a big upgrade over USB-powered Wi-Fi cameras.

    If you’re in an apartment or smaller home, these benefits still apply—especially if you’re dealing with weak Wi-Fi signals or want something more reliable without relying on battery charging cycles. Even one or two well-placed PoE cameras can provide significantly better results with less hassle long term.


    Key Features I’m Prioritising

    These are the most important factors influencing my camera choice:

    1. PoE Support

    PoE delivers both power and reliable high-speed data over Ethernet cable runs up to 100 metres without signal or voltage drop. Perfect for my home, even at longer distances.

    2. RTSP and ONVIF Compatibility

    Essential for smooth integration with my NAS and smart home software like Home Assistant or Frigate, offering flexible, powerful video management.

    3. Superior Infrared (IR) Night Vision

    I’m specifically looking for strong infrared performance for my outdoor cameras. Colour night vision typically requires additional lighting—which I’d prefer to avoid to respect my neighbours’ privacy and comfort. IR performance stronger than my current SwitchBot cameras is a must.

    4. Effective AI-Based Motion Detection

    My current SwitchBot cameras claim human detection, but the reality is frequent false alarms—like spiders or dust particles triggering motion alerts multiple times per night. Reliable AI-powered detection, specifically tuned to distinguish humans, vehicles, and important events—is a big priority to reduce false positives.

    5. Local Availability (Japan)

    Being based in Japan, I prefer to purchase locally to avoid hassles with returns, warranty issues, and shipping. Accessibility and local support matter to me, so I typically check well-known local retailers like Amazon Japan, Rakuten, or Yodobashi Camera. However, these cameras are widely available internationally through major online stores as well.
    Being based in Japan, I prefer to purchase locally to avoid hassles with returns, warranty issues, and shipping. Accessibility and local support matter to me.


    Cameras I’m Considering Right Now

    Below are the four cameras currently on my shortlist. I’ve included a deeper look at each one to help others who may be weighing similar options.

    Reolink RLC-810A

    • Price Range: $55–$80
    • Resolution: 4K Ultra HD
    • Smart Detection: Built-in human and vehicle detection
    • NAS Compatibility: RTSP and ONVIF supported, works well with most NVR and NAS setups
    • Pros: Excellent value for money, strong community support, widely available, simple setup
    • Cons: Detection performance may vary depending on whether you’re using a Reolink NVR or third-party NAS software
    • Use Case Fit: This is my leading candidate. It offers a great mix of reliability, smart detection, and direct NAS recording. It’s also widely supported in Japan and abroad. Reolink also offers several dome-style cameras if I decide to go with that format for front door coverage.
    • Visual Placement: Best suited for covering driveways or home fronts with a clear line of sight.
    Reolink RLC-810A PoE security camera with 4K resolution, ideal for NAS recording and driveway surveillance.

    TP-Link VIGI C340 / C540

    • Price Range: $70–$110
    • Resolution: Up to 4K depending on model
    • Smart Detection: Person and vehicle detection (varies by model)
    • NAS Compatibility: RTSP stream supported for use with NVRs and NAS systems
    • Pros: Solid specs at an affordable price, increasingly available, backed by TP-Link’s reputation
    • Cons: Ecosystem still maturing, some models lack smart detection entirely
    • Use Case Fit: A strong alternative to Reolink, particularly if pricing or availability is more favourable at time of purchase.
    • Visual Placement: Great for perimeter coverage or front yard monitoring.
    TP-Link VIGI C340 PoE security camera with up to 4K resolution and smart detection features.

    UniFi G4 Bullet

    • Price Range: $180–$250
    • Resolution: 4MP (1440p)
    • Smart Detection: Advanced analytics via UniFi Protect (not all features available with RTSP)
    • NAS Compatibility: Partial – RTSP available but full functionality requires UniFi Protect NVR
    • Pros: Premium build, clean design, exceptional image quality, long-term support
    • Cons: Expensive, best used with UniFi ecosystem, availability limited in some regions
    • Use Case Fit: A future-proof, high-end option if I decide to go all-in on UniFi. Less likely as a mixed system.
    • Visual Placement: High-visibility areas or integrated with UniFi-managed homes.
    UniFi G4 Bullet 4MP PoE camera with premium metal housing and support for UniFi Protect analytics.

    Eufy E40 PoE

    Visual Placement: Ideal for wall or eave mounting at entry points like front doors or side paths where human movement is the key concern.

    Price Range: $100–$150

    Resolution: 2K (2560 x 1440)

    Smart Detection: AI-powered person detection built into the camera

    NAS Compatibility: Supports RTSP for local recording to NAS systems (including Synology, QNAP, and others)

    Pros: No monthly subscription, excellent privacy stance, clean design, local AI with good accuracy

    Cons: No vehicle or pet detection, limited to person-only alerts, ecosystem not as mature as Reolink or UniFi

    Use Case Fit: A promising option for users who want strong privacy and basic AI detection without relying on cloud storage or ongoing fees. If you’re looking for a simple, effective PoE solution that integrates with your NAS and covers standard entryways or paths, this is worth considering.

    Eufy E40 PoE 2K security camera with built-in AI person detection and RTSP support for NAS integration.

    Prefer a complete system that works out of the box? If you’re looking for a plug-and-play PoE setup with local recording, Eufy’s NVR system offers a solid alternative. It includes four wired cameras, a 2TB drive, and AI person detection—perfect if you want to skip piecing together individual components.

    Next Steps

    With my honeymoon coming up soon, I’m holding off on any major purchases for now. I expect to make a final decision and start testing by the end of the year.

    My current plan is to start with one Reolink RLC-810A camera, testing its integration, reliability, and feature set in my home environment. If it performs well, I’ll likely stick with Reolink for consistency across the system. That said, I’m still considering using a dome-style camera above the front door, as the ceiling above it could benefit from a wider field of view for better coverage.

    Once the system is fully set up, I’ll publish a detailed guide covering:

    • Direct NAS recording setup (using RTSP/ONVIF)
    • Optimising motion detection and AI analytics for fewer false alerts
    • Secure remote access without risking my network

    If you’ve already made a similar upgrade—or you’re using PoE cameras in a similar NAS-based setup—I’d love to hear about your experiences, good or bad. Drop a comment below or use the contact form to get in touch.


    Related Posts You Might Like:

    Looking forward to sharing more once I start testing!

  • Choosing the Best Drives for Your NAS Setup: HDD vs. SSD Recommendations

    Choosing the Best Drives for Your NAS Setup: HDD vs. SSD Recommendations

    Choosing the right drives for your NAS can significantly impact reliability, performance, and data safety. This comprehensive guide explores HDDs versus SSDs, recommended drive capacities, specific drive recommendations for various use-cases, and even enterprise and surveillance drive options, helping you make the best-informed decision for your NAS setup.

    Some of the links in this post are affiliate links. If you buy something through them, I may earn a small commission — it doesn’t cost you anything extra, and it helps support the site.

    HDD vs. SSD: What’s Best for Your NAS?

    • HDD (Hard Disk Drive): Ideal for bulk storage, affordable, high capacities. Drawbacks include noise, slower performance, and higher power consumption.
    • SSD (Solid State Drive): Faster, quieter, energy-efficient, and perfect for applications like Docker, VMs, and intensive tasks. However, they are pricier per GB.

    Recommended Drive Capacities

    • General Home & Media Storage: HDD (4-8TB), SSD (1-2TB)
    • Small Business & Critical Data: HDD (8-16TB), SSD (2-4TB)
    • Docker & Applications: NVMe SSD (1-2TB)
    • Virtual Machines & Intensive Use: NVMe SSD (2-4TB)
    • Security Camera Systems: HDD (2-10TB)

    HDD Manufacturers: WD Red vs. Seagate IronWolf

    Both Western Digital (WD) Red and Seagate IronWolf drives are NAS-optimized for reliability and continuous operation. Differences include:

    • WD Red Series: Quieter and cooler, ideal for home setups.
    • Seagate IronWolf Series: Slightly higher performance and built-in IronWolf Health Management (IHM), beneficial in critical NAS environments.

    Both are excellent—pick whichever is priced better during sales unless you have specific performance or noise requirements.

    Specific Drive Recommendations & Detailed Insights

    General Storage/Home NAS

    • Western Digital Red Plus (4-6TB): Quiet, efficient, and cost-effective.
    • Seagate IronWolf (4-6TB): Reliable with optimized firmware, slightly higher performance.

    Data Security & Critical Storage

    • Western Digital Red Pro (8-16TB): High RPM, extended warranty, robust reliability.
    • Seagate IronWolf Pro (8-16TB): Excellent reliability, includes data recovery service.

    Security Camera Systems

    • Western Digital Purple (2-10TB): Optimized for continuous video recording, reliable for CCTV setups.
    • Seagate SkyHawk (2-10TB): Built for surveillance, robust performance, supports multiple HD cameras.

    Docker Containers & Application Servers

    • Samsung 980 Pro NVMe (1-2TB): High speeds, great for Docker responsiveness.
    • Crucial MX500 SATA SSD (1-2TB): Solid performance, budget-friendly.

    Virtual Machines & Heavy Docker Usage

    • Samsung 990 Pro NVMe (2TB): Excellent for demanding workloads.
    • Western Digital Black SN850X NVMe (2TB): Superior speed and durability.
    • Crucial P3 Plus NVMe (2TB): Great balance of price and performance.

    Enterprise Drives: Cost-Effective Alternatives & Enhanced Reliability

    Enterprise drives such as WD Ultrastar, Seagate Exos, Toshiba MG Series, and HGST Ultrastar are designed for heavy use, offering high reliability and performance. Reconditioned drives available on platforms like eBay can offer excellent value.

    • WD Ultrastar DC HC550/HC560 (14-20TB): Data center grade performance.
    • Seagate Exos X16/X18 (14-18TB): Enterprise reliability at great prices.
    • Toshiba MG Series (12-18TB): Excellent performance and competitive pricing.
    • HGST Ultrastar He Series (10-14TB): Industry-leading durability, helium-filled for efficiency.

    Benefits of Helium-Filled Drives

    • Lower power and heat, extended lifespan
    • Higher drive density, ideal for multi-drive setups

    My Personal NAS Setup and Drive Choices

    I’ve chosen the UGreen DXP2800, attracted by its powerful hardware, competitive price via crowdfunding, and flexibility to run either its own OS or alternatives without voiding warranty. It serves as a backup solution for photos, phones, and laptops, and can also integrate seamlessly with cloud storage.

    I’m opting for Western Digital Red HDDs (6-8TB) in RAID 1 due to their excellent value, reliability, and retailer bundle discounts. RAID 1 specifically meets my needs by:

    • Ensuring data redundancy and easy recovery
    • Offering improved read performance
    • Being simple to manage, ideal for first-time NAS users

    Additionally, I’m exploring Docker, particularly Home Assistant for smart home management. For Docker and potential applications like Pi-Hole, I’ve selected two 1TB WD Black SN850X NVMe SSDs for their exceptional speed and reliability.

    FAQ: Quick Answers for Common NAS Drive Questions

    • What’s the difference between WD Red and WD Purple?
      WD Red drives are optimized for NAS environments (general data storage), while WD Purple drives are optimized specifically for continuous video recording in surveillance systems.
    • Should I buy new or reconditioned enterprise drives?
      Reconditioned enterprise drives offer substantial cost savings and excellent reliability, provided you buy from reputable sellers and thoroughly check drive health upon delivery.
    • Can I mix different brands or sizes in RAID?
      It’s best practice to keep drives identical in RAID setups for optimal performance and reliability.

    Looking for the drives mentioned?

    Here are quick links to everything I covered above:

    HGST Ultrastar He Series (10–14TB)

    WD Red Plus (4–6TB)

    Seagate IronWolf (4–6TB)

    WD Red Pro (8–16TB)

    Seagate IronWolf Pro (8–16TB)

    WD Purple (2–10TB, Surveillance)

    Seagate SkyHawk (2–10TB, Surveillance)

    Samsung 980 Pro NVMe (1–2TB)

    Crucial MX500 SATA SSD (1–2TB)

    Samsung 990 Pro NVMe (2TB)

    WD Black SN850X NVMe (2TB)

    Crucial P3 Plus NVMe (2TB)

    WD Ultrastar DC HC550/HC560 (14–20TB)

    Seagate Exos X16/X18 (14–18TB)

    Toshiba MG Series (12–18TB)

    Conclusion

    Selecting drives involves considering your specific storage requirements, budget, and performance needs. HDDs are ideal for bulk storage, SSDs excel at performance-intensive tasks, and enterprise drives offer unmatched reliability, particularly when purchased reconditioned.

    Have insights or further questions? I’d love to hear about your own NAS experiences in the comments!

    Check out my other posts on setting up your NAS and smart home networking essentials.

  • Cloud vs. Local Storage: Which One is Best for You? (Pros & Cons Explained)

    Cloud vs. Local Storage: Which One is Best for You? (Pros & Cons Explained)

    Introduction

    Choosing between cloud storage and local storage isn’t just about convenience—it’s about balancing security, cost, accessibility, and reliability. Cloud storage offers ease of access, but is it secure enough? Local storage gives you control, but is it practical in the long run?

    This guide breaks down the key differences, so you can choose the best option based on your needs, risk tolerance, and budget.

    A quick comparison between local storage (HDD) and cloud storage. Local storage keeps data on physical devices, while cloud storage allows remote access through online servers.

    1. What is Cloud Storage?

    Cloud storage refers to storing data on remote servers managed by a provider (e.g., Google Drive, OneDrive, Dropbox). These services allow you to upload, access, and sync your data online from multiple devices.

    ✅ Pros of Cloud Storage

    ✔ Access from Anywhere – Your data is available on any device, anytime.

    ✔ Automatic Backups & Redundancy – Cloud providers store copies across multiple locations, reducing data loss risks.

    ✔ Scalability – Upgrade or downgrade your storage plan as needed.

    ✔ Collaboration & Sharing – Easily share files and collaborate in real time.

    ✔ No Hardware Maintenance – No need to buy or maintain physical drives.

    ❌ Cons of Cloud Storage

    ✖ Recurring Costs – Monthly fees add up over time, and higher storage tiers can be expensive.

    ✖ Data Privacy & Security Risks – Your files are stored on third-party servers, which may be vulnerable to data breaches, government access, or provider shutdowns.

    ✖ Internet Dependency – Slow or no internet? No access to your files.

    ✖ Limited Control – You rely on the provider’s policies, pricing, and service uptime.

    2. What is Local Storage?

    Local storage means keeping your data on physical devices like external hard drives, SSDs, or a Network-Attached Storage (NAS) device. This gives you direct control over your files without relying on a third party.

    ✅ Pros of Local Storage

    ✔ Full Control & Privacy – Your data is 100% yours—no third-party access or cloud provider risks.

    ✔ One-Time Cost – Unlike cloud storage subscriptions, you buy hardware once and own your storage.

    ✔ Faster Access – No internet lag—files are available instantly.

    ✔ Better for Large Files – Ideal for video editing, 3D modeling, and backups, where cloud speeds can be limiting.

    ❌ Cons of Local Storage

    ✖ Risk of Hardware Failure – Hard drives and SSDs can fail, degrade, or get lost. Without proper backups, data loss is permanent.

    ✖ Limited Accessibility – Unless you set up remote access (e.g., NAS), files are only available where the device is stored.

    ✖ Upfront Cost & Maintenance – Storage devices can be expensive, and you’ll need manual backups.

    ✖ No Automatic Redundancy – Unlike cloud services, if your drive dies, data recovery can be difficult without backups.

    3. Which One Should You Choose?

    Choose Cloud Storage If:

    ☑ You need remote access from multiple devices.

    ☑ You want automated backups & syncing without manual effort.

    ☑ You don’t mind paying a monthly fee for security and convenience.

    ☑ You collaborate with others and need seamless file sharing.

    Choose Local Storage If:

    ☑ You want full control & privacy over your files.

    ☑ You prefer a one-time cost instead of recurring payments.

    ☑ You work with large files (video, 3D modeling, gaming) and need fast access.

    ☑ You are comfortable managing backups and storage hardware.

    Cloud storage allows remote access and easy collaboration, while local storage offers full control and better security for sensitive data. The best choice depends on your needs and priorities.

    If you’re thinking about using a NAS for storage, read our guide on why you should consider one.

    4. The Best of Both: Hybrid Storage Strategy

    For most users, a hybrid setup is the ideal solution:

    • Use cloud storage for documents, work files, and quick access.

    • Use local storage for backups, large files, and sensitive data.

    • Back up NAS to the cloud – If you store files on a NAS, use services like Backblaze B2, Google Drive, or OneDrivefor an offsite backup. This protects against hardware failure, theft, or natural disasters.

    This reduces cloud costs while keeping your most important files safe.

    A side-by-side comparison of cloud storage and physical storage, highlighting key differences in accessibility, cost, security, and backup management. Cloud storage offers convenience, while local storage provides full control.

    Conclusion

    Both cloud and local storage have trade-offs. If you prioritize ease of access and automation, cloud storage is the way to go. If you want total control, better privacy, and no recurring fees, local storage is the better choice.

    For most people, a hybrid approach—using both cloud and local backups—offers the best balance.

    How do you store your data? Let me know in the comments!