Tag: cloud backup

  • Automated NAS Backup to Azure with rclone: UGREEN NAS Guide

    Automated NAS Backup to Azure with rclone: UGREEN NAS Guide

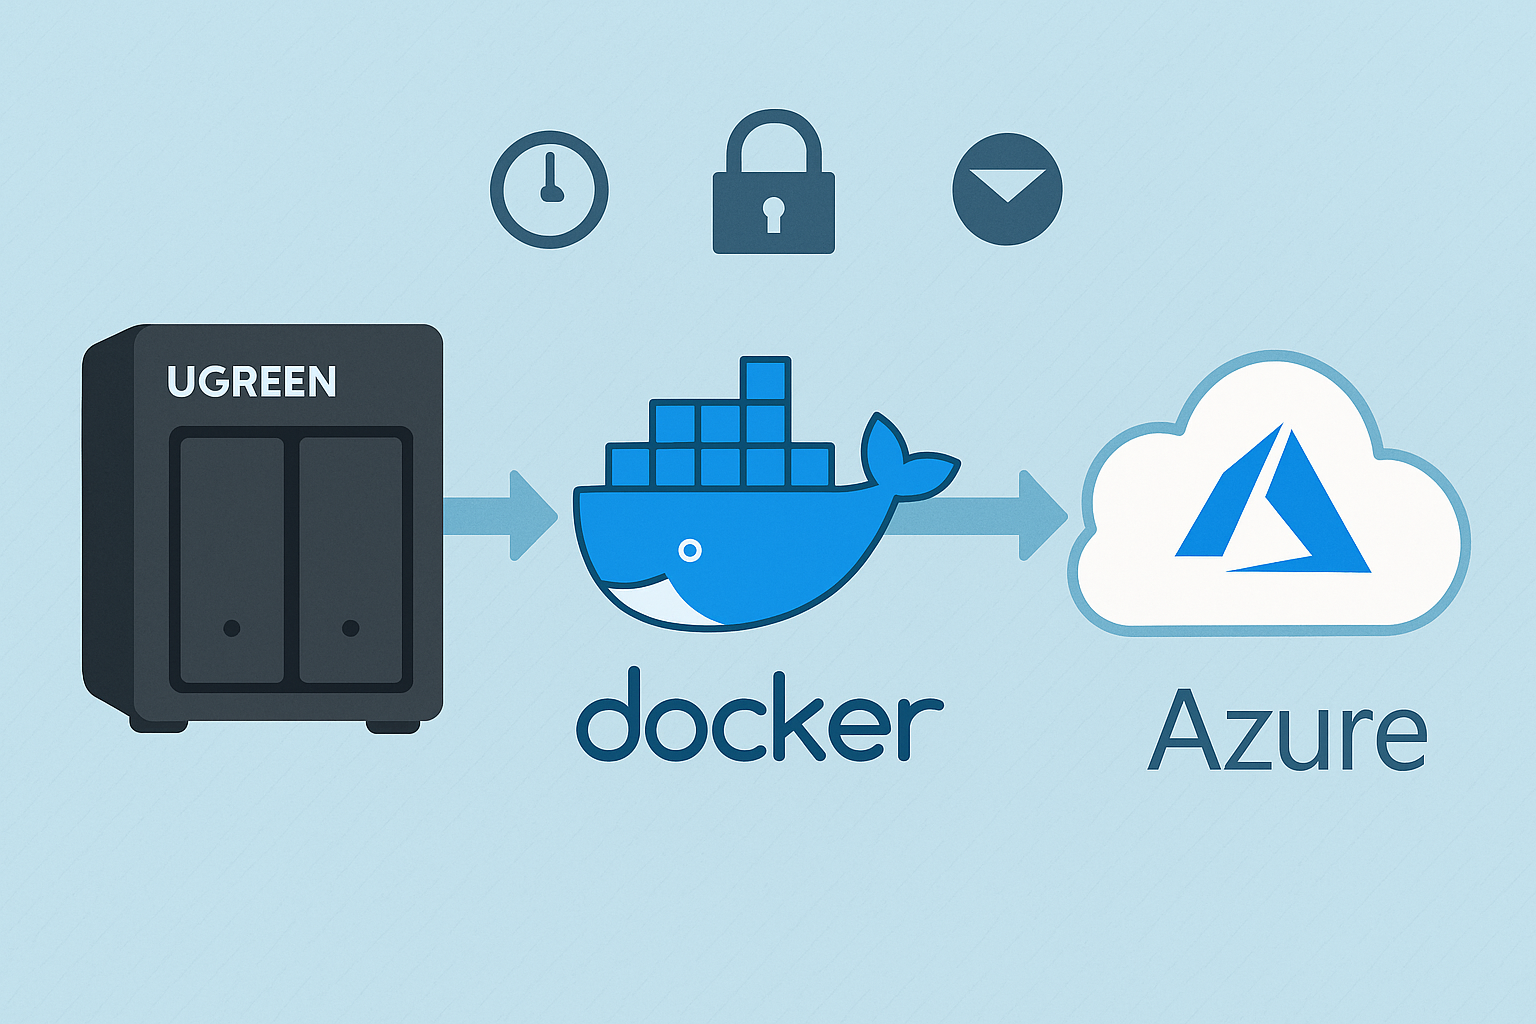
    Backing up your NAS is essential to protect against data loss from hardware failure, theft, or natural disasters. In this guide, I’ll walk you through how I set up a backup from my UGREEN NASync DXP2800 to Azure using rclone, based on the exact process I followed. Each step includes context so you understand not just how to do it, but why.

    Why Azure?

    Azure is a robust cloud storage option offering high reliability, excellent redundancy, and flexible access tiers specifically designed for backup and archiving. While Azure doesn’t provide a permanent free tier (unlike services such as Google Drive), it does offer generous trial credits to new users. To minimise ongoing storage costs without these credits, I recommend using the Cool or Archive storage tiers—both ideal for backups that don’t require frequent access.

    Other options: rclone supports a wide range of cloud providers. Here are a few great alternatives:

    • Backblaze B2 – Very affordable, especially for large backups. Well-supported by rclone.
    • Google Drive – Great for personal backups. Offers 15GB free and integrates easily.
    • Wasabi – Flat-rate pricing and no egress fees. A strong S3-compatible choice.
    • Dropbox – Easy to use with good syncing capabilities, though pricing can be high for large storage needs.
    • Amazon S3 – Enterprise-grade option, scalable but more complex to configure and can get expensive.

    You can easily substitute Azure in this guide with one of the above by changing the remote configuration step.

    Step 1: Generate rclone Configuration File

    To make rclone work from Docker, I first created a persistent config file using a temporary container:

    docker run -it --rm \
      -v /mnt/data/rclone-config:/config \
      --env XDG_CONFIG_HOME=/config \
      rclone/rclone config

    Walk through the prompts:

    • Select n to create a new remote.
    • Name it something like myremote (avoid using your NAS or personal name).
    • Select storage type 34 for Azure Blob Storage.
    • Enter your Azure Storage Account Name for account.
    • Enter your Access Key for key.
    • Leave endpoint blank.
    • Skip advanced config and auto config by selecting n.

    Once complete, the config will be saved as /mnt/data/rclone-config/rclone.conf on your NAS, ready for Docker containers to use.

    🛠️ Tip: To test that it works:

    docker run --rm \
      -v /mnt/data/rclone-config:/config \
      --env XDG_CONFIG_HOME=/config \
      rclone/rclone:latest lsd myremote:mycontainer \
      --config="/config/rclone.conf"

    Step 2: Create the Backup Script

    This script is broken into three parts: syncing data, deleting older backups, and emailing on failure. Each part is explained below.

    I wanted versioned backups and automatic cleanup of older ones. Here’s the exact script I used:

    #!/bin/sh
    
    LOG_FILE="/mnt/data/rclone-config/monthly_backup.log"
    CONFIG="/mnt/data/rclone-config/rclone.conf"
    REMOTE="myremote:mycontainer"
    BACKUP_NAME="nas-backup-$(date +%Y-%m)"
    DELETE_DATE=$(date -d "4 months ago" +%Y-%m)
    OLD_BACKUP_NAME="nas-backup-$DELETE_DATE"
    
    # 🔁 Sync Step – Copy /volume1 to a dated backup folder
    docker run --rm \
      -v /volume1:/data \
      -v /mnt/data/rclone-config:/config \
      --env XDG_CONFIG_HOME=/config \
      rclone/rclone:latest sync /data "$REMOTE/$BACKUP_NAME" \
      --config="/config/rclone.conf" \
      --log-file="/config/monthly_backup.log" \
      --log-level INFO \
      --exclude "@tmp/**"
    
    # 🧹 Retention Step – Delete backups older than 4 months
    docker run --rm \
      -v /mnt/data/rclone-config:/config \
      --env XDG_CONFIG_HOME=/config \
      rclone/rclone:latest purge "$REMOTE/$OLD_BACKUP_NAME" \
      --config="/config/rclone.conf"
    
    # 📧 Notification Step – Email if backup fails
    if [ $? -ne 0 ]; then
      echo "NAS Backup failed. See log below:" | mail -s "NAS Backup FAILED" you@example.com < "$LOG_FILE"
    fi

    📌 Note: Replace myremote and mycontainer with your rclone remote and Azure Blob container name. Avoid using identifiable names like your NAS hostname.

    Step 3: Enable Email Reporting on Your NAS

    To enable email alerts for failed backups, I used the built-in mail command entirely through SSH — no GUI or additional packages were needed.

    What I did:

    1. SSH into your NAS:
       ssh your-nas-username@your-nas-ip
    1. Test email functionality:
       echo "Test message" | mail -s "Test Email" you@example.com

    If you receive the test email, your NAS is already configured to send system emails.

    1. Check your mail config (if test mail fails):
      The system uses msmtp under the hood on many embedded NAS environments. Create or edit the config:
       vi /opt/etc/msmtprc

    Example configuration (for Gmail):

       defaults
       auth           on
       tls            on
       tls_trust_file /etc/ssl/certs/ca-certificates.crt
    
       account default
       host smtp.gmail.com
       port 587
       from your.email@gmail.com
       user your.email@gmail.com
       password your_app_password
       logfile /opt/var/log/msmtp.log
    1. Make sure permissions are correct:
       chmod 600 /opt/etc/msmtprc
    1. Export the config path if needed (some systems require this):
       export MSMTP_CONFIG=/opt/etc/msmtprc
    1. Retry your test email:
       echo "Test message" | mail -s "Test Email" you@example.com
    1. Add to your script:
      Make sure your backup script includes:
       if [ $? -ne 0 ]; then
         echo "NAS Backup failed. See log below:" | mail -s "NAS Backup FAILED" you@example.com < "$LOG_FILE"
       fi

    ✅ If your provider uses two-factor authentication, use an app-specific password. Most mail issues come down to wrong SMTP server, port, or missing trusted certs.

    Step 4: Schedule the Script with Cron

    To automate your backups, schedule the script using cron:

    Edit your crontab by running:

    crontab -e

    Then, add the following line:

    30 2 1 * * /volume1/scripts/backup_to_azure.sh

    Here’s what these numbers mean:

    • 30: Minute (0-59)
    • 2: Hour (0-23, where 2 is 2:00 AM)
    • 1: Day of the month (1-31)
    • *: Month (1-12, * means every month)
    • *: Day of the week (0-6, Sunday=0, * means every day)

    In this example, the backup script runs automatically at 2:30 AM on the 1st day of every month. Adjust these numbers according to your preferred backup schedule.

    ✅ Why this schedule? Monthly snapshots avoid daily clutter and keep backups manageable.

    Step 5: Verify Your Backups

    Confirm everything’s working with:

    cat /mnt/data/rclone-config/monthly_backup.log

    And list current backup folders:

    docker run --rm \
      -v /mnt/data/rclone-config:/config \
      --env XDG_CONFIG_HOME=/config \
      rclone/rclone:latest lsd myremote:mycontainer \
      --config="/config/rclone.conf"

    🔄 Optional Enhancements

    🔐 Encrypt Your Backups

    Want extra protection? Add a second rclone remote (type crypt) that wraps your Azure remote:

    rclone config
    • Create new remote myremote-crypt
    • Type: crypt
    • Remote: myremote:mycontainer
    • Set a strong password and salt

    Then replace the backup target in your script with:

    myremote-crypt:$BACKUP_NAME

    🔍 Restore Test

    Try restoring a test file from Azure to confirm you can actually recover data if needed:

    docker run --rm \
      -v /volume1/test-restore:/restore \
      -v /mnt/data/rclone-config:/config \
      --env XDG_CONFIG_HOME=/config \
      rclone/rclone:latest copy myremote:mycontainer/nas-backup-2025-05/testfile.txt /restore \
      --config="/config/rclone.conf"

    🧩 Troubleshooting & FAQ

    Q: My backup failed with a permissions error—how do I fix it?

    A: Make sure your Docker container has read permissions for /volume1 and that the rclone configuration (rclone.conf) is properly mounted. Also, confirm file permissions with chmod 600.

    Q: I received a network error during my backup—what can I do?

    A: Add retry options to your rclone sync command to enhance resilience against temporary network issues:

    --retries 5 --low-level-retries 10

    Q: My email notifications aren’t being sent—how do I troubleshoot this?

    A: Ensure the built-in mail command on your NAS works by testing from SSH:

    echo "Test Email" | mail -s "Test" you@example.com

    If it doesn’t, verify SMTP configuration (see Step 3 above).

    Q: How can I avoid hitting Azure bandwidth or cost limits?

    A: Use bandwidth limiting during uploads with:

    --bwlimit=8M

    Additionally, choose the “Cool” or “Archive” Azure tiers for cost efficiency.

    Q: Can I use another cloud provider instead of Azure?

    A: Absolutely! rclone supports many services like Backblaze B2, Google Drive, Dropbox, Wasabi, and Amazon S3. You simply adjust the remote setup step accordingly.

    Final Thoughts

    You now have automated, secure, and reliable backups ready to protect your valuable data. Have you tried setting this up yourself yet? I’d love to hear your experiences, challenges, or ideas for enhancements in the comments below. Happy backing up!

    If you’re interested in other NAS setups and configurations, you might find these previous posts helpful:

    Let me know if there are other topics you’d like to see covered!

  • Top 5 NAS Mistakes Beginners Make (And How to Avoid Them)

    Top 5 NAS Mistakes Beginners Make (And How to Avoid Them)

    Introduction

    Setting up your first Network-Attached Storage (NAS) can dramatically enhance your home network by centralising your data, improving security, and streamlining access. However, beginners frequently make mistakes that cause frustration, unexpected costs, or even critical data loss. This comprehensive guide addresses these common pitfalls with practical advice, real-world scenarios, and visual resources to help ensure a successful NAS setup experience.


    Mistake #1: Choosing Incompatible or Unreliable Drives

    Selecting inappropriate drives can severely compromise your NAS’s reliability and performance. For example, in data centres, it’s not uncommon for entire batches of drives to fail simultaneously due to manufacturing defects. While rare, this highlights the value of using drives from different production batches to mitigate simultaneous failure risks.

    • Advice:
      • Always consult your NAS manufacturer’s compatibility list.
      • Opt for NAS-specific drives like Western Digital Red or Seagate IronWolf, which are designed for continuous operation.
      • Using identical drives (same manufacturer, model, capacity, and speed) is the recommended best practice to ensure compatibility and optimal RAID performance.
      • While mixing drives from different manufacturers is possible, it’s essential that drives have identical capacity, speed, and specifications to utilise RAID effectively. However, this approach isn’t generally recommended due to potential compatibility or performance issues.
    Two WD Red Plus NAS hard drives side-by-side with different serial numbers, illustrating best practice of using drives from different batches to reduce risk of simultaneous failure in RAID setups.

    Related Guide: HDD vs SSD for Your NAS


    Mistake #2: Overestimating or Underestimating Storage Needs

    Miscalculating your storage needs can result in wasted money or insufficient capacity. For instance, purchasing lower-capacity SSDs simply because they’re cheaper may initially seem like a smart choice, but this often leads to storage shortages down the line, forcing you to upgrade prematurely, as you experienced with your personal PC setup.

    • Advice:
      • Carefully evaluate your current usage and anticipate future growth.
      • Factor in media consumption, regular backups, and future data accumulation.
      • Consider investing in slightly more storage than you initially think you’ll need to avoid frequent upgrades.
    Table showing recommended HDD and SSD storage sizes based on use cases including gaming, media servers, content creation, backups, and professional workstations.

    Related Guide: Beginner’s Guide to Choosing a NAS


    Mistake #3: Neglecting Proper Network Configuration

    Improper network setup can significantly limit NAS performance, leading to slow data transfers and frustrating buffering during media streaming. For example, upgrading from an older Wi-Fi 5 router to a modern Wi-Fi 7 system like the TP-Link BE85 dramatically improved file transfer speeds, streaming quality, and overall responsiveness of your NAS setup.

    • Advice:
      • Upgrade to modern networking standards (Gigabit Ethernet, Wi-Fi 6/7) to prevent bottlenecks.
      • Use high-quality Ethernet cables (Cat 6 or higher).
      • Properly configure network settings, including IP addresses and DNS, to optimise performance.
    Comparison chart showing Wi-Fi 5, Wi-Fi 6, and Wi-Fi 7 speeds in Mbps, highlighting significant improvements in wireless performance for modern networking.

    Related Guide: Understanding Wi-Fi 6 and Wi-Fi 7


    Mistake #4: Overlooking Security and Backup Measures

    Underestimating security risks or misunderstanding RAID’s role can leave your NAS vulnerable to severe data loss or breaches. For example, numerous reports highlight how ransomware attacks exploit poorly secured NAS devices, encrypting valuable data and demanding hefty ransoms, leading to significant financial and personal distress for affected users.

    • Advice:
      • Disable default admin accounts and always use strong, unique passwords.
      • Implement robust firewall settings and VPN access for secure remote connections.
      • Recognise RAID’s limitations—use RAID alongside separate, regular external or cloud-based backups.
      • Regularly test your backup restorations to verify reliability.

    Table: RAID Setups and Recommended Backup Strategies

    RAID Level Protection Provided Recommended Backup Strategy
    RAID 0 No redundancy — performance only Not suitable alone. Always pair with full external or cloud backups.
    RAID 1 Mirroring — protects from 1 drive failure Backup to cloud or external storage to recover from accidental deletion or corruption.
    RAID 5 Striping with parity — protects from 1 drive failure Use the 3-2-1 backup rule: 3 copies, 2 types of media, 1 offsite. Include cloud backup.
    RAID 6 Double parity — protects from 2 drive failures Add versioned backups (e.g., cloud storage with file history) to protect against corruption.
    RAID 10 Striping + mirroring — fast and fault-tolerant Add incremental or differential backups for quick recovery and long-term protection.

    Mistake #5: Ignoring Firmware and Software Updates

    Skipping firmware or software updates exposes your NAS to critical vulnerabilities that can lead to ransomware, instability, or total data loss. A major example was the Qlocker ransomware attack, where QNAP NAS devices with outdated firmware were targeted. Attackers exploited unpatched weaknesses, encrypted users’ files, and demanded ransom payments in Bitcoin.

    Staying current with firmware isn’t just about security — it also unlocks performance improvements, new features, and bug fixes.

    Comparison Table: Why Timely Updates Matter

    Outdated FirmwareUpdated Firmware
    Exposed to known vulnerabilitiesPatched against known threats
    High risk of ransomware and malwareEnhanced security and firewall protections
    Possible performance bugs or system crashesStability improvements and optimisations
    Compatibility issues with newer devices/appsImproved device and software compatibility
    • Advice:
      • Enable automatic firmware and software updates where possible.
      • Regularly review release notes to understand what’s changed.
      • Always back up your data before applying major updates.
      • Schedule routine checks for firmware across all connected devices.

    Quick Summary Checklist

    • Select NAS-specific and compatible drives
    • Accurately estimate and plan for future storage requirements
    • Upgrade and optimise your home network infrastructure
    • Prioritise security measures and regular backups
    • Keep firmware and software updated regularly

    Frequently Asked Questions (FAQ)

    • What NAS brand should beginners choose?
      Synology and QNAP are user-friendly and highly recommended for beginners due to their intuitive interfaces and reliable hardware.
    • Is RAID necessary for a beginner NAS setup?
      While not strictly necessary, RAID is strongly recommended to protect against drive failures and data loss.
    • How often should I backup my NAS data?
      Weekly backups are a good standard, though important data might require daily backups.

    Conclusion

    By proactively avoiding these common beginner mistakes, you’ll ensure your NAS system is reliable, secure, and meets your long-term needs. Are you ready to take the next step?

    • Explore More: Check out our comprehensive guides to further your understanding and optimise your NAS setup.
    • Stay Updated: Subscribe to our newsletter for the latest tips, guides, and updates in home networking and NAS technologies.
    • Share Your Experience: We’d love to hear your NAS setup experiences or questions in the comments below—your insights help our community grow!

    Ready to dive deeper? Explore our additional beginner-friendly guides:

    💬 Have you made any of these NAS mistakes?
    Whether you’re just getting started or refining your setup, I’d love to hear from you. Share your experience in the comments — or let me know what you’d like to see covered next!