Tag: ONVIF

  • How to Store Security Camera Footage at Home using NAS or NVR

    How to Store Security Camera Footage at Home using NAS or NVR

    Security camera systems have become more capable, flexible, and open over the last decade. One of the most significant developments is the shift from closed cloud storage ecosystems to open, standards based recording.

    A Network Attached Storage (NAS) system can serve as a robust central recording point, provided the cameras support open protocols and the NAS is configured to accept, index, and store those recordings properly. When designed correctly, a NAS based workflow offers long term retention, predictable performance, and complete ownership of your data.

    Note: For practical insight into how a modern NAS behaves under these workloads, read my post on UGREEN NASync DXP2800 Review 2 Months Later. For background on why network storage is valuable in the first place, my guide on NAS Network Storage and Why You Need It provides a useful introduction.


    Understanding the NAS Recording Workflow

    A NAS does not record video by itself. It has no built in awareness of surveillance workflows unless specific software is installed. The NAS becomes a recording engine only when three conditions are met.

    1. The camera must send data using an open standard.
    2. The network must provide stable addressing and sufficient sustained throughput.
    3. The NAS must run a service that can receive, process, and index the incoming streams.

    Regardless of the vendor, the workflow operates in stages. The camera encodes the video. The data is transmitted via RTSP or file transfer. The NAS writes it to storage. Retention rules then determine when that data is deleted. While simple on paper, the technical details behind each stage determine reliability.


    Camera Protocols: The Language of Recording

    Marketing descriptions often promise local recording, but this can sometimes refer to SD cards rather than network storage. The technical specification sheet is your authoritative source. A NAS can only record from cameras that support the following open protocols.

    • RTSP (Real Time Streaming Protocol): This is the industry standard for continuous recording. The camera provides a persistent video URL that the NAS connects to. RTSP connections are long lived and highly sensitive to network interruptions.
    • ONVIF Profile S: This protocol allows cameras and recorders to communicate in a standard way. Cameras supporting ONVIF usually expose an RTSP stream and allow the NAS to discover and configure the device automatically. It guarantees a baseline of interoperability.
    • FTP (File Transfer Protocol): Event driven cameras often use this. When motion occurs, the camera creates a specific file and uploads it to a folder on the NAS. This is not suitable for continuous recording, as it would generate thousands of fragmented files per hour.
    • SMB or NFS: Similar to FTP, the camera writes directly to a shared folder. The NAS is unaware that recording is happening. It simply sees files being written.

    The bottom line: If a camera relies on a proprietary cloud app and does not support RTSP, ONVIF, or FTP, it cannot be integrated into a NAS workflow.

    A modern digital illustration showing how a security camera sends video through a home network to different storage systems, with glowing network lines, a router, and cloud backup icons.
    How a security camera sends footage through the home network to different storage options.

    How the NAS Processes Video

    Once the camera is connected, the NAS performs several key tasks that determine recording quality.

    • Stream negotiation: For RTSP workflows, the NAS initiates the session. Data is sent over UDP (efficient but sensitive to interference) or TCP (more resilient to packet loss but higher latency).
    • Indexing versus raw storage: Advanced surveillance software, such as Synology Surveillance Station or Frigate, creates a database index which allows timeline scrubbing and smart playback. Simpler setups just dump raw files, which are easier to back up but harder to review manually.
    • Retention enforcement: Surveillance datasets grow rapidly. The NAS must frequently scan and delete old footage to prevent volume exhaustion. This logic must run efficiently to avoid bogging down the system.

    Encoding Formats: H.264 versus H.265

    The codec you choose determines storage requirements and CPU load.

    • H.264: The most compatible standard. It uses more storage space than newer codecs but requires relatively little processing power to decode and view.
    • H.265 (HEVC): Highly efficient. It can reduce storage needs significantly for the same visual quality, but it requires more processing power to view and is less compatible with older browser based players.

    Bitrate behaviour: You must also choose between Variable Bitrate (VBR) and Constant Bitrate (CBR).

    • VBR saves space by lowering quality during static scenes, but storage usage will fluctuate depending on activity.
    • CBR ensures predictable storage consumption but may sacrifice image quality during high motion scenes.

    Storage Hardware: Why Desktop Drives Fail

    Security camera workloads are unique. Continuous recording generates a constant write workload. Event based recording creates sudden, uneven bursts.

    • HDD: Drives specifically tuned for surveillance or NAS use are strongly recommended. Consumer desktop drives are not designed for twenty four seven write cycles and may suffer rapid mechanical failure or performance degradation.
    • SSD: Solid state drives offer excellent speed, but continuous video recording consumes their write endurance quickly. Only enterprise grade or high endurance NAS SSDs should be used for surveillance.

    Deep dive: For a detailed analysis of suitable storage, read my post on Choosing the Best Drives for Your NAS Setup.

    A side-by-side comparison of PC, NAS, and surveillance hard drives, showing which storage type is suitable for continuous recording and always-on workloads.

    Networking: The Silent Killer of Reliability

    Network quality is the most overlooked factor in surveillance. A fast speed test does not guarantee a stable surveillance network. These are the technical realities that matter.

    1. Stable addressing: RTSP streams rely on fixed IP addresses. If the router assigns a new IP to the camera, recording breaks. Static IPs or DHCP reservations are essential for cameras and the NAS.
    2. Session persistence: Mesh Wi Fi systems often steer devices between nodes. This handover causes a micro outage, which can create corrupted frames or dropped connections in recordings. Cameras should ideally be associated with a single access point.
    3. Airtime congestion: Wi Fi cameras share airtime with every other device on the channel. Even with a strong signal, a congested channel will cause upload failures and inconsistent performance.
    4. Upload saturation: Many home internet connections have limited upload bandwidth. If multiple cameras trigger at once or if you back up footage to the cloud, you can saturate the uplink and cause dropped frames or failed transfers.

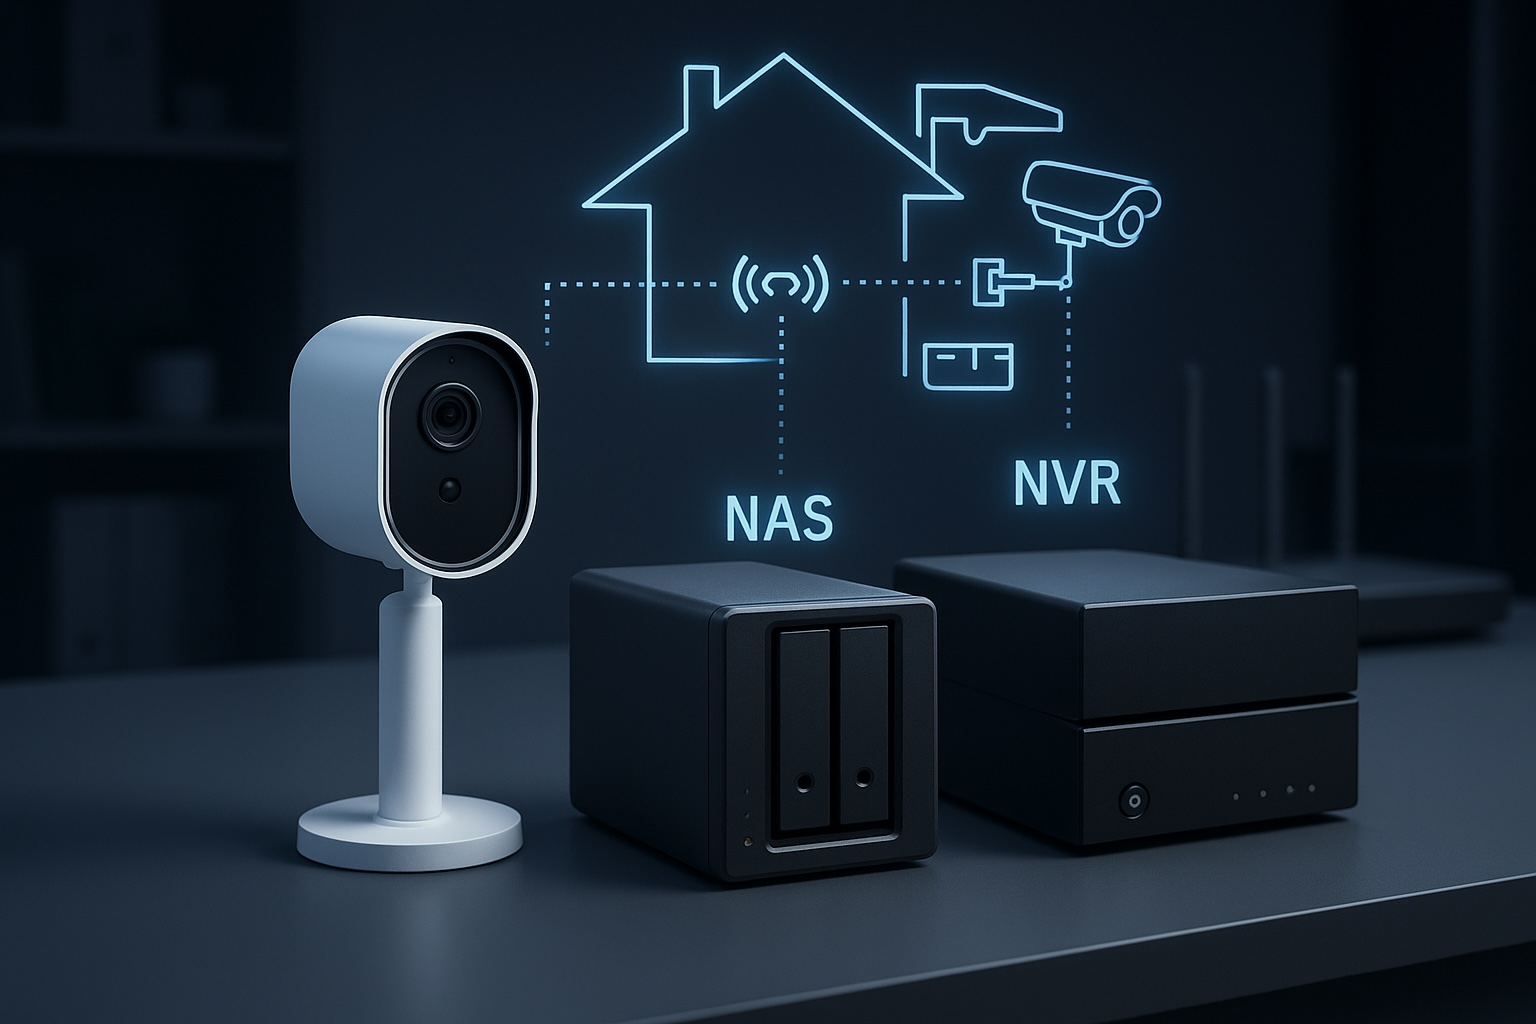
    NAS versus NVR: Which Architecture is Right?

    • NVR (Network Video Recorder): A purpose built appliance dedicated to recording. It is straightforward and reliable but focused almost entirely on video.
    • NAS (Network Attached Storage): A general purpose server. It offers flexible retention, open file formats, and the ability to run other applications such as media servers, home automation and backup tools alongside surveillance workloads.

    If you want a dedicated appliance that requires very little ongoing thought, an NVR is usually the better choice. If you want a central hub for data, applications, and cameras, a NAS workflow provides more flexibility and control.


    Conclusion

    A NAS becomes a powerful surveillance tool when the workflow is respected end to end. Cameras must use open standards such as RTSP or ONVIF. The network must provide stable addressing and consistent performance rather than just impressive speed test results. Storage must be chosen for endurance as well as capacity. Surveillance software must be configured to handle streams, indexing and retention without overwhelming the hardware.

    This workflow centric view removes guesswork. By focusing on these technical realities, it becomes possible to build a system that delivers consistent results for years rather than months.

    Next steps:

  • How I’m Choosing the Right PoE Security Camera for My NAS in 2025

    In my last post, I explored several great security cameras compatible with NAS setups—particularly Reolink’s models, known for solid RTSP and ONVIF support. Since then, I’ve been digging deeper into my camera choices, evaluating specific brands, features, and compatibility.

    I haven’t pulled the trigger just yet, but since many of you are probably going through a similar selection process, I thought I’d share exactly what’s guiding my decision-making.

    Some of the links in this post are affiliate links. If you buy something through them, I may earn a small commission — it doesn’t cost you anything extra, and it helps support the site.


    My Current Home Setup

    Here’s a quick overview of what I have today:

    • NAS: UGREEN NASync DXP2800 (2-bay NAS, RAID1, NVMe SSDs)
    • Software: Docker with Home Assistant, Pi-hole, and several self-hosted apps
    • Existing Cameras: Two SwitchBot outdoor cameras (USB-powered, each with built-in 10,000mAh battery backup)
    • Camera locations:
      • Front door camera: Covers people approaching the house
      • Driveway camera: Covers the front area of my home, including mailbox, car, and motorcycle
    • Cabling: USB cables (8–10 metres each), neatly routed through trunking to keep everything tidy
    • Storage: Local recording to NAS only—avoiding cloud storage for privacy reasons

    Reflecting on My Current Setup

    My current USB-powered SwitchBot outdoor cameras have a real advantage with built-in batteries, ensuring they keep working even during a power outage. This provides peace of mind, knowing I’ll maintain video coverage in emergencies.

    However, despite neatly routed cables through trunking, the setup isn’t ideal. The main issue is cable length: each USB cable runs approximately 8–10 metres, which is right at the top end of USB power delivery limits. Although significant reliability issues rarely occur, the long cables occasionally result in slow charging times for the cameras, especially at the front door due to higher usage.

    The biggest frustration with my current setup is motion detection. Even though the SwitchBot cameras claim human-only detection, they regularly produce false positives, especially at night due to dust, spider webs, and minor movements. This issue significantly impacts the usefulness and reliability of my security system.


    Why Upgrading to PoE Makes Sense

    Switching to Power over Ethernet (PoE) cameras addresses these reliability issues. Each camera will still have its own cable, just like my USB setup—but the critical advantage of PoE is combining power and stable high-speed data over a single Ethernet cable. Ethernet comfortably supports cable lengths up to 100 metres without voltage drops or data issues, easily covering the longest cable runs around any typical home. Commonly recommended PoE switches include models from TP-Link, Netgear, and Ubiquiti, which are known for reliability, ease of use, and good compatibility with a wide range of PoE cameras.

    Additionally, a centralised PoE switch simplifies management, improving scalability and overall system stability. When combined with smart NAS integration and better software support, this represents a big upgrade over USB-powered Wi-Fi cameras.

    If you’re in an apartment or smaller home, these benefits still apply—especially if you’re dealing with weak Wi-Fi signals or want something more reliable without relying on battery charging cycles. Even one or two well-placed PoE cameras can provide significantly better results with less hassle long term.


    Key Features I’m Prioritising

    These are the most important factors influencing my camera choice:

    1. PoE Support

    PoE delivers both power and reliable high-speed data over Ethernet cable runs up to 100 metres without signal or voltage drop. Perfect for my home, even at longer distances.

    2. RTSP and ONVIF Compatibility

    Essential for smooth integration with my NAS and smart home software like Home Assistant or Frigate, offering flexible, powerful video management.

    3. Superior Infrared (IR) Night Vision

    I’m specifically looking for strong infrared performance for my outdoor cameras. Colour night vision typically requires additional lighting—which I’d prefer to avoid to respect my neighbours’ privacy and comfort. IR performance stronger than my current SwitchBot cameras is a must.

    4. Effective AI-Based Motion Detection

    My current SwitchBot cameras claim human detection, but the reality is frequent false alarms—like spiders or dust particles triggering motion alerts multiple times per night. Reliable AI-powered detection, specifically tuned to distinguish humans, vehicles, and important events—is a big priority to reduce false positives.

    5. Local Availability (Japan)

    Being based in Japan, I prefer to purchase locally to avoid hassles with returns, warranty issues, and shipping. Accessibility and local support matter to me, so I typically check well-known local retailers like Amazon Japan, Rakuten, or Yodobashi Camera. However, these cameras are widely available internationally through major online stores as well.
    Being based in Japan, I prefer to purchase locally to avoid hassles with returns, warranty issues, and shipping. Accessibility and local support matter to me.


    Cameras I’m Considering Right Now

    Below are the four cameras currently on my shortlist. I’ve included a deeper look at each one to help others who may be weighing similar options.

    Reolink RLC-810A

    • Price Range: $55–$80
    • Resolution: 4K Ultra HD
    • Smart Detection: Built-in human and vehicle detection
    • NAS Compatibility: RTSP and ONVIF supported, works well with most NVR and NAS setups
    • Pros: Excellent value for money, strong community support, widely available, simple setup
    • Cons: Detection performance may vary depending on whether you’re using a Reolink NVR or third-party NAS software
    • Use Case Fit: This is my leading candidate. It offers a great mix of reliability, smart detection, and direct NAS recording. It’s also widely supported in Japan and abroad. Reolink also offers several dome-style cameras if I decide to go with that format for front door coverage.
    • Visual Placement: Best suited for covering driveways or home fronts with a clear line of sight.
    Reolink RLC-810A PoE security camera with 4K resolution, ideal for NAS recording and driveway surveillance.

    TP-Link VIGI C340 / C540

    • Price Range: $70–$110
    • Resolution: Up to 4K depending on model
    • Smart Detection: Person and vehicle detection (varies by model)
    • NAS Compatibility: RTSP stream supported for use with NVRs and NAS systems
    • Pros: Solid specs at an affordable price, increasingly available, backed by TP-Link’s reputation
    • Cons: Ecosystem still maturing, some models lack smart detection entirely
    • Use Case Fit: A strong alternative to Reolink, particularly if pricing or availability is more favourable at time of purchase.
    • Visual Placement: Great for perimeter coverage or front yard monitoring.
    TP-Link VIGI C340 PoE security camera with up to 4K resolution and smart detection features.

    UniFi G4 Bullet

    • Price Range: $180–$250
    • Resolution: 4MP (1440p)
    • Smart Detection: Advanced analytics via UniFi Protect (not all features available with RTSP)
    • NAS Compatibility: Partial – RTSP available but full functionality requires UniFi Protect NVR
    • Pros: Premium build, clean design, exceptional image quality, long-term support
    • Cons: Expensive, best used with UniFi ecosystem, availability limited in some regions
    • Use Case Fit: A future-proof, high-end option if I decide to go all-in on UniFi. Less likely as a mixed system.
    • Visual Placement: High-visibility areas or integrated with UniFi-managed homes.
    UniFi G4 Bullet 4MP PoE camera with premium metal housing and support for UniFi Protect analytics.

    Eufy E40 PoE

    Visual Placement: Ideal for wall or eave mounting at entry points like front doors or side paths where human movement is the key concern.

    Price Range: $100–$150

    Resolution: 2K (2560 x 1440)

    Smart Detection: AI-powered person detection built into the camera

    NAS Compatibility: Supports RTSP for local recording to NAS systems (including Synology, QNAP, and others)

    Pros: No monthly subscription, excellent privacy stance, clean design, local AI with good accuracy

    Cons: No vehicle or pet detection, limited to person-only alerts, ecosystem not as mature as Reolink or UniFi

    Use Case Fit: A promising option for users who want strong privacy and basic AI detection without relying on cloud storage or ongoing fees. If you’re looking for a simple, effective PoE solution that integrates with your NAS and covers standard entryways or paths, this is worth considering.

    Eufy E40 PoE 2K security camera with built-in AI person detection and RTSP support for NAS integration.

    Prefer a complete system that works out of the box? If you’re looking for a plug-and-play PoE setup with local recording, Eufy’s NVR system offers a solid alternative. It includes four wired cameras, a 2TB drive, and AI person detection—perfect if you want to skip piecing together individual components.

    Next Steps

    With my honeymoon coming up soon, I’m holding off on any major purchases for now. I expect to make a final decision and start testing by the end of the year.

    My current plan is to start with one Reolink RLC-810A camera, testing its integration, reliability, and feature set in my home environment. If it performs well, I’ll likely stick with Reolink for consistency across the system. That said, I’m still considering using a dome-style camera above the front door, as the ceiling above it could benefit from a wider field of view for better coverage.

    Once the system is fully set up, I’ll publish a detailed guide covering:

    • Direct NAS recording setup (using RTSP/ONVIF)
    • Optimising motion detection and AI analytics for fewer false alerts
    • Secure remote access without risking my network

    If you’ve already made a similar upgrade—or you’re using PoE cameras in a similar NAS-based setup—I’d love to hear about your experiences, good or bad. Drop a comment below or use the contact form to get in touch.


    Related Posts You Might Like:

    Looking forward to sharing more once I start testing!