Tag: smart home

  • How to Design a Reliable Smart Home (Using Datacenter Principles)

    How to Design a Reliable Smart Home (Using Datacenter Principles)

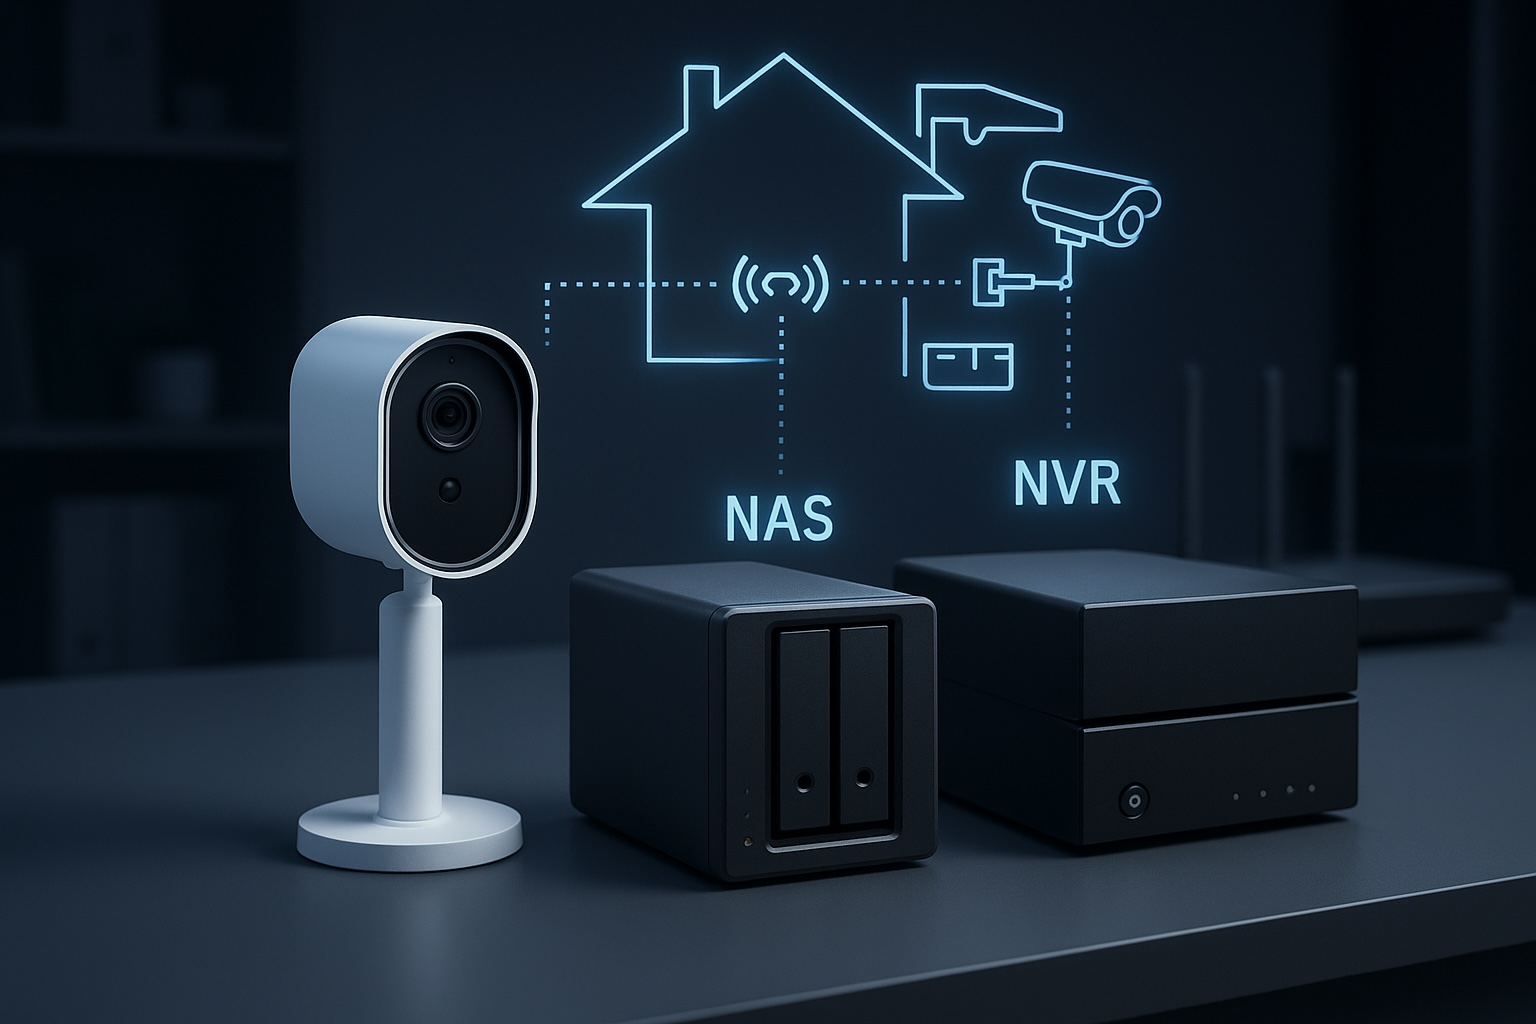
    Most people do not think about infrastructure when building a smart home.

    They buy a few smart bulbs, maybe a camera or two, add a smart speaker, and slowly build up automation over time. Everything works well enough until the day something goes wrong.

    The internet drops. The router crashes. A power outage hits.

    Suddenly the entire smart home stops being smart.

    After working in datacenters for years, I cannot help noticing the difference between how systems are designed at work compared to how most homes are set up. In a datacenter, failure is not a surprise. It is expected. Systems are designed with that in mind from day one.

    At home, the opposite is usually true. Devices are added one by one with very little thought about what happens if something breaks.

    The interesting thing is that you do not need enterprise hardware or complicated setups to borrow some of those design principles. A few small decisions can make a home setup far more reliable.

    Typical smart home vs infrastructure focused smart home network diagram
    A typical smart home often relies on a single router, creating a single point of failure. Adding infrastructure like UPS protection, segmentation, and local automation improves reliability significantly.

    Design With Failure in Mind

    One of the biggest mindset differences between home setups and datacenters is the assumption that things will fail.

    Hard drives fail. Networks crash. Power goes out.

    In a professional environment the question is rarely if something will fail. The real question is what happens when it does. Disks fail, switches reboot, firmware bugs appear, and power drops unexpectedly. Systems are designed so that these events do not bring everything down at once.

    Most homes are not built this way. There is usually a single router handling WiFi, internet access, and often the entire smart home platform. If that device stops working, everything connected to it stops too.

    I experienced this myself early on when my network dropped and suddenly Alexa became completely unresponsive. At the time, almost everything in the house relied on voice control. Without the network, nothing worked.

    There are plenty of other small failures that can cause the same frustration. A router firmware update might reboot unexpectedly. An ISP outage can disconnect cloud services. A failing disk in a NAS can degrade performance long before it completely dies.

    It was a good reminder that smart homes are only as reliable as the infrastructure behind them.

    Since then I have tried to make sure that if something fails, it does not take the entire house down with it.

    Smart home infrastructure stack showing power, network, platform, device and automation layers
    A reliable smart home works like an infrastructure stack. Power and networking support the platforms, devices, and automations above them.

    Protect the Power First

    In a datacenter, power protection is taken extremely seriously. Sudden power loss can damage systems, corrupt data, or bring down services unexpectedly.

    At home, most people plug everything directly into the wall and hope for the best.

    One of the first things I recommend for anyone running a NAS, router, or home server is a UPS (uninterruptible power supply).

    A UPS does two very simple but important things.

    First, it protects equipment from sudden power loss. This prevents things like NAS corruption when drives are actively writing data.

    Second, it gives systems enough time to shut down safely during longer outages.

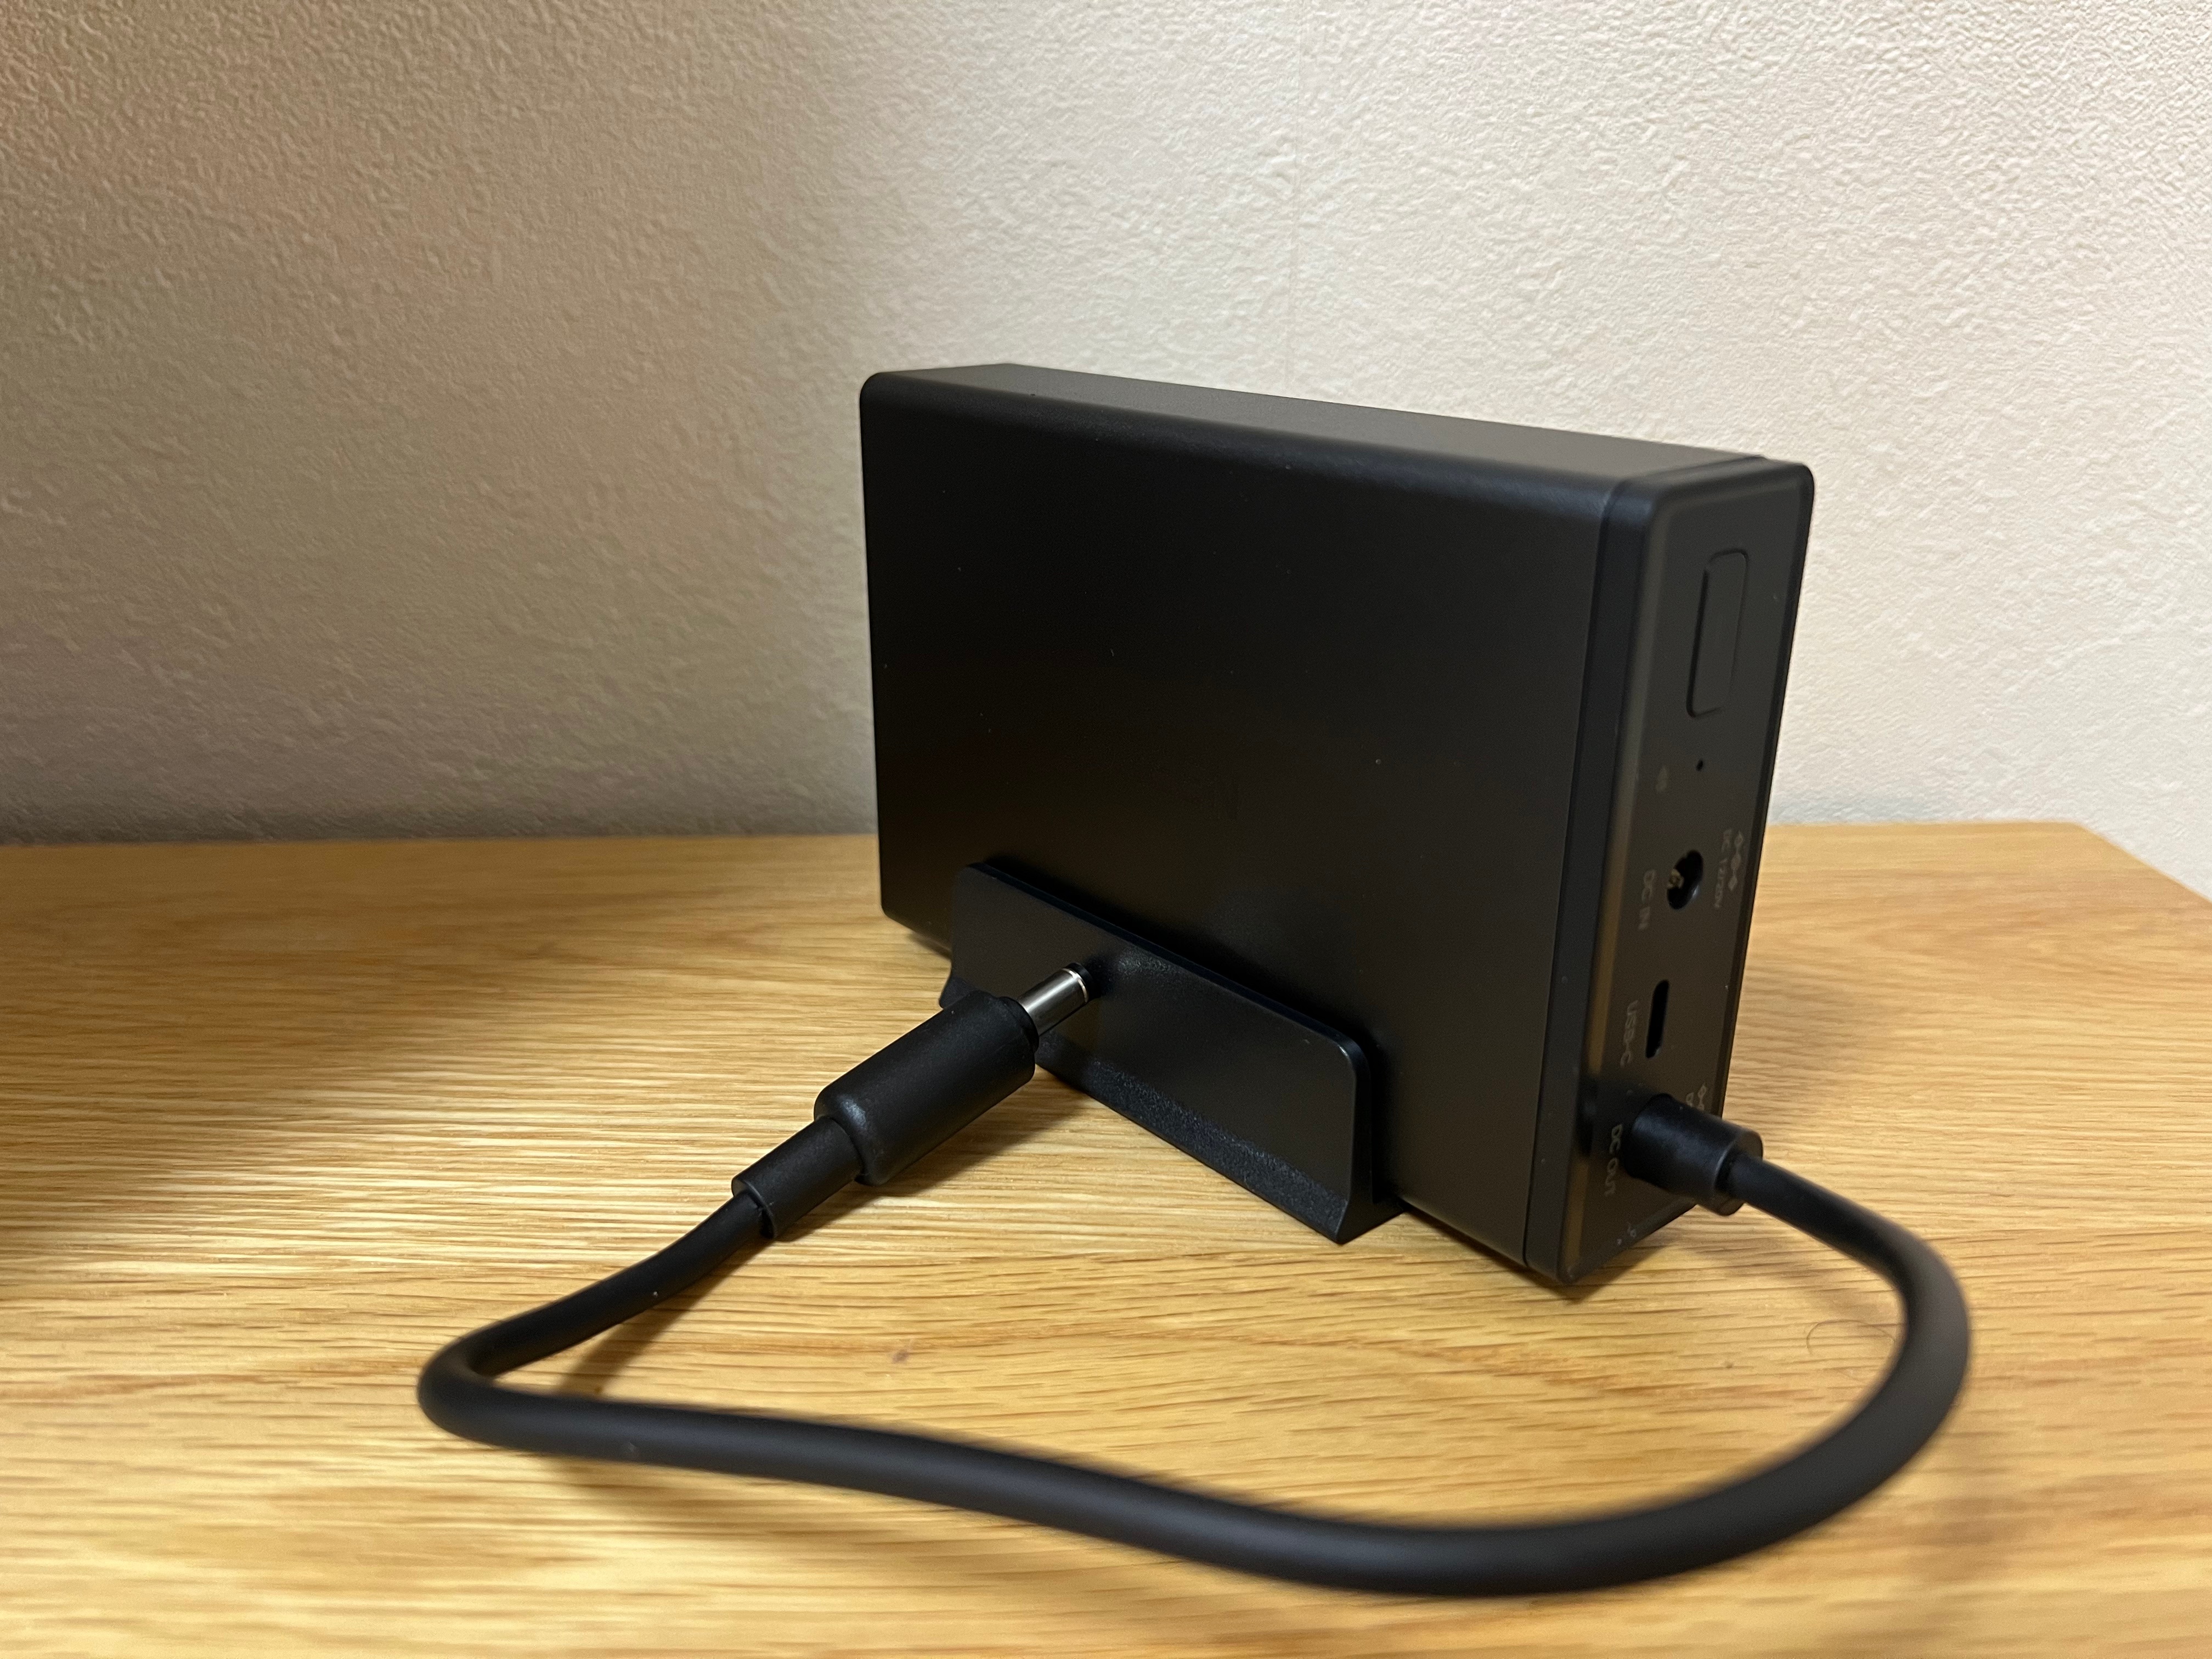
    In my own setup, the UPS is dedicated to the NAS itself. It is a NAS-specific unit designed to protect the system during outages, allowing it to shut down gracefully rather than losing power abruptly. That has already proven useful in practice. During power cuts, the UPS has kept the NAS running long enough to shut down properly, and when power returns, the NAS powers back up without drama.

    My router is not currently backed up in the same way. If I needed temporary network power during an outage, I do at least have an EcoFlow River Pro 2 available as a fallback, but that is a more manual solution rather than something permanently integrated into the setup.

    If you are curious about the specific unit I use, I covered it in detail in my review of the UGREEN US3000 NAS UPS:

    UGREEN US3000 NAS UPS review

    I also wrote a broader overview of different backup power approaches for smart homes here:

    Smart home power backup solutions

    Backups Should Not Live in the Same House

    Another lesson from working with infrastructure is that backups only matter if they survive disasters.

    A lot of people buy a NAS thinking they are now fully protected. In reality, a NAS alone is not a backup strategy.

    If the NAS fails, gets stolen, or the house experiences fire or flood damage, the data disappears along with it.

    This is why many professional environments follow the 3-2-1 backup rule:

    • 3 copies of your data
    • stored on 2 different types of media
    • with at least 1 copy stored off site

    At home the same logic applies.

    If you are running a NAS at home, this becomes even more important. I run my own storage on a UGREEN NASync system, which I reviewed after two months of real-world use:

    UGREEN NASync DXP2800 review after two months

    In my case I automate off site backups using rclone to send encrypted backups to cloud storage on Azure:

    Automated NAS backups with rclone

    In my case I run backups from my NAS to an external location so that important data exists in more than one physical place. Even if something catastrophic happened to the house, the data would still exist elsewhere.

    Network Segmentation Without Overcomplicating Things

    In datacenters, networks are carefully segmented so different systems do not interfere with each other.

    Most homes run everything on a single flat network.

    Phones, laptops, cameras, smart plugs, TVs, and automation devices are all mixed together. For many homes this works fine, but as the number of devices grows it can start to cause problems.

    One approach borrowed from professional infrastructure is network segmentation. This separates certain devices from the rest of the network so they operate in their own space.

    The good news is that modern routers have started making this easier.

    For example, my current router, the TP-Link Deco BE85, includes a dedicated IoT network designed specifically for smart home devices.

    I covered the router itself in more detail in my full review here:

    TP-Link Deco BE85 review

    Modern routers are also beginning to support newer local first smart home standards. The Deco BE85 can act as a Thread Border Router, allowing Thread based devices to communicate locally without relying on cloud services.

    This fits well with the broader idea of building a resilient smart home infrastructure. If the internet connection drops, devices that communicate locally can continue working rather than becoming completely unresponsive. This allows things like cameras, smart plugs, and sensors to live on their own network while the main network handles laptops, phones, and other personal devices.

    This provides some of the benefits of network segmentation without needing to manually configure VLANs or advanced networking features.

    Monitoring Matters More Than You Think

    In professional infrastructure environments, systems are constantly monitored.

    Disk health is checked. Power status is monitored. Alerts are triggered when something starts to fail.

    At home, problems are often discovered only after something stops working.

    Many NAS systems already include built in monitoring tools that track things like SMART disk data, temperatures, and system health. These systems can send alerts if a drive begins reporting errors or if something starts behaving unexpectedly.

    Catching a failing disk early is far less stressful than discovering the problem after the array degrades or fails.

    Even simple notifications can prevent major data loss.

    Cloud Dependence Is a Hidden Weak Point

    Smart homes often rely heavily on cloud services.

    Voice assistants, device integrations, and automation platforms frequently depend on an active internet connection to function. When the internet goes down, the entire system can suddenly stop responding.

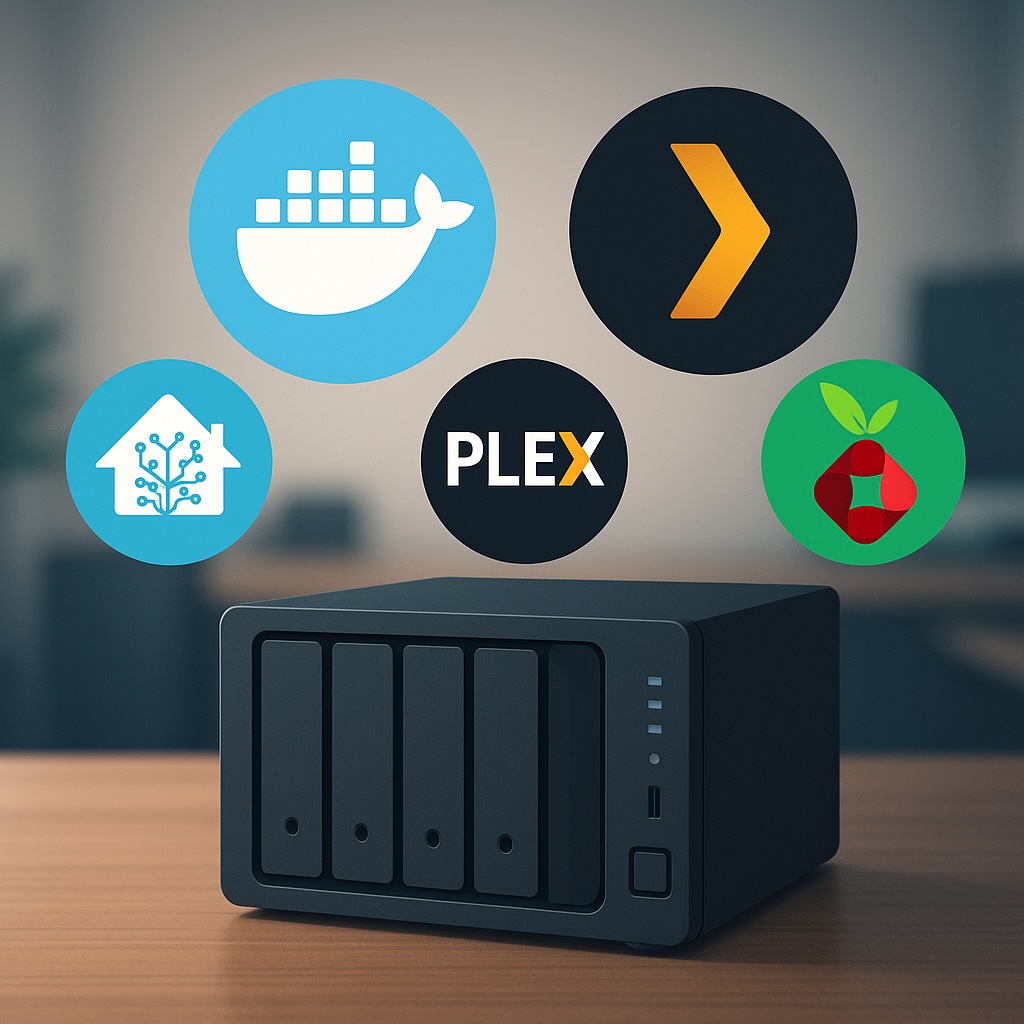
    Since then I have tried to favour systems that can run locally where possible. Platforms like Home Assistant allow smart home devices to continue working even if the internet connection drops.

    I run Home Assistant directly on my NAS, and documented the setup here if you are interested in building a similar local first automation system:

    Installing Home Assistant on a UGREEN NAS

    This reduces reliance on external services and keeps automations functioning even during outages.

    A Simple Smart Home Reliability Checklist

    If you want a quick starting point, a few small decisions can make a surprisingly big difference.

    • Reliable router and stable home network
    • UPS protecting network equipment and NAS
    • Automatic NAS backups
    • Off site backup copy
    • Local automation where possible

    None of these require enterprise hardware, but together they dramatically improve reliability.

    You Do Not Need a Datacenter in Your House

    All of this might sound like over engineering, but the goal is not to turn a home into a miniature datacenter.

    The real takeaway is simply thinking about reliability earlier.

    A reliable router.

    A UPS protecting important devices.

    A backup strategy that survives disasters.

    Those three things alone already make a smart home far more resilient than most.

    Final Thoughts

    Working in datacenters has probably made me overly cautious about infrastructure. When you spend your days thinking about redundancy, monitoring, and failure scenarios, it is hard not to apply that thinking at home as well.

    The funny thing is that once you start thinking this way, it becomes difficult not to apply it everywhere. You start asking small questions most people never consider.

    What happens if the router dies?

    What happens if the internet drops?

    What happens if a drive fails overnight?

    Those questions are exactly what keep datacenters running smoothly. And surprisingly, they work just as well in a normal home.

    The good news is that building a reliable smart home does not require enterprise budgets or complicated setups.

    It mostly comes down to a few sensible design choices and remembering one simple principle.

    Things will eventually break. Planning for that ahead of time makes everything else work far more smoothly.

  • How I Actually Use a NAS Day to Day After the Setup Phase

    How I Actually Use a NAS Day to Day After the Setup Phase

    When people talk about NAS devices online, it usually falls into two extremes. Either everything is a shiny demo during the first week, or it turns into an over engineered home lab that barely resembles normal use.

    Both miss what actually matters long term.

    This post is about what ownership looks like after the excitement fades. When the NAS stops being a project and starts being part of daily life. What still runs, what quietly disappeared, and which decisions ended up saving time rather than creating more work.

    If you are trying to decide whether a NAS makes sense beyond the initial setup phase, this is the part that usually gets skipped.


    What runs 24 hours a day

    These are the services that stay on permanently because they deliver value without demanding attention.

    Automated backups (local first, cloud as insurance)

    Local backups are the foundation of my setup. Both my MacBook and my wife’s MacBook back up automatically to the NAS, and our iPhone photo libraries are included as well. Once configured, this becomes invisible. Devices back up when they are on the network, and there is nothing to remember or trigger manually.

    On top of that, I use Azure Blob Storage as an off site insurance layer, not as a requirement and not as something I would tell everyone to do.

    If you are running a four bay NAS with RAID and your data lives entirely at home, an off site backup is a nice to have rather than a must have. Local redundancy already covers most everyday failures. The cloud layer exists to protect against unlikely but high impact events such as theft, fire, or total hardware loss.

    In my case, I am storing roughly 3TB in the Cool tier with RA GRS enabled, meaning the data is replicated across regions. This currently costs around $65 to $70 per month, and the cost is dominated by geo replication, cool tier storage, and write operations.

    I have not had to restore from this backup yet, which is exactly how I want it to be. It exists purely for peace of mind rather than day to day recovery.

    The backups are handled using rclone, which gives me full control over scheduling, encryption, bandwidth usage, and retention policies. It also avoids vendor lock in. If I ever decide to move away from Azure, the tooling stays the same. I have a full breakdown of how this is set up in my rclone backup guide.


    Core Docker services

    A small number of Docker containers run continuously because they support everything else I rely on.

    Home Assistant is always running. It handles automations, device integrations, and state tracking quietly in the background. I rarely interact with it directly day to day, which is exactly the point. When automations are reliable, they disappear from your attention entirely.

    This pattern repeats across the setup. Anything that needs constant monitoring or manual intervention does not survive long term.


    What runs occasionally

    These are tasks that exist to maintain confidence in the system rather than provide convenience.

    Maintenance and administration

    I do not actively manage the NAS day to day, but I do check in periodically.

    This usually means:

    • Updating Docker containers when meaningful updates are released
    • Applying NAS firmware updates
    • Reviewing SMART data and disk health
    • Confirming backups are still completing as expected

    This happens infrequently, often weeks apart. The goal is not optimisation or performance tuning. It is reassurance. I want to know the system is still healthy and behaving as expected.

    Manual actions

    Some things are intentionally kept manual.

    I occasionally restore files from backups to confirm that restores actually work. This is not something I do often, but it matters. A backup that has never been tested is only theoretical protection.

    Container updates are another example. While critical updates are automated, some applications require manual updates or restarts. I prefer this balance. Automation handles the boring and predictable parts, while I stay in control of anything that could cause disruption.

    These interactions are rare, but deliberate. Over time, they build trust in the system rather than add ongoing work.


    What I am actively planning to add

    This is where the role of the NAS will expand beyond storage and background services.

    PoE security cameras

    I am preparing to move away from battery powered cameras and into a PoE based setup once UGREEN’s native cameras are available.

    At the moment, I use SwitchBot outdoor cameras. They are genuinely good cameras, but battery management is a constant friction point. I have already run USB power to some of them, and in one location that cable is far from ideal. It works, but it is not how I want fixed infrastructure to be installed.

    The plan is to introduce a dedicated PoE switch and run Ethernet to each camera location. CAT5e, CAT6, and even CAT7 will all work for PoE cameras. In practice, CAT6 offers a good balance of reliability, shielding, and future flexibility without chasing specifications that add little real world benefit. The priority here is consistency rather than speed.

    The appeal of the upcoming UGREEN cameras is not just PoE. Features like local AI processing, tight NAS integration, and removing subscription dependencies are exactly what I want. I have already covered those features in detail in my UGREEN SynCare AI Home Security NAS post.

    Once deployed, the NAS shifts from being storage and services into proper local surveillance infrastructure, with recordings kept on site and fully under my control.


    What I use it for beyond storage

    A family recipe web app

    One use case I did not originally plan for is hosting small, purpose built applications.

    I am currently building a simple web app to store and manage family recipes. Rather than paying for another subscription or relying on third party apps, it runs locally in Docker and does exactly what we need. No ads, no accounts, and no recurring costs.

    This is a good example of where a NAS quietly replaces paid services. The value is not complexity, but ownership and flexibility over time.

    Media streaming

    I originally used Plex for media streaming, but over time I moved to Jellyfin.

    Plex increasingly depends on user accounts, cloud services, and paid tiers. Pricing changes, features moving behind subscriptions, and past security incidents eventually made me uncomfortable with the direction of the platform.

    Jellyfin is fully self hosted. There is no account requirement, no cloud authentication, and no external dependency. Everything stays local. The trade off is less polish, but the benefit is full control.

    For my usage, that trade off is worth it. Media playback should not depend on an external service being online, a subscription remaining valid, or an account existing at all. Once everything is local, media becomes another background service rather than something that needs to be managed.


    Built in apps I still use

    While Docker handles most workloads, I do not avoid built in NAS features entirely.

    I actively use:

    • The UGREEN photo app for managing local photo libraries
    • The UGREEN UPS integration in the control panel for monitoring power events and safe shutdowns (US3000 UPS review)

    The difference is intent. I use built in apps where they add value and integrate tightly with the system, and Docker where flexibility matters more.


    What surprised me over time

    Stability changes how you think about performance

    I still care about performance, but I no longer obsess over it. The system has proven itself stable under real workloads, which means I spend less time watching metrics and more time trusting the platform.

    A NAS becomes background infrastructure

    Once configured properly, a NAS fades into the background. That is a good thing. It should feel closer to household infrastructure than a gadget you constantly interact with.

    Simplicity scales better than features

    The setups that lasted were the simple ones. Anything that added complexity without a clear benefit was eventually removed.


    Who this kind of setup is actually for

    This approach works well for people who want reliability first.

    If you enjoy constant tweaking, experimentation, and rebuilding, there is nothing wrong with that. Some people genuinely enjoy running a home lab as a hobby.

    For me, the NAS is not a hobby. It is infrastructure. I want it to work, recover gracefully when something goes wrong, and stay out of the way the rest of the time.


    When something goes wrong

    This is where the setup really earns its keep.

    Things do go wrong occasionally. Files get deleted by mistake. Power drops unexpectedly. A service stops behaving the way it should. The difference now is that these situations are no longer disruptive.

    If a file is deleted, it is a restore job, not a panic. If there is a power cut, the UPS handles shutdown cleanly and everything comes back up without intervention. If something looks off, I already know where to check and what a healthy system looks like.

    Even the worst case scenarios are planned for. Local backups cover day to day mistakes. Off site backups exist for events I hope never happen. Nothing relies on a single point of failure that would force me to scramble.

    That is the real outcome of this setup. Not that failures never happen, but that they stop being stressful when they do.


    Why this setup works long term

    Owning a NAS is not exciting long term, and that is exactly why it is worth having.

    Once the setup phase is over, it becomes dependable infrastructure. Files are protected locally, off site backups exist for worst case scenarios, automations run quietly, and services behave predictably.

    The goal was never to build the most complex setup possible. It was to build something that reduces friction over time.

    A setup like this saves more than money. It saves attention. Fewer batteries to charge, fewer subscriptions to track, fewer dashboards to check, and fewer decisions to revisit.

    That is the real value of a NAS once you stop treating it like a project and start treating it like infrastructure.

    If you’re thinking through a similar setup and want a second opinion, I’m always happy to talk it through!

  • How to Store Security Camera Footage at Home using NAS or NVR

    How to Store Security Camera Footage at Home using NAS or NVR

    Security camera systems have become more capable, flexible, and open over the last decade. One of the most significant developments is the shift from closed cloud storage ecosystems to open, standards based recording.

    A Network Attached Storage (NAS) system can serve as a robust central recording point, provided the cameras support open protocols and the NAS is configured to accept, index, and store those recordings properly. When designed correctly, a NAS based workflow offers long term retention, predictable performance, and complete ownership of your data.

    Note: For practical insight into how a modern NAS behaves under these workloads, read my post on UGREEN NASync DXP2800 Review 2 Months Later. For background on why network storage is valuable in the first place, my guide on NAS Network Storage and Why You Need It provides a useful introduction.


    Understanding the NAS Recording Workflow

    A NAS does not record video by itself. It has no built in awareness of surveillance workflows unless specific software is installed. The NAS becomes a recording engine only when three conditions are met.

    1. The camera must send data using an open standard.
    2. The network must provide stable addressing and sufficient sustained throughput.
    3. The NAS must run a service that can receive, process, and index the incoming streams.

    Regardless of the vendor, the workflow operates in stages. The camera encodes the video. The data is transmitted via RTSP or file transfer. The NAS writes it to storage. Retention rules then determine when that data is deleted. While simple on paper, the technical details behind each stage determine reliability.


    Camera Protocols: The Language of Recording

    Marketing descriptions often promise local recording, but this can sometimes refer to SD cards rather than network storage. The technical specification sheet is your authoritative source. A NAS can only record from cameras that support the following open protocols.

    • RTSP (Real Time Streaming Protocol): This is the industry standard for continuous recording. The camera provides a persistent video URL that the NAS connects to. RTSP connections are long lived and highly sensitive to network interruptions.
    • ONVIF Profile S: This protocol allows cameras and recorders to communicate in a standard way. Cameras supporting ONVIF usually expose an RTSP stream and allow the NAS to discover and configure the device automatically. It guarantees a baseline of interoperability.
    • FTP (File Transfer Protocol): Event driven cameras often use this. When motion occurs, the camera creates a specific file and uploads it to a folder on the NAS. This is not suitable for continuous recording, as it would generate thousands of fragmented files per hour.
    • SMB or NFS: Similar to FTP, the camera writes directly to a shared folder. The NAS is unaware that recording is happening. It simply sees files being written.

    The bottom line: If a camera relies on a proprietary cloud app and does not support RTSP, ONVIF, or FTP, it cannot be integrated into a NAS workflow.

    A modern digital illustration showing how a security camera sends video through a home network to different storage systems, with glowing network lines, a router, and cloud backup icons.
    How a security camera sends footage through the home network to different storage options.

    How the NAS Processes Video

    Once the camera is connected, the NAS performs several key tasks that determine recording quality.

    • Stream negotiation: For RTSP workflows, the NAS initiates the session. Data is sent over UDP (efficient but sensitive to interference) or TCP (more resilient to packet loss but higher latency).
    • Indexing versus raw storage: Advanced surveillance software, such as Synology Surveillance Station or Frigate, creates a database index which allows timeline scrubbing and smart playback. Simpler setups just dump raw files, which are easier to back up but harder to review manually.
    • Retention enforcement: Surveillance datasets grow rapidly. The NAS must frequently scan and delete old footage to prevent volume exhaustion. This logic must run efficiently to avoid bogging down the system.

    Encoding Formats: H.264 versus H.265

    The codec you choose determines storage requirements and CPU load.

    • H.264: The most compatible standard. It uses more storage space than newer codecs but requires relatively little processing power to decode and view.
    • H.265 (HEVC): Highly efficient. It can reduce storage needs significantly for the same visual quality, but it requires more processing power to view and is less compatible with older browser based players.

    Bitrate behaviour: You must also choose between Variable Bitrate (VBR) and Constant Bitrate (CBR).

    • VBR saves space by lowering quality during static scenes, but storage usage will fluctuate depending on activity.
    • CBR ensures predictable storage consumption but may sacrifice image quality during high motion scenes.

    Storage Hardware: Why Desktop Drives Fail

    Security camera workloads are unique. Continuous recording generates a constant write workload. Event based recording creates sudden, uneven bursts.

    • HDD: Drives specifically tuned for surveillance or NAS use are strongly recommended. Consumer desktop drives are not designed for twenty four seven write cycles and may suffer rapid mechanical failure or performance degradation.
    • SSD: Solid state drives offer excellent speed, but continuous video recording consumes their write endurance quickly. Only enterprise grade or high endurance NAS SSDs should be used for surveillance.

    Deep dive: For a detailed analysis of suitable storage, read my post on Choosing the Best Drives for Your NAS Setup.

    A side-by-side comparison of PC, NAS, and surveillance hard drives, showing which storage type is suitable for continuous recording and always-on workloads.

    Networking: The Silent Killer of Reliability

    Network quality is the most overlooked factor in surveillance. A fast speed test does not guarantee a stable surveillance network. These are the technical realities that matter.

    1. Stable addressing: RTSP streams rely on fixed IP addresses. If the router assigns a new IP to the camera, recording breaks. Static IPs or DHCP reservations are essential for cameras and the NAS.
    2. Session persistence: Mesh Wi Fi systems often steer devices between nodes. This handover causes a micro outage, which can create corrupted frames or dropped connections in recordings. Cameras should ideally be associated with a single access point.
    3. Airtime congestion: Wi Fi cameras share airtime with every other device on the channel. Even with a strong signal, a congested channel will cause upload failures and inconsistent performance.
    4. Upload saturation: Many home internet connections have limited upload bandwidth. If multiple cameras trigger at once or if you back up footage to the cloud, you can saturate the uplink and cause dropped frames or failed transfers.

    NAS versus NVR: Which Architecture is Right?

    • NVR (Network Video Recorder): A purpose built appliance dedicated to recording. It is straightforward and reliable but focused almost entirely on video.
    • NAS (Network Attached Storage): A general purpose server. It offers flexible retention, open file formats, and the ability to run other applications such as media servers, home automation and backup tools alongside surveillance workloads.

    If you want a dedicated appliance that requires very little ongoing thought, an NVR is usually the better choice. If you want a central hub for data, applications, and cameras, a NAS workflow provides more flexibility and control.


    Conclusion

    A NAS becomes a powerful surveillance tool when the workflow is respected end to end. Cameras must use open standards such as RTSP or ONVIF. The network must provide stable addressing and consistent performance rather than just impressive speed test results. Storage must be chosen for endurance as well as capacity. Surveillance software must be configured to handle streams, indexing and retention without overwhelming the hardware.

    This workflow centric view removes guesswork. By focusing on these technical realities, it becomes possible to build a system that delivers consistent results for years rather than months.

    Next steps:

  • UGREEN U3000 UPS First Look — Small but Mighty

    UGREEN U3000 UPS First Look — Small but Mighty

    The wait is finally over — my UGREEN U3000 UPS has arrived!

    Right out of the box, I was caught off guard by its size. It’s unbelievably compact — almost the same footprint as my UGREEN Magnetic Power Bank, which makes it feel more like a portable charger than a full UPS system.

    This little unit is designed specifically for UGREEN’s NASync lineup, offering 120W of DC backup power with zero-second transfer time. That means if the power cuts out, your NAS keeps running instantly with no delay.

    It’s a clean, modern take on backup power — no bulky fans, no heavy lead-acid batteries, and no cluttered cabling. Just a sleek matte black box that slots quietly beside your NAS.

    I’ve just got it set up with my UGREEN NASync DXP2800, and here’s a quick look at the hardware, the software integration, and why this might be one of the smartest little UPS units around.


    Unboxing & First Impressions

    UGREEN U3000 UPS packaging showing 120W DC backup design.
    Simple, clean packaging that sets the tone for UGREEN’s minimalist design approach

    The box presentation is classic UGREEN — understated and premium. Even before opening it, you get the sense that this is designed to fit neatly into a modern setup rather than dominate it.


    Compact Design

    UGREEN U3000 UPS on desk showing its compact matte finish.
    The matte finish and solid build make it feel far more premium than its size suggests.

    Once unboxed, the size difference really stands out. When placed next to my UGREEN Magnetic Power Bank, they’re nearly identical in dimensions. Seeing them side by side drives home just how compact this UPS truly is — it’s impressive that something this small can output 120W of continuous power.

    UGREEN U3000 UPS compared with UGREEN Magnetic Power Bank.
    Almost pocket-sized — the U3000 looks more like a power bank than a UPS.

    Ports & Connectivity

    Close-up of UGREEN U3000 UPS rear ports including DC IN, DC OUT, and USB-C
    Straightforward port layout — DC IN, DC OUT, and USB-C for monitoring.

    The rear layout is clean and functional, featuring DC input/output and a USB-C port for communication. It runs silently and uses passive cooling, which is a welcome change from traditional UPS fans humming in the background.


    Smart Integration

    PC control panel view of UGREEN US3000 UPS showing connection status, firmware version, and NUT options.
    The U3000 is recognised instantly through the NAS interface with full NUT support.

    Connecting the U3000 to the NAS was completely plug-and-play. It appeared right away under the UPS settings as UGREEN US3000, showing battery capacity, firmware version, and auto-shutdown options.

    The UPS also supports NUT (Network UPS Tools) — an open-source protocol that allows the NAS to detect power changes and automatically shut down safely if the battery runs low. It’s a small but important addition that makes the system much more reliable in real-world conditions.


    Next Steps

    Over the next few days, I’ll see how the U3000 performs under normal NAS workloads — how quickly it switches to battery, how stable it runs during short outages, and how the NUT integration behaves over extended use.

    If you are building out your NAS, check my guide Choosing the Best Drives for Your NAS Setup and my roundup NAS Compatible Security Cameras to see how it all fits together.

    Stay tuned — this compact little unit might be one of the best NAS accessories UGREEN has released so far.

  • What Tech Deals to Expect from Amazon’s October Sale (Based on Past Years)

    What Tech Deals to Expect from Amazon’s October Sale (Based on Past Years)

    Amazon’s next major tech sale is just around the corner — and while the exact deals are under wraps, we can get a pretty good idea of what to expect based on previous Prime Day, Spring Deal, and Big Deal Day events. Historically, October sales have been some of the best opportunities for pre-holiday tech savings, often rivaling or even surpassing July Prime Day discounts.

    If you’re eyeing PC upgrades, NAS gear, or smart home essentials, now’s the time to start planning. I’ll also be sharing my own upcoming PC upgrade plan next week, so you can see exactly how I’m approaching this year’s sale. I’ll be covering live deals when the sale kicks off, but for now, here’s what history tells us might return.


    Tech Categories to Watch

    These are categories that consistently appeared in past Prime Day and Spring sale coverage by outlets like WIRED, PCMag, TechRadar, and CNET.

    PC Hardware and Upgrades

    This is where October sales can be especially valuable. If you’re building or refreshing your setup, here’s what tends to drop:

    • CPUs: AMD’s Ryzen 7000 and 5000 series have both seen price cuts of 10–25% during Prime events. The October sales are often the time when slightly older but still very capable models fall to their lowest prices. Great if you want strong gaming performance without overspending.
    • Motherboards: ASUS, MSI, and Gigabyte boards across B550, X570, and B650 chipsets frequently get bundled with CPUs or discounted on their own. Expect mid-range boards to offer the best value, while high-end models usually see smaller but still meaningful discounts.
    • SSDs: NVMe drives like the WD SN850X, Samsung 980 Pro, and Crucial P5 Plus have been heavily featured. Last year, 2 TB Gen4 models often dipped below $100, making them excellent options for both PC builds and NAS cache drives.
    • Power Supplies: Prime sales regularly feature Corsair, ASUS, and be quiet! modular PSUs. These aren’t the most exciting parts to buy, but grabbing a Gold or Platinum-rated unit on discount is one of the smartest ways to future-proof your system.
    • Cooling and Cases: AIO liquid coolers and cases from brands like NZXT, Lian Li, and Cooler Master tend to show up. Sales are a good chance to pick up premium cooling or aesthetic cases without paying full launch prices.

    💡 Examples from 2024:

    • AMD Ryzen 7 5800X3D — $329 → $279 (October 2024)
    • WD Black SN850X 2TB NVMe SSD — $179 → $129 (July and October 2024)
    • Corsair RM850x PSU — $144 → $109 (October 2024)

    (As WIRED reported in their Prime Day 2025 tech coverage, SSDs and CPUs were among the most consistently featured deals, making them a safe bet to watch again.)

    Storage & NAS Gear

    TechRadar, Forbes, and WIRED consistently highlight storage as a hot category:

    • External SSDs & HDDs — Samsung T7, SanDisk Extreme, and Seagate Expansion drives were all featured
    • NAS Enclosures — Synology and UGREEN devices sometimes bundle with disks or get standalone price cuts
    • NVMe Cache Drives — Crucial, WD, and Kingston TLC SSDs often see discounts (ideal for NAS caching)

    🔐 Trend: Bundled storage (e.g. 2 TB SSD + enclosure) was common during past sales.

    💡 Examples from 2024:

    • Synology DS923+ NAS — $599 → $499 (October 2024)
    • SanDisk Extreme 2TB Portable SSD — $239 → $139 (July 2024)
    • Seagate 5TB Expansion Portable HDD — $129 → $89 (October 2024)

    (PCMag’s roundup of early October deals also pointed to portable SSDs and NAS storage as recurring highlights.)

    Smart Home & Networking

    Smart gear is one of Amazon’s core sale drivers. In the last few events:

    • Wi-Fi 6 and 6E Mesh Systems — TP-Link Deco and ASUS ZenWiFi were regulars
    • Smart Plugs, Lights & Sensors — Especially Matter-compatible or Alexa-integrated
    • Security Cameras — Reolink, Blink, and Tapo indoor/outdoor cams saw 20–40% off

    📡 Heads up: Prime-exclusive Alexa device bundles may return based on past Big Deal Days.

    💡 Examples from 2024:

    • TP-Link Deco XE75 Wi-Fi 6E Mesh (3-pack) — $399 → $279 (October 2024)
    • Echo Dot (5th Gen) — $49 → $22 (July and October 2024)
    • Blink Outdoor 4 Camera Kit — $339 → $199 (October 2024)

    Accessories & Under-$100 Picks

    The sub-$100 category is where Amazon pushes volume:

    • Bluetooth earphones and chargers — Sony, Anker, and Beats were all on sale
    • Keyboard & Mouse Combos — Logitech and Corsair kits drop often
    • USB-C hubs & card readers — Anker, UGREEN, and Satechi are staples

    💡 Expect to see many of these in the “limited time” lightning deals section.

    💡 Examples from 2024:

    • Sony WH-1000XM4 headphones — $348 → $278 (October 2024)
    • Anker 737 GaNPrime 120W Charger — $94 → $59 (July 2024)
    • Logitech MX Keys Keyboard — $119 → $89 (October 2024)

    What Tech Media Say to Watch

    Outlets like WIRED, PCMag, and CNET regularly compile preview lists. A few key takeaways from their recent posts:

    • Past popular deals = likely repeat candidates (SSD models, Fire TV gear, smart cameras)
    • Laptop & MacBook deals often appear late but are worth tracking
    • Top sellers tend to reappear — Fire TV Stick, Echo Dot, SanDisk SSDs, etc.
    • PC parts saw deeper discounts during October vs July Prime Day in 2024

    (CNET also highlighted that last October’s sale was particularly strong for Apple products and storage — so if you’ve been waiting for a MacBook or iPad, history suggests it’s a good time to watch.)


    Prime Day vs Black Friday: Which Is Better for Tech?

    It’s fair to ask whether you’re better off waiting until Black Friday. The short answer: it depends on what you want.

    For PC parts, NAS, and accessories, October Prime events are often just as strong or better. Last year, 2TB NVMe SSDs and Ryzen CPUs hit their lowest prices in October, and many of those discounts simply repeated in November. The advantage of Prime Day is timing — you get the deals earlier and avoid stock selling out.

    For TVs, Apple gear, and gaming consoles, Black Friday tends to pull ahead because multiple retailers compete heavily. If those are your targets, waiting may pay off.

    For most readers here, though, October is the smarter bet for upgrades. You get holiday-season pricing without the chaos, and you can move into Black Friday with most of your core upgrades already secured.


    How to Prepare (Even If the Sale Hasn’t Started)

    1. Make your wishlist now — and include essentials and nice-to-haves
    2. Track current prices using Keepa or Amazon Price Tracker extensions
    3. Bookmark this blog — I’ll post a full roundup of tech deals when the event is live
    4. Plan your PC upgrades now — I’ll be sharing my own build journey in a separate post next week

    For more prep tips, check out my earlier post on Choosing the Best Drives for Your NAS for guidance on storage upgrades worth watching.


    Coming Soon…

    Next week I’ll share my own PC upgrade plan — covering what I’m replacing, what I’m keeping, and the parts I’m targeting in the October sale. If you’re considering a build or refresh, it’ll be a practical guide you can follow alongside the deals roundup once the sale goes live.


    Final Word

    Amazon’s October sale is one of the best times of the year to grab high-quality tech without waiting until Black Friday.

    Stay tuned — the sale is expected to go live October 7th, and I’ll be here with the best tech picks as they drop.

  • How AI is Transforming Smart Homes in 2025

    How AI is Transforming Smart Homes in 2025

    Smart homes have come a long way. What began with app-controlled lights and smart speakers has grown into connected ecosystems that manage energy use, strengthen security, and adapt to individual lifestyles. Artificial Intelligence (AI) is now taking this a step further. By learning from our habits and anticipating needs, AI makes smart homes more intuitive, predictive, and personalised than ever before.


    Real-World Examples of AI in Action

    AI is no longer a futuristic concept – it is already shaping daily life. Voice assistants like Alexa and Google Home respond to more than simple commands: they learn your patterns, suggest routines, and seamlessly control lighting or music. Smart thermostats such as Nest cut energy costs by adjusting temperatures automatically when you are away. Even robot vacuums use AI to map your home, avoid obstacles, and optimise cleaning routes.

    These small but powerful examples highlight how AI is quietly transforming daily routines into smoother, more efficient experiences.


    Security Benefits of AI

    Home security is one of the biggest winners from AI integration. Modern smart cameras don’t just detect movement – they can identify whether it’s a person, a pet, or a passing car. This reduces false alarms and ensures faster, more accurate responses.

    For instance, Reolink and Eufy security systems use AI to recognise suspicious behaviour, such as someone lingering outside your home. AI-driven doorbells can even tell the difference between family members, deliveries, and strangers. By filtering out irrelevant alerts, these systems provide peace of mind without overwhelming you with constant notifications.

    The result is a smarter, calmer layer of security that protects what matters most.

    Futuristic smart home security camera with a glowing AI holographic face above it, symbolising AI-powered motion detection and smart alerts.
    AI-powered cameras can distinguish between people, pets, and vehicles, reducing false alerts.

    The Pace of AI Improvements

    It’s impossible to ignore how quickly AI tools are advancing. In only a few years, platforms like ChatGPT, Microsoft Copilot, and Grok have evolved from basic Q&A bots into assistants capable of handling planning, analysis, and even decision-making. The same acceleration is happening in smart home AI, meaning features that feel premium today will likely become standard tomorrow.

    Think of the leap from Wi-Fi 5 to Wi-Fi 7. The difference was enormous, and AI is developing at an even faster rate. This speed matters: your smart home won’t remain static – it will continue to grow smarter over time, making each device a better investment.


    What Could Be Next?

    Looking ahead, AI has the potential to unlock a new wave of possibilities:

    • Adaptive Routines: Instead of fixed schedules, your home could recognise if you’ve had a late night and delay the morning coffee routine. Imagine lights staying dimmed a little longer and your coffee maker waiting until you’re actually awake.
    • Energy Optimisation: AI could predict peak electricity prices and run appliances such as dishwashers or EV chargers at the cheapest times. Picture your EV charging automatically at 2 a.m. when energy is lowest.
    • Cross-Device Intelligence: Imagine your NAS, cameras, and smart speakers sharing data to create a unified, AI-powered view of your home.

    These aren’t distant ideas – the technology already exists. What’s left is integration and refinement.

    Modern NAS storage device on a desk with a holographic AI brain projection, representing cross-device intelligence and smart home integration.
    AI could unify devices like NAS, cameras, and smart assistants into a single intelligent ecosystem.

    Should You Upgrade? A Quick Checklist

    Not sure if you’re ready to lean into AI-powered smart home tech? Here are a few practical checks:

    • Wi-Fi: Do you already have reliable Wi-Fi and a solid base of smart devices? (If not, check out my guide on Wi-Fi 6/7 Explained.)
    • Compatibility: Are your devices ready for Matter or other new standards?
    • Automation: Do you want routines that adapt to your lifestyle rather than just follow set schedules?
    • Cloud vs Local: Are you comfortable with cloud-based AI, or do you prefer local processing?
    • Security: Have you put measures in place to protect your data?

    If you tick most of these boxes, you’re in a good position to start adding AI-driven features.

    Futuristic city skyline illuminated in neon blue and purple with AI icons floating above, symbolising the future of connected smart homes.
    The future of smart living lies in AI-powered homes that evolve alongside rapid AI innovation.

    Final Thoughts

    AI isn’t just hype – it’s already reshaping the way we live with technology at home. From smarter security to lower energy bills and personalised routines, the benefits are here and growing fast. The real challenge is deciding when to adopt and which tools to trust.

    For many households, the best path is to start small. Add an AI-enhanced camera, try an adaptive thermostat, or set up an AI-powered routine in Home Assistant. As the technology matures, you can build out a smarter, more responsive system that truly makes life easier.

    If you’re planning upgrades, visit my Recommended Gear page where I highlight reliable options across networking, NAS, and smart home setups. Pairing the right hardware with emerging AI features will help you create a home that’s not just smarter, but genuinely more helpful.

    The future of smart homes isn’t about gadgets — it’s about creating a home that works seamlessly in the background, so you can focus on living. With AI, that future is closer than ever.

  • Best Security Cameras That Work Seamlessly with Your NAS

    When it comes to home security, pairing your camera system with your NAS (Network Attached Storage) can offer unbeatable advantages like local recording, improved privacy, and easy video management. If you’ve already invested in a NAS system, it makes sense to choose security cameras that integrate seamlessly. Personally, I use the UGREEN NASync DXP2800, so I’ll be highlighting options that work well with it throughout this guide. This guide covers the best NAS-compatible camera brands and models, highlighting why NAS compatibility matters and how it simplifies your home security setup.

    Why NAS Compatibility Matters

    Having a NAS-compatible security camera means:

    • Enhanced privacy: Videos stored locally mean no subscription fees or worries about cloud privacy. For instance, your home’s front door footage won’t be stored on a remote server, reducing the risk of unauthorized access.
    • Reliable storage: Continuous recording ensures you don’t miss important events, scheduled backups prevent data loss, and easy management helps you quickly review footage in case of incidents.
    • Integration: Cameras that support protocols like RTSP or ONVIF easily integrate with NAS systems, allowing seamless management through third-party apps or direct NAS interfaces, simplifying your overall workflow.

    For example, imagine a scenario where your Wi-Fi temporarily drops. With cloud-dependent cameras, you might lose critical footage. However, NAS-compatible cameras continue recording locally, ensuring continuous surveillance without interruptions.

    Top Camera Brands That Support NAS

    BrandRecommended ModelsResolutionConnectionPrice RangeKey Features
    ReolinkRLC-833A, RLC-511WA4K/5MPPoE/Wi-Fi\$\$Affordable, reliable, excellent NAS support
    HikvisionDS-2CD2043G0-I, DS-2CD2385G1-I4MP/8MPPoE\$\$\$Professional-grade quality, robust build
    Eufy SecurityEufyCam 2C, EufyCam 31080p/2KWi-Fi\$\$User-friendly, wireless convenience

    1. Reolink

    • Strengths: Reliable, excellent NAS compatibility, budget-friendly.
    • Best For: Users looking for excellent video quality, reliability, and easy NAS integration at a good price.

    2. Hikvision

    • Strengths: Professional-grade quality, advanced configuration, robust build.
    • Best For: Advanced users or those with complex setups requiring high-quality professional cameras.

    3. Eufy Security

    • Strengths: User-friendly, high-quality wireless cameras, no subscription required.
    • Best For: Users who prefer wireless flexibility with easy NAS integration and simple mobile app control.

    Quick Setup Experience with UGREEN NASync

    If you’re just getting started with Docker apps on your NAS, check out my post on must-have Docker containers for NAS beginners.

    UGREEN NASync doesn’t offer a native surveillance app like Synology’s Surveillance Station, but it supports Docker, allowing you to easily install lightweight NVR solutions. Here’s a simplified step-by-step overview to help you get started:

    1. Access Docker on your NAS: Open your UGREEN NASync web interface and navigate to the Docker application.
    2. Choose and Deploy Your NVR Solution: Search for “Frigate,” “Shinobi,” or “MotionEye” within Docker Hub and pull the image to your NAS.
    3. Configure Container Settings: Set the container’s environment variables, assign storage volumes for recordings, and map required ports.
    4. Launch and Access the Application: Start the container and access your chosen NVR via your browser using the assigned port (e.g., http://NAS_IP:port).
    5. Integrate Your Camera: Add your camera’s RTSP or ONVIF stream using its IP and login credentials within the app.

    Consider including screenshots of each stage to visually guide readers through the process, especially if they’re new to Docker setups.

    Local Storage vs. Cloud Storage Recap

    Local storage offers several clear advantages over cloud storage, especially in scenarios such as:

    • Network outages: If your internet connection goes down, local storage continues to function normally, recording and storing your footage without interruptions. In contrast, cloud-based systems might lose critical footage during outages.
    • Privacy-sensitive situations: If you’re concerned about data privacy or security breaches, local storage eliminates the risks associated with third-party cloud providers potentially mishandling your footage.
    • Long-term cost savings: While cloud storage often involves recurring subscription fees, investing in local storage via NAS means a one-time expense. For example, a household that runs multiple cameras continuously can save significantly in subscription fees over several years.
    • Customized storage management: You have full control over storage allocation, data retention periods, and backups, allowing for greater flexibility tailored specifically to your personal or business requirements.

    Best Use Cases

    • Home Entrances & Garages: Cameras from Reolink or Hikvision offer exceptional reliability and high-quality footage ideal for entryways and garages. For instance, the Reolink RLC-833A captures clear facial details even in low-light scenarios, significantly aiding in identification if an incident occurs.
    Example top-down layout showing various camera placements, including corridor mode on the side path and wide-angle coverage across driveways and entrances.
    • Baby Monitors & Indoor Surveillance: Eufy’s wireless cameras provide unmatched ease of use with mobile integration, perfect for parents monitoring babies or pets remotely.
    • Outdoor Surveillance: Hikvision and Reolink cameras are known for robust, weather-resistant construction.
    Reolink Standard View vs Corridor Mode: A side-by-side comparison showing how traditional 16:9 viewing (left) wastes vertical space in narrow areas, while corridor mode (right, 9:16) maximises coverage down long hallways or side paths.

    PoE vs. Wi-Fi Cameras: Which Should You Choose?

    • PoE (Power-over-Ethernet): Reliable wired connection, ideal for permanent installations, simpler cable management, highly recommended for outdoor setups.
    • Wi-Fi Cameras: Easier installation, ideal for renters or temporary setups, flexible camera placement but dependent on strong Wi-Fi.

    Choose PoE for reliability and Wi-Fi for flexibility based on your specific setup needs.

    What’s Next for My Setup

    I may also look at integrating object detection with Home Assistant on my NAS in the future. Beyond that, I plan to explore smart alerts, secure remote access, and making the most of corridor mode for tighter, vertical spaces — like a narrow side alley — where traditional wide-angle views aren’t efficient. These refinements aim to build a smart security system that’s both effective and privacy-conscious, without revealing sensitive home layout details.

    Common Mistakes to Avoid

    • Ignoring storage capacity needs.
    • Overlooking camera resolution compatibility with your NAS.
    • Improper network setup leading to bandwidth issues.

    Personal Insight: My Camera Journey

    If you’re not familiar with the UGREEN NASync, I reviewed it in detail here to help you understand what it’s capable of.

    I’m currently using Switchbot Wi-Fi cameras, which have served well for basic home monitoring, but I’ve experienced occasional connectivity drops and limitations in managing footage efficiently. Given my setup, which prioritises reliability, high-quality video, and seamless integration with my UGREEN NASync NAS, I’m strongly considering transitioning to Reolink PoE cameras.

    Specifically, I’m looking at the Reolink RLC-833A for front-facing or driveway monitoring due to its impressive 4K resolution, person and vehicle detection, and spotlight features. For areas like the backyard, where running Ethernet cables might be more difficult, the RLC-511WA seems like a perfect fit. I’ll be documenting this upgrade in future posts, including setup tips, integration steps, and performance insights. I’m also planning to use a camera with corridor mode for the narrow side path of my house — this setting optimises vertical viewing angles, making it ideal for covering long, narrow spaces without wasting frame area on walls or empty ground.


    By choosing NAS-compatible security cameras, you’re taking control of your home’s safety and enjoying seamless integration with your existing NAS setup. I’d love to hear your thoughts and experiences—feel free to comment below!

  • UGREEN NASync DXP2800 Review After 2 Months of Daily Use

    UGREEN NASync DXP2800 Review After 2 Months of Daily Use

    When I first picked up the UGREEN NASync DXP2800, I was looking for a cost effective, quiet, and beginner friendly way to run containers and back up devices around the house. Two months later, it’s fair to say this NAS has earned its place in my setup, but it’s also time to move on.

    This will be my last post dedicated to the DXP2800. Not because it’s failed me, but because I’ve reached a point where the NAS is no longer the centrepiece. It’s now just one part of a much larger smart home and self hosting ecosystem. So before I pivot to new topics, here’s my final verdict on the DXP2800.

    Key Specs (Quick Overview)

    • CPU: Intel N100 (4 cores)
    • RAM: 8GB DDR5 (upgradeable)
    • Drive Bays: 2 (3.5/2.5 inch)
    • Networking: 2.5GbE
    • Expansion: Dual M.2 NVMe slots
    • Video Output: HDMI
    • OS: UGOS (Linux based)

    🛒 Looking to buy the NAS featured in this review?

    💡 Need more bays?

    These are affiliate links — if you purchase through them, I may earn a small commission at no extra cost to you. Thanks for supporting the blog!

    Build Quality and Noise

    The DXP2800 is solidly built and looks great on a desk. It runs quietly if you’re using SSDs instead of HDDs, but when using spinning drives, the noise is noticeable, though not awful. All NAS systems will face the same reality with HDDs, so it’s not a unique issue to this model.

    Reviewers across several tech sites have praised the DXP2800’s design. The aluminium alloy chassis gives it a premium feel, and the magnetic dust filter and tool less drive bays are practical and appreciated. For a 2 bay system, it punches above its weight in design quality.

    Performance

    I’ve tested a range of Docker containers like Home Assistant, Pi hole, and others, and the NAS handled everything I tried smoothly. The Intel N100 and 8GB of DDR5 RAM offer more than enough headroom for most home lab needs, especially if you’re not using heavy VM workloads.

    While I don’t run Portainer, Plex, or Jellyfin myself, I recommended them in a previous post based on community feedback and ease of use. Docker itself runs reliably, and containers have been easy enough to deploy manually without needing a GUI.

    The inclusion of a 2.5GbE port and dual M.2 NVMe slots is another bonus, especially for users who want SSD caching or faster read/write operations. Some reviewers noted the lack of a second Ethernet port, but for most home users, it’s not a dealbreaker.

    Software (UGOS)

    UGOS is still developing, but I’ve personally had no issues with it. Everything works as expected. While some reviewers have pointed out that it’s not as polished as Synology’s DSM or QNAP’s QTS, I’ve found it stable and reliable for my needs.

    Once Docker was installed and configured, I rarely needed to interact with UGOS directly. It stays out of the way and hasn’t caused any crashes, slowdowns, or compatibility issues.

    Interestingly, users of the larger DXP4800+ model have echoed this sentiment. One community member reported using it to run Home Assistant in a VM, stream music and video, back up mobile photos automatically, and edit documents via ONLYOFFICE. They were particularly impressed with the unified web portal and mobile app, which simplified access and syncing across devices. They also noted that UGOS receives frequent updates and has continued to evolve, with features like object recognition, OCR, and AI tagging in the photo app.

    While there are still some gaps like limited mobile document editing and occasional network filtering issues when accessing remotely, it’s clear UGOS is heading in a promising direction.

    Real World Use

    Currently, I use the DXP2800 for:

    • Running Home Assistant to manage smart home devices
    • Hosting some personal files and containers

    I also installed Pi hole, but haven’t directed network traffic through it yet due to limitations with my router hardware.

    While I’ve recommended other containers in my previous post like Navidrome, Frigate, WireGuard, and media servers, I’m not using those myself. They’re great options depending on your needs and future plans.

    I’m also exploring PoE camera setups and considering Frigate as part of that project, so the NAS may take on a bigger role in home surveillance later down the line.

    Recent discussions suggest that Frigate does in fact run well on these NASync models. One user reported it handled four IP cameras with total CPU usage sitting around twenty percent. Others have noted ffmpeg can push CPU load higher, especially on older or lower power chips, but the Intel N100 in the DXP2800 should handle light to moderate workloads comfortably. Using a Coral TPU is also being explored in the community to offload object detection, which could be worth looking into if I go that route.

    Protecting Your NAS with the UGREEN US3000 UPS

    After two months of non-stop uptime, it’s clear that stable power is just as important as good hardware. A brief outage can interrupt writes or risk drive corruption — something no NAS owner wants to deal with. That’s why I’ve added the UGREEN US3000 UPS to my setup.

    This compact 120 W DC UPS is designed specifically for NASync devices and integrates directly with UGOS Pro. Once connected via DC and USB-C, it’s detected automatically and lets you configure auto-shutdown or short standby modes under Control Panel → Hardware & Power → UPS. Setup takes just a few minutes and adds complete peace of mind for unattended operation.

    It runs silently, provides around ten minutes of backup for the DXP2800, and ensures a clean, controlled shutdown every time. If you’d like a deeper look at performance, build quality, and teardown details, check out my full UGREEN US3000 UPS Review.

    Would I Still Recommend It?

    Yes, with a few caveats.

    If you want to run Docker apps, manage your own services, and don’t mind using community resources for support, the DXP2800 is a solid deal for the price. If you prefer a more polished software experience, plug and play apps, or long term vendor support, Synology might be a better fit.

    That said, I’ve been impressed by how far UGREEN have come in a short time. Their software updates have been consistent and meaningful, and the platform feels like it’s improving month by month. Compared to Synology’s latest hardware restrictions, like requiring branded drives, UGREEN’s more open approach could be a major draw for anyone looking to build a flexible and affordable home setup.

    For me, it’s hit the sweet spot. Powerful enough to do what I want, flexible enough to grow with me, and affordable enough that I didn’t feel like I was buying into an overkill system.

    What’s Next?

    This will be my last focused post on the DXP2800. Moving forward, I’ll be looking at:

    • Choosing PoE cameras for home security
    • Setting up Frigate properly with Coral or NPU support (if needed)
    • Automating alerts and recordings with Home Assistant
    • Managing local and cloud storage for recordings

    The NAS will still be a part of that, but it’s no longer the star.

    If you’re following along for the self hosting journey, the next few posts should be right up your alley. If you’re curious about camera compatibility, Frigate setups, or how this NAS holds up as an NVR, stay tuned — that’s what’s next.

    Want to stay in the loop? Follow the blog or drop a comment if there’s a specific setup you’re curious about. I’ll be diving into smart security next.

  • 10 Best Docker Containers to Supercharge Your NAS

    10 Best Docker Containers to Supercharge Your NAS

    For Beginners & Tinkerers Alike

    Why Docker on a NAS?

    If you’re running a NAS like the UGREEN NASync DXP2800, Synology, or any other x86-based box, Docker is where things start to get fun. Containers let you run lightweight, modular apps that give your NAS way more functionality — without needing a full-blown VM or extra hardware.

    Docker makes it easy to deploy apps in isolated environments, meaning you can try things out without worrying about breaking your whole system. They’re fast to spin up, easy to update, and work consistently across different systems. And the best part? You don’t need to be a hardcore Linux user to make the most of them.

    Below are ten of the best Docker containers you can run on your NAS — a handpicked mix of essential utilities, media servers, privacy tools, and smart home apps that turn your box into a true home server. that will make your NAS feel more like a full home server.


    1. Home Assistant

    Smart home control on your terms

    If you’ve dipped your toe into smart home automation, you’ve probably already heard of Home Assistant. It’s a powerful, open-source platform that lets you integrate and automate just about every smart device imaginable — lights, sensors, switches, thermostats, and even your TV.

    Running Home Assistant in Docker is a great way to keep it separate from your main system while still enjoying all its features. It supports local control, so you’re not reliant on cloud services (great for privacy), and it’s constantly being improved by a huge community. Whether you’re just starting with a few SwitchBot devices or building a full-blown smart home, Home Assistant is a game-changer.

    Pair it with MQTT and Zigbee2MQTT for even more flexibility — both of which you can also run in Docker.

    Start here with my Smart Home Network Setup Guide.


    2. Mosquitto (MQTT Broker)

    Behind-the-scenes magic for smart homes

    Mosquitto is a lightweight message broker that uses the MQTT protocol — a key part of many smart home setups. If you’re running Home Assistant, Zigbee2MQTT, or any device with Tasmota firmware, you’ll likely need an MQTT broker to allow devices to communicate reliably.

    Mosquitto doesn’t have a fancy interface, but that’s by design. It’s incredibly efficient, fast, and stable. Once set up, it just runs in the background passing messages between your devices and services. You won’t interact with it much, but it’s a critical cog in the machine for those looking to build a local-first automation system.


    3. Plex or Jellyfin

    Your own personal Netflix (and more)

    If you’ve got a library of media — movies, TV shows, home videos — Plex and Jellyfin turn your NAS into a full-fledged streaming platform. Plex offers a polished UI and optional remote streaming features, while Jellyfin is the go-to for open-source purists who want everything self-hosted.

    These containers are easy to get up and running, especially if your media is already well-organised. Plex can pull in metadata, posters, subtitles, and more, and supports nearly every device under the sun. Jellyfin is a bit more hands-on but avoids subscriptions or locked features.


    4. Navidrome

    Spotify vibes, minus the monthly fee

    Have a huge collection of MP3s or FLAC files from back in the day? Navidrome breathes new life into local music libraries by turning your NAS into a private music streaming service. Think of it as Spotify for your own collection.

    The interface is clean and responsive, and it integrates with apps like Substreamer or Symfonium. It supports smart playlists, scrobbling to Last.fm, album art, and more. Plus, it’s extremely lightweight and can run on almost any system — making it a great fit for your NAS.


    5. Pi-hole

    Block ads for your whole network

    If you’ve never used Pi-hole before, prepare to be amazed at how much cleaner the internet can be. It acts as a DNS server that blocks ads, trackers, and malicious domains before they ever reach your devices. Set it once, and every device on your network benefits — phones, tablets, smart TVs, even IoT devices.

    Running Pi-hole in Docker is simple, and the dashboard gives you a detailed look at what’s being blocked. You can also manually whitelist or blacklist domains and pair it with Unbound for encrypted DNS.

    Pi-hole gives you a real-time view of DNS queries and blocked domains.

    6. WireGuard

    Access your home network from anywhere

    WireGuard is a modern VPN protocol designed to be fast, simple, and secure. When run on your NAS, it allows you to create a secure tunnel into your home network — perfect for accessing files, media servers, or smart home dashboards while away.

    It’s incredibly lightweight, quick to set up, and performs well even on modest hardware. Once configured, you can connect from your phone, laptop, or tablet and use your home network as if you were physically there. Whether you’re self-hosting your VPN server or connecting to a cloud-hosted instance, WireGuard offers a great balance between ease of use and strong encryption.


    7. Frigate (Advanced)

    Smart surveillance, powered by AI

    Frigate is an AI-based NVR (Network Video Recorder) that detects people, cars, and more in real time using your cameras — all without relying on the cloud. Unlike most camera apps that flood you with motion alerts for every leaf or shadow, Frigate focuses on what matters.

    It’s designed to work best with Coral AI accelerators for fast detection, but it can also run on CPUs or GPUs. It integrates well with Home Assistant and supports real-time notifications, event clips, and camera dashboards.

    Frigate uses AI to detect people, cars, and more — without the cloud.

    I’m currently researching Reolink’s PoE cameras as part of my own upgrade, so expect a deeper dive soon.


    8. Portainer

    Manage Docker without the command line

    Not everyone enjoys messing with the terminal, and that’s where Portainer shines. It gives you a web-based GUI for managing your Docker containers, volumes, networks, and images. You can see logs, update images, stop/start containers, and even deploy new ones — all from your browser.

    Portainer makes managing Docker containers accessible even for beginners.

    It’s great for beginners and pros alike. Even if you’re comfortable with Docker CLI, Portainer makes managing a growing stack of services way more convenient.


    9. FileBrowser

    A better way to access your NAS files

    Most NAS units have some sort of file management tool, but they’re often basic or clunky. FileBrowser is a slick web app that lets you browse, upload, rename, and share files via your browser. It even works well on mobile.

    You can create user accounts with specific permissions, set up public file shares, and preview images or documents right in the UI. It’s fast, lightweight, and a big improvement over standard Samba or FTP setups for everyday file access.


    10. Uptime Kuma

    Know when things break (before someone else does)

    Whether you’re self-hosting multiple services or just want to make sure your NAS is always online, Uptime Kuma is a must. It’s a beautiful, self-hosted status monitor that pings your apps, websites, or IPs and lets you know if they go down.

    You can customise alerts, set up dashboards, and even monitor services hosted outside your home network. It’s surprisingly feature-rich, and the UI is clean and easy to navigate. Once it’s up and running, it becomes one of those “how did I live without this?” tools.


    Where Should You Start?

    If you’re new to Docker and NAS apps in general, start with Pi-hole, Portainer, and Plex or Jellyfin. They’re easy to install, give immediate results, and don’t require much maintenance.

    When you’re ready to level up, move on to Home Assistant and WireGuard. They’ll open the door to deeper control of your smart home and remote access setup.

    And if you’re serious about home security and privacy, keep an eye on Frigate — especially if you’re considering upgrading to PoE cameras like Reolink.


    💡 New to Docker?
    Start by installing Portainer — it gives you a simple dashboard to deploy and manage containers without the command line.

    Got a favourite container I didn’t mention?
    Whether you’re deep into automation or just starting out, I’d love to hear what you’re running on your NAS. Drop it in the comments — I’m always on the lookout for new setups to try.

    Want to Dive Deeper?

    Here are a few more posts that expand on ideas in this article:

    More tutorials, setup guides, and automation tips are on the way!

  • How to Install Home Assistant on the UGREEN NASync Series Using Docker

    How to Install Home Assistant on the UGREEN NASync Series Using Docker

    Introduction

    After getting my UGREEN NASync DXP2800 set up, the next logical step was bringing my smart home devices under one roof.
    With its compact size, low power consumption, and full Docker support, the DXP2800 is a perfect hidden powerhouse for running Home Assistant.
    Rather than setting up another Raspberry Pi or a VM, I decided to run Home Assistant directly in Docker on the DXP2800 for a cleaner, more efficient setup.

    Quick Update:
    In my last post, I mentioned setting up lightweight apps like Pi-hole and Plex.
    After exploring it further, I decided to hold off on Plex for now — personally, I don’t need a media server since I’m not storing my own movies or shows.

    I’m planning to try setting up Pi-hole soon as a local DNS blocker. However, since I’m based in Japan, and local ISPs tend to lock down their routers pretty tightly, it might need a few extra workarounds. Either way, I’ll share how it goes — whether it’s a full setup guide or lessons learned trying to get it working.

    I also spent some time working on setting up an OpenVPN tunnel. The original plan was to host an OpenVPN server on Azure and route only my Fire Stick’s traffic through the VPN, without affecting the rest of my home network. After running into some technical hurdles, I decided to simplify things for now — I’m currently connecting my MacBook directly to the TV when needed, and planning to pick up an Apple TV 4K later to streamline streaming even further.

    As always, if you have questions, or there’s a specific setup you want to see covered, drop a comment below — happy to help!

    If you’re completely new to the UGREEN NASync series, you might want to check out my earlier post where I set up the NASync DXP2800 from scratch: Setting up the UGREEN NASync DXP2800 – A Beginner-Friendly Guide.

    Now that you know why Home Assistant is a great choice, let’s get it installed.


    Why Home Assistant?

    • Free, open-source smart home platform.
    • Supports thousands of integrations.
    • Centralises your entire smart home without cloud dependence.
    • Running it on the NAS keeps everything in one place and easy to manage.

    What You’ll Need

    • UGREEN NASync series unit
    • Docker installed (via App Center)
    • Bluetooth dongle (optional but recommended for Bluetooth devices)
    • I used the TP-Link UB500 — Bluetooth 5.0 and works flawlessly
    • Access to your NAS’s IP address and admin account

    Let’s move on to installing Home Assistant on your DXP2800.

    🖥️ The NAS used in this setup:

    💡 Need more bays?

    🧩 Bluetooth adapter I used for Home Assistant:

    These are affiliate links — if you decide to buy through them, it supports the blog at no extra cost to you. Thanks!


    Installing Home Assistant in Docker

    Option 1: Using the UGREEN NAS Interface (Recommended)

    UGREEN’s built-in Docker app makes container setup simple, even for beginners.

    Step 1: Install the Docker App

    • Open the App Center on your NAS.
    • Search for and install Docker.

    Step 2: Download the Home Assistant Image

    • Go to Docker > Image > Image Database.
    • Search for:
      homeassistant/home-assistant
    • Click Download to pull the image onto your NAS.

    Step 3: Create the Home Assistant Container

    • Go to Docker > Container > New Container.
    • Choose the homeassistant/home-assistant image you just downloaded from the Image Database.

    Configure the container:

    • Container Name: homeassistant
    • Network Mode: Host
    • Restart Policy: Always
    • Volume Mapping:
    • Host path: /docker/homeassistant/config (or your preferred location)

    Important: Enable Privileged Mode

    • When setting up the container, scroll down and tick Privileged Mode (this is essential if you want Bluetooth devices like SwitchBot to work).

    ✅ Once created, Home Assistant will launch and you can access it at:

    http://[NAS-IP]:8123

    If you prefer using command line for finer control, here’s how to set it up via SSH.


    Option 2: Installing via SSH (Optional / Advanced)

    Note:
    Depending on your NAS settings, you may need to prefix the following commands with sudo.
    For example, use sudo docker pull homeassistant/home-assistant instead of docker pull homeassistant/home-assistant.

    Prefer full control over your setup? Here’s how to do it manually via SSH.

    Step 1: SSH into Your NAS

    ssh [your-username]@[NAS-IP]

    Step 2: Pull the Home Assistant Image

    docker pull homeassistant/home-assistant

    Step 3: Run Home Assistant with Privileged Mode

    docker run -d \
      --name homeassistant \
      --privileged \
      --network host \
      --restart unless-stopped \
      -v /docker/homeassistant/config:/config \
      homeassistant/home-assistant

    ✅ Same result — Home Assistant running and Bluetooth-ready.


    Quick Comparison

    MethodBest ForProsCons
    NAS InterfaceBeginnersEasy, visual, no command line neededMight not suit users who want full CLI control
    SSH CLIAdvanced usersFull control, scripting flexibilityRequires SSH access and basic Docker knowledge

    Now that Home Assistant is installed and running, let’s move onto adding Bluetooth devices if you need them.


    Setting Up Bluetooth Devices like SwitchBot (Optional)

    If you want to control Bluetooth smart home devices, here’s how to set it up.

    Hardware Used:

    • Bluetooth Dongle: TP-Link UB500 (Bluetooth 5.0)

    How to Enable Bluetooth Support:

    1. Plug in the TP-Link UB500 to one of your NAS’s USB ports.
    2. Verify Bluetooth Detection:
      SSH into your NAS and run:
       lsusb

    Look for something like:

       Bus 002 Device 003: ID 2357:0604 TP-Link UB500 Adapter
    1. Home Assistant Detection:
    • Home Assistant should auto-detect the Bluetooth adapter after restarting.
    • You can then add integrations like SwitchBot easily.

    Pro Tip: If your NAS is tucked away in a cabinet or has weak Bluetooth range, using a short USB extension cable can dramatically improve signal reception.

    Adding SwitchBot Devices:

    • Go to Settings > Devices & Services.
    • Click + Add Integration, search for SwitchBot.
    • Follow the prompts to pair devices.

    First Steps After Installation

    Once Home Assistant was up and running, here’s what I did first:

    • Set up geofencing automations using the Home Assistant mobile app:
    • When I leave the house, my lights automatically turn off.
    • When I arrive home, certain lights turn on.
    • Created a few basic backups (snapshots) of my configuration, just in case anything went wrong.
    • Explored integrations like SwitchBot, lights, and sensors to start building out my smart home.

    Tip: Setting up a simple automation like geofencing is a great way to immediately see the power of Home Assistant in everyday life.


    Quick Troubleshooting Tips (Optional)

    If you run into small issues during setup:

    • Home Assistant can’t find Bluetooth devices?
      ➡️ Make sure Privileged Mode was enabled when creating the container, and confirm the Bluetooth dongle is detected with lsusb.
    • Can’t access Home Assistant web page?
      ➡️ Double-check the network mode was set to Host, and verify the container is running.

    Wrapping Up

    Running Home Assistant on the UGREEN NASync is a perfect way to centralise your smart home — simply and reliably. Thanks to Docker and a small Bluetooth dongle, I was able to control everything from Wi-Fi devices to SwitchBot sensors without needing multiple hubs or additional hardware.

    I’m planning to spend a bit more time exploring Home Assistant properly before posting anything detailed about it. No point rushing into features without understanding them fully.

    In the meantime, I’m looking at setting up a reliable NAS backup system — aiming to use Azure as a cloud destination to protect my data. If all goes well, I’ll share a simple guide on how to back up your NASync to Azure soon.

    As always, feel free to drop a comment if there’s something you’d like to see covered!