Category: IT

  • Top 5 NAS Mistakes Beginners Make (And How to Avoid Them)

    Top 5 NAS Mistakes Beginners Make (And How to Avoid Them)

    Introduction

    Setting up your first Network-Attached Storage (NAS) can dramatically enhance your home network by centralising your data, improving security, and streamlining access. However, beginners frequently make mistakes that cause frustration, unexpected costs, or even critical data loss. This comprehensive guide addresses these common pitfalls with practical advice, real-world scenarios, and visual resources to help ensure a successful NAS setup experience.


    Mistake #1: Choosing Incompatible or Unreliable Drives

    Selecting inappropriate drives can severely compromise your NAS’s reliability and performance. For example, in data centres, it’s not uncommon for entire batches of drives to fail simultaneously due to manufacturing defects. While rare, this highlights the value of using drives from different production batches to mitigate simultaneous failure risks.

    • Advice:
      • Always consult your NAS manufacturer’s compatibility list.
      • Opt for NAS-specific drives like Western Digital Red or Seagate IronWolf, which are designed for continuous operation.
      • Using identical drives (same manufacturer, model, capacity, and speed) is the recommended best practice to ensure compatibility and optimal RAID performance.
      • While mixing drives from different manufacturers is possible, it’s essential that drives have identical capacity, speed, and specifications to utilise RAID effectively. However, this approach isn’t generally recommended due to potential compatibility or performance issues.
    Two WD Red Plus NAS hard drives side-by-side with different serial numbers, illustrating best practice of using drives from different batches to reduce risk of simultaneous failure in RAID setups.

    Related Guide: HDD vs SSD for Your NAS


    Mistake #2: Overestimating or Underestimating Storage Needs

    Miscalculating your storage needs can result in wasted money or insufficient capacity. For instance, purchasing lower-capacity SSDs simply because they’re cheaper may initially seem like a smart choice, but this often leads to storage shortages down the line, forcing you to upgrade prematurely, as you experienced with your personal PC setup.

    • Advice:
      • Carefully evaluate your current usage and anticipate future growth.
      • Factor in media consumption, regular backups, and future data accumulation.
      • Consider investing in slightly more storage than you initially think you’ll need to avoid frequent upgrades.
    Table showing recommended HDD and SSD storage sizes based on use cases including gaming, media servers, content creation, backups, and professional workstations.

    Related Guide: Beginner’s Guide to Choosing a NAS


    Mistake #3: Neglecting Proper Network Configuration

    Improper network setup can significantly limit NAS performance, leading to slow data transfers and frustrating buffering during media streaming. For example, upgrading from an older Wi-Fi 5 router to a modern Wi-Fi 7 system like the TP-Link BE85 dramatically improved file transfer speeds, streaming quality, and overall responsiveness of your NAS setup.

    • Advice:
      • Upgrade to modern networking standards (Gigabit Ethernet, Wi-Fi 6/7) to prevent bottlenecks.
      • Use high-quality Ethernet cables (Cat 6 or higher).
      • Properly configure network settings, including IP addresses and DNS, to optimise performance.
    Comparison chart showing Wi-Fi 5, Wi-Fi 6, and Wi-Fi 7 speeds in Mbps, highlighting significant improvements in wireless performance for modern networking.

    Related Guide: Understanding Wi-Fi 6 and Wi-Fi 7


    Mistake #4: Overlooking Security and Backup Measures

    Underestimating security risks or misunderstanding RAID’s role can leave your NAS vulnerable to severe data loss or breaches. For example, numerous reports highlight how ransomware attacks exploit poorly secured NAS devices, encrypting valuable data and demanding hefty ransoms, leading to significant financial and personal distress for affected users.

    • Advice:
      • Disable default admin accounts and always use strong, unique passwords.
      • Implement robust firewall settings and VPN access for secure remote connections.
      • Recognise RAID’s limitations—use RAID alongside separate, regular external or cloud-based backups.
      • Regularly test your backup restorations to verify reliability.

    Table: RAID Setups and Recommended Backup Strategies

    RAID Level Protection Provided Recommended Backup Strategy
    RAID 0 No redundancy — performance only Not suitable alone. Always pair with full external or cloud backups.
    RAID 1 Mirroring — protects from 1 drive failure Backup to cloud or external storage to recover from accidental deletion or corruption.
    RAID 5 Striping with parity — protects from 1 drive failure Use the 3-2-1 backup rule: 3 copies, 2 types of media, 1 offsite. Include cloud backup.
    RAID 6 Double parity — protects from 2 drive failures Add versioned backups (e.g., cloud storage with file history) to protect against corruption.
    RAID 10 Striping + mirroring — fast and fault-tolerant Add incremental or differential backups for quick recovery and long-term protection.

    Mistake #5: Ignoring Firmware and Software Updates

    Skipping firmware or software updates exposes your NAS to critical vulnerabilities that can lead to ransomware, instability, or total data loss. A major example was the Qlocker ransomware attack, where QNAP NAS devices with outdated firmware were targeted. Attackers exploited unpatched weaknesses, encrypted users’ files, and demanded ransom payments in Bitcoin.

    Staying current with firmware isn’t just about security — it also unlocks performance improvements, new features, and bug fixes.

    Comparison Table: Why Timely Updates Matter

    Outdated FirmwareUpdated Firmware
    Exposed to known vulnerabilitiesPatched against known threats
    High risk of ransomware and malwareEnhanced security and firewall protections
    Possible performance bugs or system crashesStability improvements and optimisations
    Compatibility issues with newer devices/appsImproved device and software compatibility
    • Advice:
      • Enable automatic firmware and software updates where possible.
      • Regularly review release notes to understand what’s changed.
      • Always back up your data before applying major updates.
      • Schedule routine checks for firmware across all connected devices.

    Quick Summary Checklist

    • Select NAS-specific and compatible drives
    • Accurately estimate and plan for future storage requirements
    • Upgrade and optimise your home network infrastructure
    • Prioritise security measures and regular backups
    • Keep firmware and software updated regularly

    Frequently Asked Questions (FAQ)

    • What NAS brand should beginners choose?
      Synology and QNAP are user-friendly and highly recommended for beginners due to their intuitive interfaces and reliable hardware.
    • Is RAID necessary for a beginner NAS setup?
      While not strictly necessary, RAID is strongly recommended to protect against drive failures and data loss.
    • How often should I backup my NAS data?
      Weekly backups are a good standard, though important data might require daily backups.

    Conclusion

    By proactively avoiding these common beginner mistakes, you’ll ensure your NAS system is reliable, secure, and meets your long-term needs. Are you ready to take the next step?

    • Explore More: Check out our comprehensive guides to further your understanding and optimise your NAS setup.
    • Stay Updated: Subscribe to our newsletter for the latest tips, guides, and updates in home networking and NAS technologies.
    • Share Your Experience: We’d love to hear your NAS setup experiences or questions in the comments below—your insights help our community grow!

    Ready to dive deeper? Explore our additional beginner-friendly guides:

    💬 Have you made any of these NAS mistakes?
    Whether you’re just getting started or refining your setup, I’d love to hear from you. Share your experience in the comments — or let me know what you’d like to see covered next!
  • How to Choose the Best NAS for Your Home Network (Beginner’s Guide)

    How to Choose the Best NAS for Your Home Network (Beginner’s Guide)

    As data storage needs continue to grow, more people are turning to NAS (Network-Attached Storage) solutions for reliable and secure access to their files. But with so many options on the market, how do you choose the best NAS for your needs? This guide will break down the leading NAS brands, their strengths, and what to consider before making a purchase.


    1. Introduction

    A NAS is a dedicated storage device that connects to your network, allowing multiple users to store, access, and manage files from anywhere. Whether you’re looking for a home media server, business backup solution, or cloud storage alternative, a NAS can provide scalability and security without the limitations of traditional external hard drives.

    Common NAS Use Cases

    Backups – Protect important files from accidental loss or corruption.
    Media Streaming – Store and stream movies, music, and TV shows across multiple devices.
    Home Automation – Store logs and automation scripts for smart home setups.
    Remote Access – Securely access your data from anywhere in the world.


    2. Key Factors to Consider When Choosing a NAS

    Understanding RAID: Which One is Right for You?

    RAID (Redundant Array of Independent Disks) is used to improve performance, redundancy, or both. Here’s a breakdown of the most common RAID types:

    • RAID 0 (Striping)Fastest performance, but no redundancy. If one drive fails, all data is lost. Best for speed but risky for critical data.
    • RAID 1 (Mirroring)Copies data to two drives. If one fails, the other keeps your data safe. Great for backups and reliability but reduces usable space by 50%.
    • RAID 5 (Striping with Parity) – Requires at least 3 drives. Data is spread across drives with parity (recovery data). If one drive fails, data is safe. Best for balancing storage, speed, and redundancy.
    • RAID 6 (Dual Parity) – Similar to RAID 5 but can tolerate two drive failures. Ideal for critical business storage. Requires at least 4 drives.
    • RAID 10 (Mirroring + Striping) – Combines RAID 1 and RAID 0, offering both speed and redundancy. Requires at least 4 drives and reduces usable storage by half. Best for high-speed performance with protection.
    • SHR (Synology Hybrid RAID) – Exclusive to Synology NAS, allowing mixed drive sizes and automatic optimization of storage. Great for users who want flexibility.

    👉 Which RAID should you choose?

    • For maximum performance → RAID 0
    • For basic redundancy → RAID 1
    • For best balance → RAID 5
    • For business-grade protection → RAID 6
    • For speed + redundancy → RAID 10
    • For flexible storage → SHR

    How Many Drive Bays Do You Need?

    Choosing the right number of drive bays is essential for balancing storage capacity, performance, and scalability. Here’s a quick comparison:

    Drive BaysStorage CapacityBest ForRAID SupportScalability
    1-BayLimited to a single driveBasic personal storageNo RAIDNot expandable
    2-BayMirroring or basic RAIDHome backups & small media librariesRAID 1Limited expansion
    4-BayMore storage & RAID optionsPower users, media servers, small businessRAID 1, 5, 6, SHRGood balance of capacity & performance
    6+ BayHigh storage & enterprise RAIDLarge-scale storage, business & professionalsRAID 5, 6, 10, SHR, advanced configurationsHighly scalable, future-proof

    3. DIY vs. Pre-Built NAS

    Pre-Built NAS (Synology, QNAP, Asustor, etc.)

    • Easy to use with a plug-and-play setup.
    • Comes with user-friendly software like Synology DSM or QNAP QTS.
    • Limited upgradeability (though some allow RAM or SSD cache upgrades).

    DIY NAS (TrueNAS, Unraid, OpenMediaVault, etc.)

    • Fully customizable and can run enterprise-grade features.
    • Allows you to choose your own hardware for better performance at a lower price.
    • Requires technical knowledge to set up and maintain.

    4. Best NAS Options in 2025 (Entry-Level, Mid-Range, and High-End)

    Synology – Best for User-Friendly Software & Cloud Integration
    Key Features: DiskStation Manager (DSM) UI, built-in cloud syncing (Google Drive, Dropbox), strong security tools, and great backup solutions.

    QNAP – Power & Expandability for Advanced Users
    Key Features: 2.5G/10G networking, PCIe expansion (for GPUs, SSDs, or extra ports), and virtualization support.

    Asustor – Budget-Friendly NAS with Strong Multimedia Support
    Key Features: Affordable pricing, 2.5G networking, HDMI output for media, and Plex/Jellyfin support.

    TerraMaster – Entry-Level NAS with Simple Setup
    Key Features: Low-cost storage, easy-to-use UI, RAID 0/1/5/6 support, and Docker compatibility.

    UGREEN NASync – High-Performance & Open OS Support
    Key Features: New to the market, strong hardware at competitive pricing. Allows users to install TrueNAS, Unraid, or OpenMediaVault without voiding the warranty. Seamless cloud backup integration.

    📌 On a personal note, I’m currently transitioning from cloud storage to a UGREEN NAS. Its combination of high-performance hardware, flexible OS support, and hybrid cloud capabilities makes it an ideal choice for my needs.


    5. Setting Up Your NAS

    1️⃣ Install Hard Drives – Use WD Red, Seagate IronWolf, or Toshiba N300 drives.
    2️⃣ Initial Setup – Access the NAS web interface and configure users & permissions.
    3️⃣ Enable RAID & Backups – Set up RAID 1, 5, or 6 and sync backups to cloud or external drives.
    4️⃣ Secure Your NASChange default admin passwords, enable 2FA, and disable unnecessary services.

    For a more detailed setup guide, check out NAS & Network Storage: Why You Need It.


    6. Small Buying Guide – What NAS Should You Choose?

    If you’re still unsure, here’s a simple guide based on your needs:

    • 💰 Budget-Friendly: TerraMaster, Asustor
    • 📂 Best Software & Cloud Features: Synology
    • 🚀 Most Expandable & Powerful: QNAP
    • 🛠️ Full Customization & DIY Power: TrueNAS, Unraid
    • 📡 Cloud & Hybrid Support: UGREEN NASync

    7. Conclusion

    Choosing a NAS depends on your storage needs, technical expertise, and budget.
    No matter which NAS you choose, setting up proper backups, security measures, and performance optimizations will ensure the best experience.

    Looking for more insights? Check out NAS vs. Cloud Storage: Which One Should You Choose?.


    Which NAS are you considering? Let us know in the comments below!

  • NAS vs Cloud Storage: Which Is Best for You in 2025?

    NAS vs Cloud Storage: Which Is Best for You in 2025?

    Introduction

    Choosing the right storage solution isn’t just about short-term convenience—it’s about long-term data management, security, and cost efficiency. Many people rely on cloud storage, but is it truly the best option for storing data long-term? On the other hand, NAS (Network-Attached Storage) offers full control over your files but comes with upfront costs and maintenance. This guide breaks down both options to help you make the best choice.


    What Makes a Storage Solution “Long-Term Friendly”?

    Not all storage solutions are built for long-term reliability and affordability. When deciding between Cloud and NAS, here are the key factors to consider:

    1️⃣ Cost Over Time

    • Cloud Storage: Starts with low upfront costs but requires ongoing monthly or yearly subscription fees. Costs increase as storage needs grow.
    • NAS Storage: Requires an initial investment but has no recurring subscription costs, aside from electricity and potential drive replacements. Over time, NAS can be more cost-effective.

    2️⃣ Data Ownership & Privacy

    • Cloud Storage: Your data is stored on third-party servers, meaning you rely on the provider’s security policies. While major providers offer strong encryption, you don’t have full control over your files.
    • NAS Storage: With NAS, you own and control your data. No third-party access means greater privacy, but security management (e.g., encryption, backups) is your responsibility.

    3️⃣ Performance & Accessibility

    • Cloud Storage: Access speeds depend on your internet connection. If your connection is slow, retrieving files can be frustrating. However, files are accessible from anywhere.
    • NAS Storage: Works locally on your home or office network, making file transfers much faster than cloud storage. Remote access is possible, but it requires setup.

    4️⃣ Maintenance & Technical Expertise

    • Cloud Storage: Managed by the provider, requiring zero maintenance from your end.
    • NAS Storage: Requires manual maintenance, including firmware updates, security configurations, and monitoring hardware health.

    5️⃣ Scalability

    • Cloud Storage: Easily scalable—you can buy more storage as needed.
    • NAS Storage: Expandable, but limited by physical hardware capacity. Additional drives or larger storage must be purchased when running out of space.

    6️⃣ Security & Compliance

    • Cloud Storage: Providers implement strong security measures, but you must trust their encryption and policies. Compliance depends on the provider’s setup (e.g., GDPR, HIPAA compliance).
    • NAS Storage: Offers direct control over security policies. Ideal for businesses with strict compliance requirements.

    NAS vs. Cloud Storage: Real-World Use Cases

    💼 Freelancers & Remote WorkersCloud Storage is ideal for collaboration and accessibility across multiple devices.

    🎥 Media Professionals & Content CreatorsNAS is best for storing large video files and high-resolution images without relying on internet speeds.

    🏢 Small Businesses & OfficesNAS + Cloud Hybrid provides local storage with offsite cloud backups for extra security.

    🎮 Gamers & EnthusiastsNAS can store game libraries, mods, and backups, reducing reliance on external drives.


    NAS vs. Cloud: Quick Comparison Table

    FeatureNAS StorageCloud Storage
    CostOne-time purchase + electricityMonthly/yearly subscription
    AccessibilityLocal network, remote access with setupAvailable anywhere with internet
    Data ControlFull user controlManaged by provider
    SecurityUser-managed security (can be more secure)Provider encryption, potential breaches
    Internet DependenceNot needed for local accessRequired for access
    ScalabilityLimited by hardwareVirtually unlimited

    NAS vs. Cloud Storage: Decision Guide

    If you’re unsure which storage solution is best for you, follow this simple decision guide:

    1. Do you require remote access to your data from anywhere?

    • YesCloud Storage is best.
    • No → Proceed to the next question.

    2. Do you want full control over your data and privacy?

    • YesNAS is best.
    • No → Proceed to the next question.

    3. Are you comfortable handling hardware setup and maintenance?

    • YesNAS may be suitable.
    • NoCloud Storage is the better choice.

    4. What is your budget preference?

    • One-time investmentNAS is cost-effective long-term.
    • Monthly payments are fineCloud Storage is flexible and scalable.

    5. Do you need to store large files or backups?

    • YesNAS is ideal for local high-speed storage.
    • NoCloud Storage works well for smaller files.

    6. Do you frequently share data with others?

    • YesCloud Storage is best for seamless sharing.
    • NoNAS works for local storage needs.

    Hybrid Approach: The Best of Both Worlds

    For those who want both flexibility and security, a hybrid approach offers the best of both:
    ✔ Use NAS for primary storage with fast local access.
    ✔ Backup important files to the cloud for redundancy.
    ✔ Automate syncing between NAS & Cloud to maintain real-time backups.

    Popular NAS Brands That Support Cloud Backup

    • UGREEN NASync – Supports OneDrive, Google Drive, and Dropbox.
    • Synology NAS – Features Synology Cloud Sync.
    • QNAP NAS – Offers Hybrid Backup Sync.
    • Western Digital My Cloud – Provides third-party cloud sync.

    Related Post: Cloud vs. Local Storage

    If you’re still deciding between all types of local storage, including external hard drives, SSDs, and NAS, check out our guide here → Cloud vs. Local Storage: Best Choice Pros & Cons

    Final Thoughts: Making the Right Choice for You

    Both NAS and Cloud Storage offer advantages, but the best option depends on your needs:

    ✔ If you want full control, cost savings, and high-speed local access, go with NAS.
    ✔ If you prefer convenience, remote access, and automatic backups, choose Cloud Storage.
    ✔ If you want the best of both worlds, consider a hybrid approach.

    🔹 What’s your storage setup? Do you use NAS, Cloud, or both? Let us know in the comments!

  • Cloud vs. Local Storage: Which One is Best for You? (Pros & Cons Explained)

    Cloud vs. Local Storage: Which One is Best for You? (Pros & Cons Explained)

    Introduction

    Choosing between cloud storage and local storage isn’t just about convenience—it’s about balancing security, cost, accessibility, and reliability. Cloud storage offers ease of access, but is it secure enough? Local storage gives you control, but is it practical in the long run?

    This guide breaks down the key differences, so you can choose the best option based on your needs, risk tolerance, and budget.

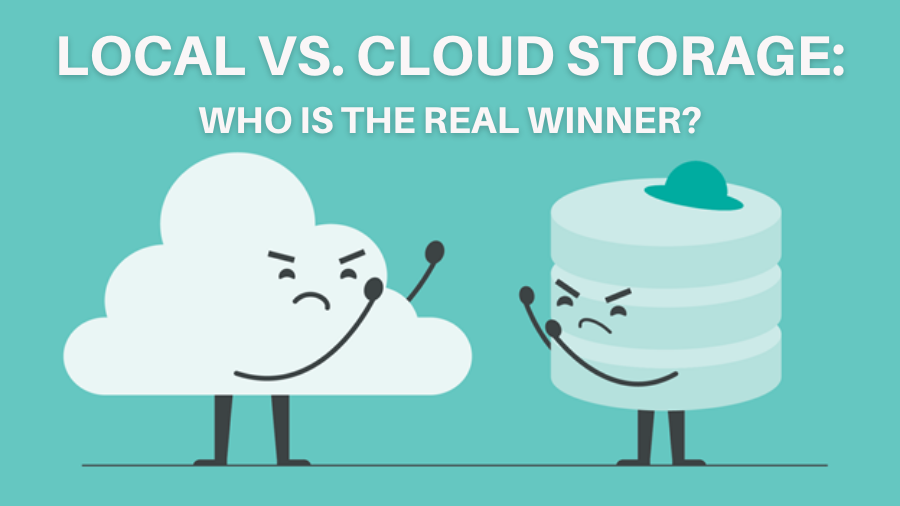
    A quick comparison between local storage (HDD) and cloud storage. Local storage keeps data on physical devices, while cloud storage allows remote access through online servers.

    1. What is Cloud Storage?

    Cloud storage refers to storing data on remote servers managed by a provider (e.g., Google Drive, OneDrive, Dropbox). These services allow you to upload, access, and sync your data online from multiple devices.

    ✅ Pros of Cloud Storage

    ✔ Access from Anywhere – Your data is available on any device, anytime.

    ✔ Automatic Backups & Redundancy – Cloud providers store copies across multiple locations, reducing data loss risks.

    ✔ Scalability – Upgrade or downgrade your storage plan as needed.

    ✔ Collaboration & Sharing – Easily share files and collaborate in real time.

    ✔ No Hardware Maintenance – No need to buy or maintain physical drives.

    ❌ Cons of Cloud Storage

    ✖ Recurring Costs – Monthly fees add up over time, and higher storage tiers can be expensive.

    ✖ Data Privacy & Security Risks – Your files are stored on third-party servers, which may be vulnerable to data breaches, government access, or provider shutdowns.

    ✖ Internet Dependency – Slow or no internet? No access to your files.

    ✖ Limited Control – You rely on the provider’s policies, pricing, and service uptime.

    2. What is Local Storage?

    Local storage means keeping your data on physical devices like external hard drives, SSDs, or a Network-Attached Storage (NAS) device. This gives you direct control over your files without relying on a third party.

    ✅ Pros of Local Storage

    ✔ Full Control & Privacy – Your data is 100% yours—no third-party access or cloud provider risks.

    ✔ One-Time Cost – Unlike cloud storage subscriptions, you buy hardware once and own your storage.

    ✔ Faster Access – No internet lag—files are available instantly.

    ✔ Better for Large Files – Ideal for video editing, 3D modeling, and backups, where cloud speeds can be limiting.

    ❌ Cons of Local Storage

    ✖ Risk of Hardware Failure – Hard drives and SSDs can fail, degrade, or get lost. Without proper backups, data loss is permanent.

    ✖ Limited Accessibility – Unless you set up remote access (e.g., NAS), files are only available where the device is stored.

    ✖ Upfront Cost & Maintenance – Storage devices can be expensive, and you’ll need manual backups.

    ✖ No Automatic Redundancy – Unlike cloud services, if your drive dies, data recovery can be difficult without backups.

    3. Which One Should You Choose?

    Choose Cloud Storage If:

    ☑ You need remote access from multiple devices.

    ☑ You want automated backups & syncing without manual effort.

    ☑ You don’t mind paying a monthly fee for security and convenience.

    ☑ You collaborate with others and need seamless file sharing.

    Choose Local Storage If:

    ☑ You want full control & privacy over your files.

    ☑ You prefer a one-time cost instead of recurring payments.

    ☑ You work with large files (video, 3D modeling, gaming) and need fast access.

    ☑ You are comfortable managing backups and storage hardware.

    Cloud storage allows remote access and easy collaboration, while local storage offers full control and better security for sensitive data. The best choice depends on your needs and priorities.

    If you’re thinking about using a NAS for storage, read our guide on why you should consider one.

    4. The Best of Both: Hybrid Storage Strategy

    For most users, a hybrid setup is the ideal solution:

    • Use cloud storage for documents, work files, and quick access.

    • Use local storage for backups, large files, and sensitive data.

    • Back up NAS to the cloud – If you store files on a NAS, use services like Backblaze B2, Google Drive, or OneDrivefor an offsite backup. This protects against hardware failure, theft, or natural disasters.

    This reduces cloud costs while keeping your most important files safe.

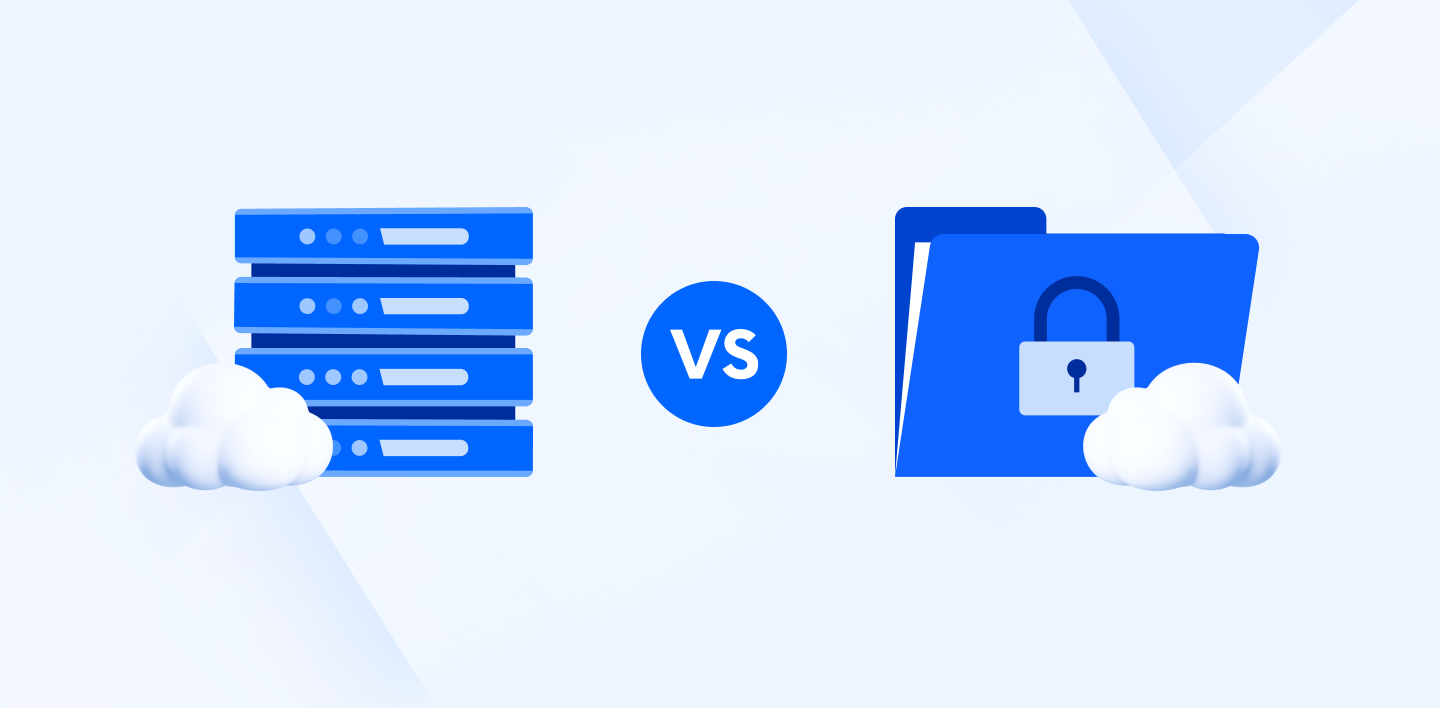
    A side-by-side comparison of cloud storage and physical storage, highlighting key differences in accessibility, cost, security, and backup management. Cloud storage offers convenience, while local storage provides full control.

    Conclusion

    Both cloud and local storage have trade-offs. If you prioritize ease of access and automation, cloud storage is the way to go. If you want total control, better privacy, and no recurring fees, local storage is the better choice.

    For most people, a hybrid approach—using both cloud and local backups—offers the best balance.

    How do you store your data? Let me know in the comments!

  • Home Network Optimization: Essential Steps to Improve Speed & Reliability

    Introduction

    As a Senior Datacenter Technician with almost a decade of experience, I’ve worked with complex networking setups on a professional level. However, home networking presents its own unique challenges. Setting up a fast, secure, and reliable home network isn’t just about plugging in a router—it requires proper planning, equipment selection, and security measures to ensure optimal performance.

    Whether you’re working from home, gaming, streaming, or managing smart home devices, a well-optimized home network is essential. This guide will take you through every step, from choosing the right hardware to enhancing security and performance.


    Step 1: Understand Your Home Network Components

    Before diving into the setup, it’s important to understand what each component does and how they interact.

    🔹 Key Network Devices:

    • Modem – Connects your home to the internet via your ISP. Some ISPs provide a modem-router combo, but separate devices generally offer better performance.
    • Router – Manages wired and wireless connections. Wi-Fi 7 routers are now available, offering higher speeds, lower latency, and improved multi-device handling. If you’re in the market for a new router, Wi-Fi 7 could be a great option to futureproof your network.
    • Ethernet Cables – Provide a faster, more stable connection compared to Wi-Fi. Cat6 or Cat7 cables are ideal for reducing interference.
    • Network Switch (Optional) – Expands the number of wired connections for multiple devices like gaming consoles, PCs, and NAS units.
    • Mesh Wi-Fi System or Extender (Optional) – Helps eliminate dead zones in larger homes by expanding wireless coverage seamlessly.

    Step 2: Set Up Your Modem and Router

    A properly configured modem and router ensure a stable and high-speed connection. Follow these steps:

    1. Connect your modem – Plug it into your ISP’s connection point and power it on. Wait until all indicator lights show a stable connection.
    2. Link your router – Use an Ethernet cable to connect the modem’s LAN port to the router’s WAN (internet) port.
    3. Power on your router – Allow the router to boot up fully before proceeding.
    4. Verify ISP provisioning – Some ISPs require MAC address registration or specific settings. Check your provider’s instructions if the connection isn’t working.
    5. Initial device connection – Use a wired connection (Ethernet) or connect via the router’s default Wi-Fi credentials to proceed with setup.

    Step 3: Configure Your Router for Security and Performance

    Once your router is powered on, it’s time to secure and optimize your network.

    1. Access the router’s interface – Open a web browser and enter the router’s IP address (commonly 192.168.1.1 or 192.168.0.1).
    2. Change admin credentials – Default router passwords are a major security risk. Set a strong and unique password.
    3. Update firmware and set automatic updates – Keeping your router’s software up to date ensures security patches and performance enhancements. Set updates to occur automatically during off-peak hours (e.g., 3 AM) to prevent disruptions to your internet connection during the day.
    4. Set up SSID (Wi-Fi Network Name) – Choose a unique name for your network, avoiding personal identifiers.
    5. Enable WPA3 or WPA2-PSK encryption – This prevents unauthorized access.
    6. Create a guest network – Isolate guest devices from your main network for added security.
    Asus admin page

    Step 4: Optimize Your Network for Speed and Stability

    Proper configuration and placement significantly impact network performance. Consider the following:

    • Router Placement: Keep it central in your home, away from walls, metal objects, and electronic interference.
    • Use 5GHz for Speed, 2.4GHz for Range: Assign gaming and streaming devices to 5GHz, and smart home devices to 2.4GHz for extended coverage.
    • Enable Quality of Service (QoS): Prioritize bandwidth for gaming, video calls, or streaming.
    • Monitor Connected Devices: Limit unnecessary background usage and disconnect inactive devices.
    • Wired vs Wireless: Devices like gaming consoles, workstations, and NAS units perform better with a wired connection over Ethernet.
    • Check Wi-Fi Channel Interference: If you live in an apartment or densely populated area, your router may be using the same Wi-Fi channel as others, causing congestion. Some routers offer automatic channel selection, but you can also use free tools like NetSpot (Windows/macOS), WiFi Analyzer (Android), or Acrylic Wi-Fi Home (Windows) to find the least crowded channels. Manually adjusting your router’s channel settings can improve speed and reduce interference.
    NetSpot Wifi Analyzer

    Step 5: Enhance Security and Privacy

    A secure home network prevents unauthorized access and data breaches. Implement these security measures:

    • Disable WPS (Wi-Fi Protected Setup): This feature can be a security risk.
    • Change Default DNS Settings: Using DNS providers like Cloudflare (1.1.1.1) or Google DNS (8.8.8.8) can improve security and speed.
    • Set up MAC Address Filtering: Allows only authorized devices to connect.
    • Monitor Network Logs: Check your router’s logs periodically for unusual activity.

    Step 6: Expanding Your Home Network

    If you’re experiencing weak signals or bandwidth congestion, consider these solutions:

    • Mesh Wi-Fi Systems: Provide seamless Wi-Fi coverage across large homes.
    • Wi-Fi Extenders or Powerline Adapters: Extend Wi-Fi coverage in areas with poor reception.
    • Network Attached Storage (NAS): Allows centralized file sharing, backups, and media storage with RAID for redundancy.
    • VLANs (Virtual LANs): For more advanced users, VLANs help segregate smart home devices from work-related traffic.

    Conclusion

    Building an efficient home network requires more than just plugging in a router. By choosing the right equipment, optimizing configurations, securing your connection, and expanding when necessary, you can create a fast, secure, and future-proof network.

    ✅ Next Steps:

    • Test your Wi-Fi speeds using an online speed test tool.
    • Check for firmware updates on your router.
    • Try optimizing Wi-Fi channels using NetSpot or WiFi Analyzer.

    💬 Got any questions or network challenges? Drop a comment below and let’s troubleshoot together!