Category: IT

  • How to Access Home Assistant Remotely with Tailscale on a NAS (No Port Forwarding Required)

    How to Access Home Assistant Remotely with Tailscale on a NAS (No Port Forwarding Required)

    One of the biggest things I wanted after setting up Home Assistant was reliable remote access.

    At first, I assumed this would be simple. Install Home Assistant, install the mobile app, sign in remotely somehow, and that would be the end of it.

    The deeper I got into self hosting though, the more I realised remote access is one of those areas where things become complicated surprisingly quickly. Every guide seemed to recommend something different, from opening ports on the router to setting up reverse proxies, SSL certificates, Cloudflare tunnels and domain names.

    None of those things are inherently bad, but when you are still building your understanding it becomes difficult to know what is actually necessary and what is just adding complexity.

    There was another factor as well: subscriptions. I completely understand why Home Assistant Cloud exists and for many people it is probably the right solution. But like a lot of people these days, it feels as though everything wants a monthly fee.

    I was not trying to avoid spending money entirely. I just wanted to see if I could achieve reliable and secure remote access using the hardware and software I already had, without exposing Home Assistant directly to the internet while I was still figuring things out.

    That is what led me to Tailscale. It gave me a way to get remote access working without turning it into a much bigger networking project.

    My setup

    For reference, this is the setup I am currently running.

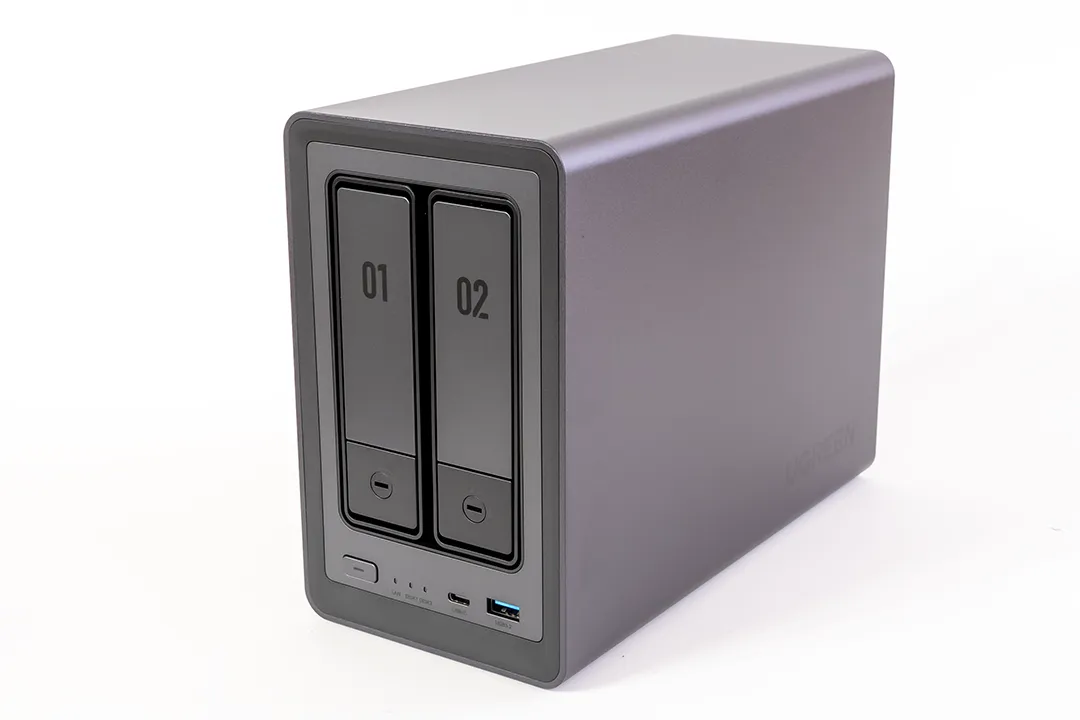
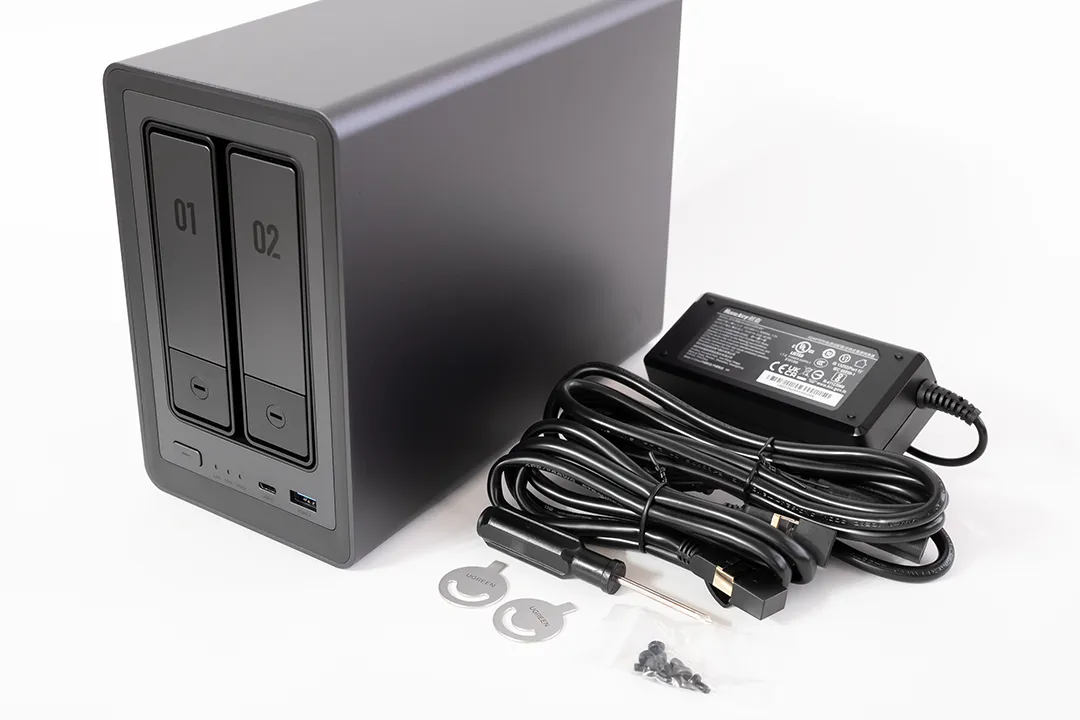
    The NAS itself is a UGREEN NASync DXP2800 running Docker containers for both Home Assistant and Tailscale. If you’re interested in the hardware itself, I covered my experience in my  UGREEN NASync DXP2800 Review After 2 Months.

    There is no port forwarding, no reverse proxy, no public Home Assistant exposure, and no Home Assistant Cloud subscription.

    That probably sounds restrictive at first, especially if you spend enough time reading forums where people are building very advanced setups. But honestly, that was exactly the point.

    Despite working in IT, I did not want this to become a project that required constant maintenance. I wanted something that was secure, made sense, and just worked day to day without needing to be constantly revisited.

    Just because a solution is more advanced does not automatically make it better for your situation. For me, the goal was not to build the most complex setup possible. It was to build one that was secure, reliable, and easy to live with long term.

    That is what pushed me towards Tailscale.

    Why I chose Tailscale

    The biggest reason was simplicity, not because the alternatives were beyond me, but because I was trying to solve a specific problem rather than build a networking project.

    There are plenty of ways to provide remote access to Home Assistant. You can use reverse proxies, SSL certificates, Cloudflare tunnels, domain names, port forwarding and various other combinations depending on how much control you want.

    The problem is that every additional layer becomes something else to configure, secure and maintain.

    For some people that is part of the hobby, and there is nothing wrong with that. For me, the goal was simply to access Home Assistant securely when I was away from home.

    Tailscale felt like a very clean solution to that problem. Instead of exposing Home Assistant publicly and then protecting it afterwards, it creates a private encrypted network between devices you already trust.

    In practice, that meant my phone could communicate directly with my NAS without Home Assistant ever being exposed to the public internet.

    That shift in approach made everything much easier to reason about. I was not publishing a service and securing it, I was extending a private network.

    For a home setup, that balance between simplicity, security and reliability was hard to ignore.

    The benefit I was not expecting

    When I first started looking at remote access, I was focused almost entirely on Home Assistant. The goal was simply to be able to open dashboards and make sure automations worked when I was away from home.

    What I did not really think about at the time was that I was solving a much bigger problem.

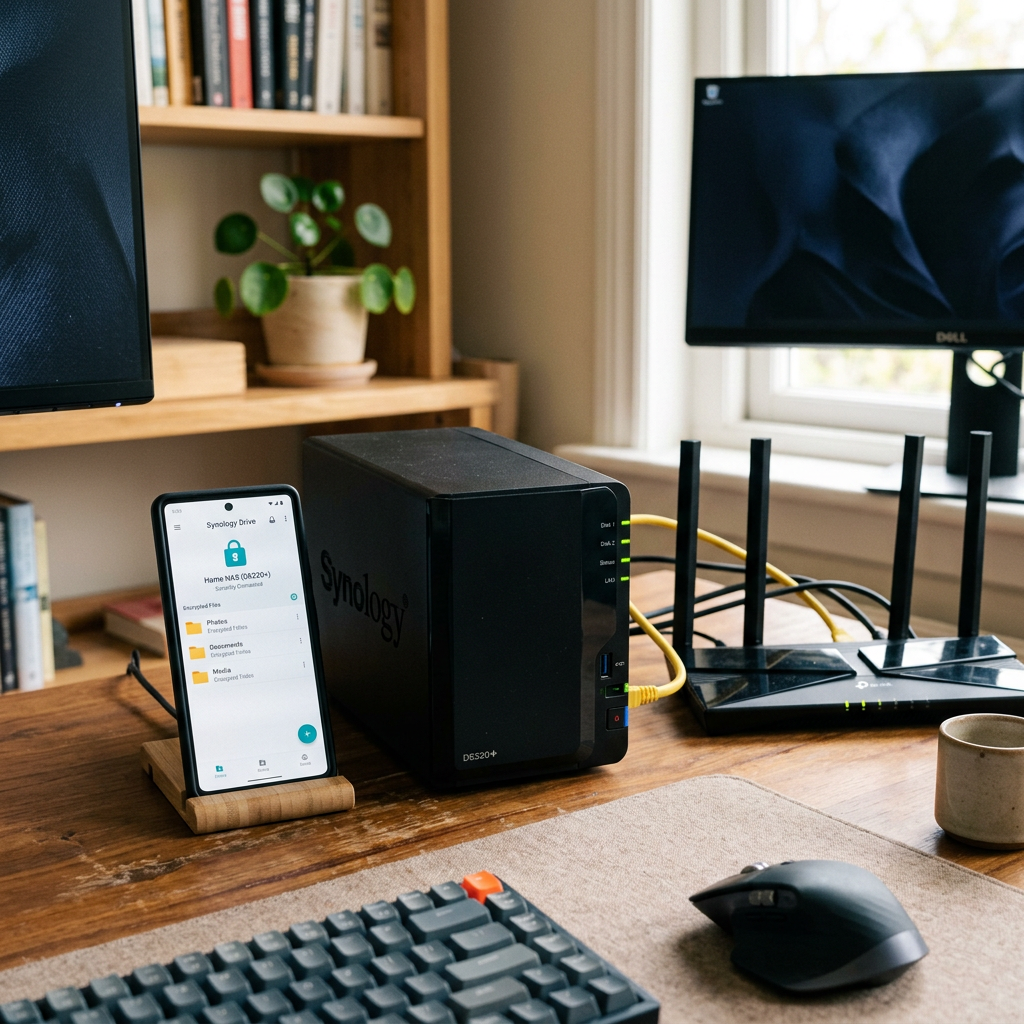
    Once Tailscale was working, Home Assistant was only one of the things I could access remotely. I also had other services running on my NAS, including my Recipe App and Home Dashboard. Several of these are applications I discussed in my  Docker Containers I Still Use One Year Later article, and Tailscale effectively gave me secure remote access to all of them at the same time.

    That was the point where it clicked. Tailscale stopped feeling like a Home Assistant tool and started feeling like part of the underlying infrastructure of my home network. The more services I added locally, the more useful it became.

    The Home Assistant benefits were still significant. Presence detection became more reliable, location updates worked more consistently, and geofenced automations behaved the way I expected them to.

    But the bigger takeaway was that I only needed to solve remote access once. Every service I run now, and anything I add in the future, can use the same setup.

    Before you start

    This guide assumes you already have Home Assistant running and accessible on your local network.

    If you are starting from scratch, make sure you can access Home Assistant locally first, for example:

    http://192.168.x.x:8123

    Do not move on until this works reliably. Otherwise you end up troubleshooting multiple things at once.

    Checking Home Assistant locally

    Before adding Tailscale, confirm Home Assistant is actually listening on port 8123.

    sudo ss -tulpn | grep 8123

    You should see Home Assistant (usually as python3) listening on that port. If not, fix that first.

    Installing Tailscale in Docker

    Tailscale running as a Docker container on a UGREEN NAS alongside other self-hosted applications.
    Tailscale running as a Docker container on my UGREEN NAS.

    Install Tailscale as a Docker container on your NAS.

    docker pull tailscale/tailscale:latest
    docker run -d \
    --name=tailscale \
    --hostname=nas \
    --network=host \
    --cap-add=NET_ADMIN \
    --cap-add=NET_RAW \
    -v tailscale-data:/var/lib \
    tailscale/tailscale:latest

    Check the logs to get the authentication link:

    docker logs tailscale

    Open the URL shown, sign in, and approve the device.

    Make sure to click this link right away, as Tailscale login URLs expire after a few minutes. If it has expired, simply restart the container or re-check the logs to generate a new one.

    Note: In this example, Tailscale stores its configuration in a Docker named volume called tailscale-data. If you prefer to keep your container data in a specific folder for easier backups or management, you can replace the named volume with a local path that suits your environment.

    For example:

    -v /path/to/tailscale-data:/var/lib

    The exact location will depend on your operating system, NAS, or Docker setup.

    Verify the connection:

    docker exec -it tailscale tailscale status

    Setting up Tailscale on your phone

    Tailscale mobile app showing connected devices and assigned tailnet IP addresses.
    The Tailscale app lets you confirm your devices are connected and quickly find your NAS Tailscale IP address.

    Installing Tailscale on the NAS is only half of the setup. You also need it running on the device you actually want to connect from, which in my case is my iPhone.

    Download the Tailscale app from the App Store and sign in using the same account you used to authenticate the NAS. Once signed in, your phone will appear in your Tailscale admin console alongside your NAS.

    At that point, your phone is part of the same private network. Your phone is no longer “connecting into” your home network, it is effectively part of it.

    One useful thing is that the Tailscale app shows all connected devices and their assigned IP addresses. That means you can quickly check your NAS Tailscale IP directly from your phone without needing to SSH in.

    This is useful when setting things up or troubleshooting because you can confirm:

    • your NAS is online
    • your phone is connected to the tailnet
    • the correct Tailscale IP is being used

    Finding the Tailscale IP

    Get the Tailscale IP:

    docker exec -it tailscale tailscale ip -4

    You will get something like:

    100.x.x.x

    Use that to access Home Assistant remotely:

    http://100.x.x.x:8123

    This uses HTTP, not HTTPS. Tailscale already encrypts the connection, so forcing HTTPS here will break things.

    Configuring the Home Assistant Companion App

    Home Assistant Companion App server settings showing internal and external URL configuration.
    Directly after “Configuring the Home Assistant Companion App” and before you explain Internal vs External URLs.

    In the Home Assistant Companion App, you need to set the Internal URL and External URL.

    On iPhone, open the app and go to:

    Settings → Companion App → Server Settings

    (If you have multiple servers configured, tap your server first, then open Server Settings.)

    Use your local IP for Internal URL:

    http://192.168.x.x:8123

    Use your Tailscale IP for External URL:

    http://100.x.x.x:8123

    Both should use HTTP. Tailscale already encrypts the connection, so you do not need HTTPS here.

    Once set, back out of the menu and give the app a few seconds to reconnect. If everything is correct, it should connect both on WiFi and over Tailscale without any errors.

    VPN On Demand on iPhone

    One thing I highly recommend enabling is VPN On Demand inside the Tailscale app.

    Enable it for both WiFi and cellular so the connection is automatic. That way you do not need to remember to manually connect before opening Home Assistant.

    This makes the whole setup feel much more seamless day to day and also improves reliability for things like presence detection and geofenced automations because your phone maintains a consistent connection back to Home Assistant.

    The issue that caused the most confusion

    The biggest problem I hit was not Home Assistant. It was Tailscale Serve taking over port 8123.

    sudo ss -tulpn | grep 8123

    If you do not see Home Assistant on that port, something else has taken it.

    Fix it with:

    tailscale serve reset

    Hardware I Use

    Before I wrap up, a quick note: some of the links below are Amazon affiliate links. If you choose to purchase through them, I may earn a small commission at no additional cost to you. I only recommend products I personally use or have hands-on experience with.

    The software in this guide is free, but if you’re curious about the hardware behind my setup, this is what I currently use:

    I’ve been using this setup for Home Assistant, Docker containers, remote access through Tailscale, and various self-hosted projects. If you’re building something similar, these are the components I have the most hands-on experience with.

    Final thoughts

    Tailscale ended up being one of the most useful additions to my setup, not because it was flashy, but because it removed friction.

    Once it was configured, I stopped thinking about remote access entirely. Combined with a stable home network, which I discussed in  What Actually Happens on Your Network (Why WiFi Feels Inconsistent), it became one of those rare pieces of infrastructure that simply fades into the background and does its job.

    There are more advanced ways to achieve the same result, and for some setups they will make sense. But for me, this struck the right balance. It solved the problem I actually had without introducing more moving parts to maintain.

    Looking back, that was the biggest win. Not just remote access, but a simple foundation I can keep building on without having to rethink it every time I add something new.
  • The Docker Containers I Still Use One Year Later on My NAS

    The Docker Containers I Still Use One Year Later on My NAS

    A year ago I wrote about the best Docker containers to run on a NAS. At the time, I was still in the “this is exciting, what else can I install?” phase. That phase is useful, and honestly it is part of the fun, but it is not the same as living with these containers day after day.

    After a year, my view has changed quite a bit. I no longer think the best Docker containers are always the most impressive ones. The best ones are the ones that keep solving a real problem without creating new ones.

    That sounds obvious, but it’s very easy to forget when you first set up a NAS. You start with storage, then Docker appears, then suddenly you are looking at dashboards, monitoring tools, media servers, smart home platforms, DNS blockers, download managers, and random utilities you did not even know existed two weeks earlier.

    This post is not another “install these 20 containers” list. I already wrote that kind of post n my earlier post on the best Docker containers for a NAS. This is the follow-up I wish more people wrote: what I actually kept, what I removed, what I still want to revisit, and what I would tell someone setting up Docker on a NAS for the first time.

    How Docker changed how I use my NAS

    When I bought my NAS, I mostly thought of it as storage. I wanted somewhere for backups, files, photos, and maybe some media. That’s still important, but Docker changed the role of the NAS completely.

    Instead of being a box that only stores files, it became a small home server. It could run Home Assistant for smart home automation, local apps that only I use, monitoring tools, and services that sit quietly in the background until I need them.

    That’s the part that’s hard to appreciate until you try it. A NAS with Docker is not just “storage plus apps”. It becomes infrastructure for your home. It can run things locally, keep data inside your own network, and remove some dependence on cloud services.

    But there is a catch. Every container you install has a cost. Not always a money cost, but a maintenance cost. It might use CPU, RAM, storage, network access, database writes, logs, or background activity. It might wake your HDDs when you expected the NAS to stay quiet. It might need updates. It might break. It might make your setup more complicated than it needs to be.

    That’s the lesson I learned over the last year. Docker is powerful, but it is also easy to overdo.

    My current rule: install for a problem, not for curiosity

    The biggest change in my thinking is that I no longer install containers just because they sound useful. I still like experimenting, but I now separate “interesting” from “actually worth running all the time”.

    A good container should do at least one of these things:

    • fix a genuine day-to-day annoyance
    • replace a cloud service I do not want to depend on
    • make the NAS more useful day to day
    • run quietly without constant maintenance
    • justify the resources it uses

    If it does not meet one of those, I probably do not need it running permanently.

    That does not mean you should never experiment. Experimenting is how you learn. But there is a difference between testing a container for a weekend and letting it become part of your permanent setup.

    Home Assistant: the one that genuinely changed my setup

    Home Assistant is the container that made the biggest difference for me.

    Custom Home Assistant dashboard running on a NAS with smart home controls, weather information, lighting zones, and sensor data.
    My Home Assistant dashboard running locally on my NAS. I recently rebuilt the layout from scratch, so it’s still very much a work in progress, but it already gives me a much cleaner overview of lighting, sensors, and smart home controls around the house.

    At first, I used it for simple automations. Motion sensors turning on lights, basic routines, and small quality-of-life improvements. Nothing too advanced. But even those simple automations changed how the house felt.

    The important thing I learned is that Home Assistant is only as good as the reliability of the devices and network around it. If a motion sensor is slow to report, or a light takes a second too long to respond, the automation feels bad even if Home Assistant itself is working perfectly.

    That was a big shift in how I thought about it. When something was delayed, my first instinct was to blame the automation or the container. In reality, the issue was often the communication path. Sensor to router, router to Home Assistant, Home Assistant back to the device. Every wireless step can add a little inconsistency.

    Once I improved my network setup, Home Assistant became much more dependable. A lot of that came down to reducing weak wireless paths and removing inconsistent connections between devices, which I covered in more detail in my post about WiFi vs wired consistency for smart home setups.

    That is why Home Assistant is one of the first things I would recommend if someone is interested in smart home control, but I would also warn them not to judge it too quickly. If it feels inconsistent, check the network and devices before assuming Home Assistant is bad.

    Who should install Home Assistant?

    Install Home Assistant if you have more than a couple of smart home devices and want them to work together instead of living in separate apps.

    It is especially useful if you have devices from different brands and want one central place for automations. For example, you might have SwitchBot devices, smart lights, sensors, and other equipment that all work fine individually but become much more useful when linked together.

    Who should skip it for now?

    If you only have one or two smart devices and are happy using the manufacturer apps, Home Assistant may be overkill. It is powerful, but it also rewards patience. You will probably spend time tweaking, testing, and learning how your devices actually behave.

    For me, it is worth it. But it is not a “set it and forget it in ten minutes” container.

    One thing I have added since then is Tailscale so I can securely access Home Assistant remotely without exposing my network directly to the internet. That alone completely changed how useful the setup feels day to day, especially when checking automations or devices while away from home. It also lets me use geofenced automations remotely without needing to pay for Home Assistant Cloud, which was a nice bonus. I will probably do a separate post on that because remote access is one of those areas where it is very easy to do the wrong thing if you are new to self hosting.

    Uptime Kuma: useful, but not essential for my setup

    Uptime Kuma is one of those containers that feels brilliant when you first install it. It gives you a clean dashboard showing whether your services are online, and it can notify you when something goes down.

    If you run a lot of services, it makes sense. If you host things for other people, it makes even more sense. It is also great if you are learning because it helps you understand what is actually running on your network.

    I liked it. I really did.

    The problem is that I eventually removed it because one of my monitoring containers seemed to be keeping my HDDs active. I am not saying Uptime Kuma is bad or that everyone will have that problem, but in my setup, I started caring more about disk activity, noise, and letting the NAS sit quietly when idle.

    That is something beginners often overlook. A monitoring tool is useful, but it also has to monitor things constantly. Depending on how it is configured, where its data is stored, and how often it checks services, it may create background activity you did not expect.

    Would I still recommend Uptime Kuma?

    Yes, but with context.

    If you are running several containers and want a simple way to see whether they are online, Uptime Kuma is excellent. It is one of the easiest monitoring tools to understand, and the interface is beginner friendly.

    But if your NAS is mainly for storage and you care about keeping HDD activity low, I would treat it as optional rather than essential. Install it, test it, and pay attention to whether your disks stay active more than expected.

    A good container can still be the wrong fit for your priorities.

    Portracker: helpful for learning, but I did not keep it

    Portracker was another container I liked because it helped me understand what was happening with my ports and services. When you are new to Docker, it is easy to lose track of what is exposed, what is mapped, and what is actually reachable on your network.

    That kind of visibility is useful. It gives you a better mental picture of your setup.

    But like Uptime Kuma, I eventually removed it. Again, the issue was not that it was bad. It was that my setup had changed. I no longer needed constant visibility enough to justify keeping every monitoring-style tool running.

    This is probably one of the biggest lessons from using Docker long term: some containers are great teachers, but not permanent residents.

    Portracker helped me learn. Once I understood my setup better, I did not need it running all the time.

    The DNS blockers: my unfinished business

    Pi-hole is the container I wanted to love, but I never got it working the way I wanted.

    To be clear, the problem was not that I could not start the container. The problem was that I could not get my network traffic to actually route through Pi-hole properly. In other words, Pi-hole may be running, but if your devices are not using it for DNS, it is not doing anything useful.

    That distinction is important for beginners.

    Installing the container is only step one. The real work is making sure your router, DHCP settings, DNS settings, and devices are actually pointing at it. If they are not, you can stare at a perfectly healthy Pi-hole dashboard while your network completely ignores it.

    That was my issue.

    At the time, I probably did not understand my network well enough to troubleshoot it properly. Since then, I have learned more about VLANs, mesh behaviour, DNS routing, and how devices actually communicate across the network. Because of that, I actually want to give Pi-hole another proper attempt.

    The appeal is obvious. Network-wide ad blocking, cleaner DNS control, and better visibility into what devices are requesting. For people who like understanding their network, Pi-hole is still one of the classic self-hosted tools.

    But I would not describe it as “install and done” for everyone.

    If your router makes it easy to set a custom DNS server, Pi-hole can be straightforward. If your router hides those settings, uses its own DNS behaviour, has awkward mesh or IoT network handling, or if your devices bypass local DNS, it can become frustrating quickly.

    That does not mean Pi-hole is bad. It means DNS is one of those areas where the container is only half the story.

    I also experimented with AdGuard Home briefly because I liked the cleaner interface and overall approach, but I never spent enough time with it to make a fair comparison. Right now, both of them sit in the category of “containers I still want to figure out properly” rather than containers I can fully recommend from long-term experience.

    That will probably become a future post by itself.

    My self-hosted recipe app: the thing that changed my mindset

    The most unexpected part of running Docker on my NAS was not installing someone else’s container. It was eventually hosting something I built myself.

    I created a local recipe app so I can store recipes in a way that works for me. It runs on my NAS and is available on my local network. It is not a huge commercial-style project, and that is exactly the point.

    It solved a specific problem I had.

    That changed how I looked at the NAS. It was no longer just a device for storage or prebuilt apps. It became a place where I could run my own tools.

    Self hosted recipe app running locally on a NAS with meal categories, recipe cards, and meal planning features.
    One of the unexpected benefits of Docker was eventually hosting my own apps locally. This recipe app runs entirely on my NAS and is used day to day for meal planning and recipe storage.

    This is one of the most underrated parts of Docker. You are not limited to whatever your NAS app store provides. If you can build or find a small web app, you can often run it yourself.

    Why this matters for beginners

    You do not need to be a professional developer to appreciate this idea. Even if you never build your own app, understanding that your NAS can host local tools changes how you think about it.

    Maybe it is a recipe app. Maybe it is a dashboard. Maybe it is a small tool for your household. The point is that Docker turns the NAS into something flexible.

    That is when the NAS stops feeling like “a hard drive on the network” and starts feeling like a small home platform.

    What I learned about NVMe and Docker

    Another thing I understand better now is where fast storage actually matters. I also touched on some of this in my UGREEN NASync DXP2800 review because Docker workloads changed how I approached storage much more than I originally expected.

    For bulk storage, HDDs still make the most sense. They are cheaper per TB and ideal for backups, media, archives, and general file storage.

    For apps and containers, NVMe can make the system feel more responsive. Containers often involve lots of small reads and writes, databases, thumbnails, logs, configuration files, and web interfaces. Those are the kinds of workloads where SSDs feel much better than HDDs.

    That does not mean everyone needs NVMe on day one. If you are building your first NAS, I would still prioritise enough HDD capacity first, especially if your main goal is storage.

    But if you plan to run Docker seriously, NVMe is worth considering. Not necessarily massive drives, but enough fast storage for apps, containers, and potentially cache.

    The key is not “NVMe is better than HDD”. The key is using each type of storage for the job it suits best.

    What I would install first today

    If I was setting up Docker on a NAS again from scratch, I would not install ten containers immediately.

    I would start with one container that solves a real problem, then build from there.

    For me, the first serious install would still be Home Assistant because it has had the biggest day-to-day impact. After that, I would consider a monitoring tool like Uptime Kuma, but I would pay close attention to whether it increases disk activity. Then I would revisit Pi-hole carefully, making sure the DNS routing side is actually working before judging the container itself.

    I would not install things just because they appear on every “best Docker containers” list.

    That is how you end up with a busy NAS, a dozen dashboards, and very little that actually improves your life.

    What I would avoid as a beginner

    The biggest mistake is installing too much too quickly.

    Every container adds another thing to understand. Where does it store data? Does it need a database? Does it expose a port? Does it need internet access? Does it write logs constantly? Does it wake the drives? How do you back it up? How do you update it?

    None of that means Docker is bad. It just means containers are not free from responsibility.

    I would also avoid exposing anything to the internet until you understand what you are doing. Running an app locally on your home network is one thing. Opening ports so you can access it from anywhere is completely different.

    For most beginners, local-only is the right starting point.

    What I still think Docker is best for

    After a year, I think Docker is best for three things on a home NAS.

    First, smart home control. Home Assistant is the obvious example here.

    Second, useful local services. This could be a monitoring tool, a DNS tool, or a small personal app.

    Third, learning. Docker teaches you a lot about networking, storage, ports, backups, persistence, and how services actually run.

    That learning curve can be frustrating, but it is also what makes the NAS more valuable over time.

    Final thoughts

    A year ago, I mostly thought Docker was a way to add cool features to my NAS.

    Now I think it is more about choosing what deserves to run permanently in your home.

    Some containers stayed because they genuinely improved my setup. Some were removed because they added more background activity than value. Others, like Pi-hole, are still on my revisit list because I know the idea is useful even if my first attempt did not work.

    That is the honest version of Docker on a NAS. It is powerful, flexible, and genuinely useful, but it is not about installing everything.

    It is about building a setup that solves real problems without creating too many new ones.

  • Fixing WRITE FPDMA QUEUED Errors on UGREEN DXP2800 with WD Red Plus WD80EFPX

    Fixing WRITE FPDMA QUEUED Errors on UGREEN DXP2800 with WD Red Plus WD80EFPX

    I Thought My NAS Drive Had Failed. It Hadn’t.

    My NAS told me one of my drives had failed, yet SMART reported everything as healthy. The logs told a completely different story. What made it more confusing was that these weren’t old drives, with roughly 9,000 hours of runtime, well within their expected lifespan. If you are running a UGREEN DXP2800 with WD Red Plus drives and have seen “WRITE FPDMA QUEUED” errors, this post may save you from replacing a perfectly good disk.

    TLDR

    If your DXP2800 shows “WRITE FPDMA QUEUED” errors with WD Red Plus drives, especially WD80EFPX, it may be a SATA interface compatibility issue rather than a failing disk. Forcing SATA to 3.0Gbps resolved it in my case.

    My Setup

    NAS: UGREEN DXP2800

    Configuration: RAID 1

    Drives: 2 x WD Red Plus 8TB, model WD80EFPX

    The Problem

    WRITE FPDMA QUEUED error in UGREEN DXP2800 system logs
    Example of the “WRITE FPDMA QUEUED” error appearing in the system logs

    My storage pool suddenly became degraded and the drive in Slot 2 was marked as broken. When I checked the logs I kept seeing the same error, “WRITE FPDMA QUEUED”. At first I assumed this had just happened, but after digging into the logs properly I realised the same error had been appearing intermittently for weeks, possibly months. I had simply not noticed it earlier because everything continued to function until the RAID finally dropped the disk.

    Symptoms to Look For

    If you are seeing a degraded RAID, SMART showing no issues, and repeated “WRITE FPDMA QUEUED” errors in your logs, you are likely dealing with the same problem.

    What I Tried First

    I started with the usual checks to rule out something simple. SMART data looked normal, quick and extended tests passed, and temperatures were well within range. I then reseated the drive using hot swap. After reseating, the NAS automatically began rebuilding the RAID, which initially looked promising. However, during the rebuild the same WRITE error appeared again. That confirmed this was not a loose connection or a one off glitch.

    Why This Was Confusing

    When a drive fails you normally expect SMART warnings, reallocated sectors, or obvious read or write issues. In this case everything pointed to a healthy disk, yet the NAS had removed it from the array. That mismatch is what makes this issue particularly frustrating.

    What I Found

    After searching around I found multiple reports of the same behaviour with the DXP2800 and WD Red Plus drives, especially the WD80EFPX models. The same error kept coming up, which strongly suggested a compatibility issue rather than a failing disk.

    Contacting Support

    At that point I contacted UGREEN support and shared my logs. They responded much faster than I expected, in some cases within minutes, and got straight to the point. This was easily one of the best support experiences I’ve had with any company. They reviewed the logs, identified the root cause, and provided a clear fix without any unnecessary back and forth. They explained that some WD Red Plus drives have a narrow tolerance for signal timing at higher SATA speeds, which can cause instability with certain units. In other words, the drive and the NAS were not failing, but they were not communicating reliably at full speed.

    The Fix

    The solution they provided was to force the SATA interface to operate at 3.0Gbps instead of 6.0Gbps. This improves signal stability and prevents the write errors. The change is made by adding the kernel parameter “libata.force=3.0Gbps” to the boot configuration.

    ⚠️ Important Before You Try This

    The steps below were provided directly by UGREEN support after reviewing my logs. Since this involves system level changes, take your time and double check each step before applying it. Mistakes here can prevent the system from booting correctly. Make sure your RAID is healthy or your data is backed up before making changes, and avoid interrupting the system while editing or rebooting. If you are unsure or running a different configuration, I would strongly recommend contacting UGREEN support first. I am simply sharing what worked in my case.

    Step by Step Fix

    Example showing the libata.force=3.0Gbps parameter added to the boot configuration

    These commands are run on the NAS itself via SSH. The SSH connection step works the same on macOS and Windows PowerShell.

    1. Connect to your NAS via SSH

    ssh yourusername@your-nas-ip

    Enter your NAS password when prompted.

    2. Gain root access

    sudo -i

    Enter your password again if prompted. You should now see a prompt ending with # which means you are running as root.

    3. Confirm the files exist

    ls -l /boot/EFI/debian/grub.cfg /boot/EFI/debian/grub.am

    4. Backup the configuration files

    cp /boot/EFI/debian/grub.cfg /boot/EFI/debian/grub.cfg.bk
    cp /boot/EFI/debian/grub.am /boot/EFI/debian/grub.am.bk

    5. Edit grub.cfg

    vi /boot/EFI/debian/grub.cfg

    When the file opens:

    Press i to enter insert mode.

    Find the line that starts with:

    linux /boot/vmlinuz

    Move your cursor to the end of that line and add:

    libata.force=3.0Gbps

    Make sure there is a space before libata.

    Press Esc to leave insert mode.

    Type the following and press Enter to save and exit:

    :wq

    6. Edit grub.am

    vi /boot/EFI/debian/grub.am

    Repeat the same process:

    Press i to edit.

    Find the line starting with:

    linux /boot/@VMLINUXZ@

    Add to the end of that line:

    libata.force=3.0Gbps

    Press Esc, then type:

    :wq

    and press Enter.

    7. Reboot the NAS

    reboot

    Your SSH session will disconnect. Wait a minute or two for the NAS to come back online.

    8. Verify the change

    Reconnect via SSH and run:

    cat /proc/cmdline

    libata.force=3.0Gbps shown in /proc/cmdline after reboot on UGREEN DXP2800
    Verification showing the libata.force=3.0Gbps parameter active after reboot

    You should see libata.force=3.0Gbps in the output. If it is present, the fix has been applied successfully.

    9. Exit root and SSH

    exit

    exit

    Does This Affect Performance

    In practice it does not. SATA 3.0Gbps provides roughly 300MB per second of bandwidth, while most mechanical hard drives top out around 200 to 250MB per second. The interface is still faster than the drive itself, so there is no noticeable impact in real world use.

    The Result

    After applying the fix the RAID rebuild completed successfully, the storage pool returned to a healthy state, and the WRITE errors stopped appearing. Everything has been stable since.

    Fix or Replace

    If SMART shows no issues and you are seeing these specific errors, it is worth trying the fix first. If errors continue after applying it, or the disk drops from the array again, then replacing the drive becomes the safer option. Alternatives such as Seagate IronWolf or Toshiba N300 have worked well for others.

    Note for the Future

    This change is applied at the boot configuration level. If you update your NAS firmware or system software, these files may be overwritten.

    If the error ever returns after an update, check whether the libata.force=3.0Gbps line is still present in both files.

    Final Thoughts

    This caught me off guard. Everything about the setup was technically supported, and the drives themselves were still relatively new, so a failure was not something I expected. It turned out to be a compatibility issue that only showed up under real world conditions, which made it even harder to diagnose. Credit to UGREEN support for identifying the root cause quickly and providing a fix that worked straight away. Hopefully this helps if you run into the same problem.

  • How I Actually Use a NAS Day to Day After the Setup Phase

    How I Actually Use a NAS Day to Day After the Setup Phase

    When people talk about NAS devices online, it usually falls into two extremes. Either everything is a shiny demo during the first week, or it turns into an over engineered home lab that barely resembles normal use.

    Both miss what actually matters long term.

    This post is about what ownership looks like after the excitement fades. When the NAS stops being a project and starts being part of daily life. What still runs, what quietly disappeared, and which decisions ended up saving time rather than creating more work.

    If you are trying to decide whether a NAS makes sense beyond the initial setup phase, this is the part that usually gets skipped.


    What runs 24 hours a day

    These are the services that stay on permanently because they deliver value without demanding attention.

    Automated backups (local first, cloud as insurance)

    Local backups are the foundation of my setup. Both my MacBook and my wife’s MacBook back up automatically to the NAS, and our iPhone photo libraries are included as well. Once configured, this becomes invisible. Devices back up when they are on the network, and there is nothing to remember or trigger manually.

    On top of that, I use Azure Blob Storage as an off site insurance layer, not as a requirement and not as something I would tell everyone to do.

    If you are running a four bay NAS with RAID and your data lives entirely at home, an off site backup is a nice to have rather than a must have. Local redundancy already covers most everyday failures. The cloud layer exists to protect against unlikely but high impact events such as theft, fire, or total hardware loss.

    In my case, I am storing roughly 3TB in the Cool tier with RA GRS enabled, meaning the data is replicated across regions. This currently costs around $65 to $70 per month, and the cost is dominated by geo replication, cool tier storage, and write operations.

    I have not had to restore from this backup yet, which is exactly how I want it to be. It exists purely for peace of mind rather than day to day recovery.

    The backups are handled using rclone, which gives me full control over scheduling, encryption, bandwidth usage, and retention policies. It also avoids vendor lock in. If I ever decide to move away from Azure, the tooling stays the same. I have a full breakdown of how this is set up in my rclone backup guide.


    Core Docker services

    A small number of Docker containers run continuously because they support everything else I rely on.

    Home Assistant is always running. It handles automations, device integrations, and state tracking quietly in the background. I rarely interact with it directly day to day, which is exactly the point. When automations are reliable, they disappear from your attention entirely.

    This pattern repeats across the setup. Anything that needs constant monitoring or manual intervention does not survive long term.


    What runs occasionally

    These are tasks that exist to maintain confidence in the system rather than provide convenience.

    Maintenance and administration

    I do not actively manage the NAS day to day, but I do check in periodically.

    This usually means:

    • Updating Docker containers when meaningful updates are released
    • Applying NAS firmware updates
    • Reviewing SMART data and disk health
    • Confirming backups are still completing as expected

    This happens infrequently, often weeks apart. The goal is not optimisation or performance tuning. It is reassurance. I want to know the system is still healthy and behaving as expected.

    Manual actions

    Some things are intentionally kept manual.

    I occasionally restore files from backups to confirm that restores actually work. This is not something I do often, but it matters. A backup that has never been tested is only theoretical protection.

    Container updates are another example. While critical updates are automated, some applications require manual updates or restarts. I prefer this balance. Automation handles the boring and predictable parts, while I stay in control of anything that could cause disruption.

    These interactions are rare, but deliberate. Over time, they build trust in the system rather than add ongoing work.


    What I am actively planning to add

    This is where the role of the NAS will expand beyond storage and background services.

    PoE security cameras

    I am preparing to move away from battery powered cameras and into a PoE based setup once UGREEN’s native cameras are available.

    At the moment, I use SwitchBot outdoor cameras. They are genuinely good cameras, but battery management is a constant friction point. I have already run USB power to some of them, and in one location that cable is far from ideal. It works, but it is not how I want fixed infrastructure to be installed.

    The plan is to introduce a dedicated PoE switch and run Ethernet to each camera location. CAT5e, CAT6, and even CAT7 will all work for PoE cameras. In practice, CAT6 offers a good balance of reliability, shielding, and future flexibility without chasing specifications that add little real world benefit. The priority here is consistency rather than speed.

    The appeal of the upcoming UGREEN cameras is not just PoE. Features like local AI processing, tight NAS integration, and removing subscription dependencies are exactly what I want. I have already covered those features in detail in my UGREEN SynCare AI Home Security NAS post.

    Once deployed, the NAS shifts from being storage and services into proper local surveillance infrastructure, with recordings kept on site and fully under my control.


    What I use it for beyond storage

    A family recipe web app

    One use case I did not originally plan for is hosting small, purpose built applications.

    I am currently building a simple web app to store and manage family recipes. Rather than paying for another subscription or relying on third party apps, it runs locally in Docker and does exactly what we need. No ads, no accounts, and no recurring costs.

    This is a good example of where a NAS quietly replaces paid services. The value is not complexity, but ownership and flexibility over time.

    Media streaming

    I originally used Plex for media streaming, but over time I moved to Jellyfin.

    Plex increasingly depends on user accounts, cloud services, and paid tiers. Pricing changes, features moving behind subscriptions, and past security incidents eventually made me uncomfortable with the direction of the platform.

    Jellyfin is fully self hosted. There is no account requirement, no cloud authentication, and no external dependency. Everything stays local. The trade off is less polish, but the benefit is full control.

    For my usage, that trade off is worth it. Media playback should not depend on an external service being online, a subscription remaining valid, or an account existing at all. Once everything is local, media becomes another background service rather than something that needs to be managed.


    Built in apps I still use

    While Docker handles most workloads, I do not avoid built in NAS features entirely.

    I actively use:

    • The UGREEN photo app for managing local photo libraries
    • The UGREEN UPS integration in the control panel for monitoring power events and safe shutdowns (US3000 UPS review)

    The difference is intent. I use built in apps where they add value and integrate tightly with the system, and Docker where flexibility matters more.


    What surprised me over time

    Stability changes how you think about performance

    I still care about performance, but I no longer obsess over it. The system has proven itself stable under real workloads, which means I spend less time watching metrics and more time trusting the platform.

    A NAS becomes background infrastructure

    Once configured properly, a NAS fades into the background. That is a good thing. It should feel closer to household infrastructure than a gadget you constantly interact with.

    Simplicity scales better than features

    The setups that lasted were the simple ones. Anything that added complexity without a clear benefit was eventually removed.


    Who this kind of setup is actually for

    This approach works well for people who want reliability first.

    If you enjoy constant tweaking, experimentation, and rebuilding, there is nothing wrong with that. Some people genuinely enjoy running a home lab as a hobby.

    For me, the NAS is not a hobby. It is infrastructure. I want it to work, recover gracefully when something goes wrong, and stay out of the way the rest of the time.


    When something goes wrong

    This is where the setup really earns its keep.

    Things do go wrong occasionally. Files get deleted by mistake. Power drops unexpectedly. A service stops behaving the way it should. The difference now is that these situations are no longer disruptive.

    If a file is deleted, it is a restore job, not a panic. If there is a power cut, the UPS handles shutdown cleanly and everything comes back up without intervention. If something looks off, I already know where to check and what a healthy system looks like.

    Even the worst case scenarios are planned for. Local backups cover day to day mistakes. Off site backups exist for events I hope never happen. Nothing relies on a single point of failure that would force me to scramble.

    That is the real outcome of this setup. Not that failures never happen, but that they stop being stressful when they do.


    Why this setup works long term

    Owning a NAS is not exciting long term, and that is exactly why it is worth having.

    Once the setup phase is over, it becomes dependable infrastructure. Files are protected locally, off site backups exist for worst case scenarios, automations run quietly, and services behave predictably.

    The goal was never to build the most complex setup possible. It was to build something that reduces friction over time.

    A setup like this saves more than money. It saves attention. Fewer batteries to charge, fewer subscriptions to track, fewer dashboards to check, and fewer decisions to revisit.

    That is the real value of a NAS once you stop treating it like a project and start treating it like infrastructure.

    If you’re thinking through a similar setup and want a second opinion, I’m always happy to talk it through!

  • UGREEN NASync DXP2800 Review After 2 Months of Daily Use

    UGREEN NASync DXP2800 Review After 2 Months of Daily Use

    When I first picked up the UGREEN NASync DXP2800, I was looking for a cost effective, quiet, and beginner friendly way to run containers and back up devices around the house. Two months later, it’s fair to say this NAS has earned its place in my setup, but it’s also time to move on.

    This will be my last post dedicated to the DXP2800. Not because it’s failed me, but because I’ve reached a point where the NAS is no longer the centrepiece. It’s now just one part of a much larger smart home and self hosting ecosystem. So before I pivot to new topics, here’s my final verdict on the DXP2800.

    Key Specs (Quick Overview)

    • CPU: Intel N100 (4 cores)
    • RAM: 8GB DDR5 (upgradeable)
    • Drive Bays: 2 (3.5/2.5 inch)
    • Networking: 2.5GbE
    • Expansion: Dual M.2 NVMe slots
    • Video Output: HDMI
    • OS: UGOS (Linux based)

    🛒 Looking to buy the NAS featured in this review?

    💡 Need more bays?

    These are affiliate links — if you purchase through them, I may earn a small commission at no extra cost to you. Thanks for supporting the blog!

    Build Quality and Noise

    The DXP2800 is solidly built and looks great on a desk. It runs quietly if you’re using SSDs instead of HDDs, but when using spinning drives, the noise is noticeable, though not awful. All NAS systems will face the same reality with HDDs, so it’s not a unique issue to this model.

    Reviewers across several tech sites have praised the DXP2800’s design. The aluminium alloy chassis gives it a premium feel, and the magnetic dust filter and tool less drive bays are practical and appreciated. For a 2 bay system, it punches above its weight in design quality.

    Performance

    I’ve tested a range of Docker containers like Home Assistant, Pi hole, and others, and the NAS handled everything I tried smoothly. The Intel N100 and 8GB of DDR5 RAM offer more than enough headroom for most home lab needs, especially if you’re not using heavy VM workloads.

    While I don’t run Portainer, Plex, or Jellyfin myself, I recommended them in a previous post based on community feedback and ease of use. Docker itself runs reliably, and containers have been easy enough to deploy manually without needing a GUI.

    The inclusion of a 2.5GbE port and dual M.2 NVMe slots is another bonus, especially for users who want SSD caching or faster read/write operations. Some reviewers noted the lack of a second Ethernet port, but for most home users, it’s not a dealbreaker.

    Software (UGOS)

    UGOS is still developing, but I’ve personally had no issues with it. Everything works as expected. While some reviewers have pointed out that it’s not as polished as Synology’s DSM or QNAP’s QTS, I’ve found it stable and reliable for my needs.

    Once Docker was installed and configured, I rarely needed to interact with UGOS directly. It stays out of the way and hasn’t caused any crashes, slowdowns, or compatibility issues.

    Interestingly, users of the larger DXP4800+ model have echoed this sentiment. One community member reported using it to run Home Assistant in a VM, stream music and video, back up mobile photos automatically, and edit documents via ONLYOFFICE. They were particularly impressed with the unified web portal and mobile app, which simplified access and syncing across devices. They also noted that UGOS receives frequent updates and has continued to evolve, with features like object recognition, OCR, and AI tagging in the photo app.

    While there are still some gaps like limited mobile document editing and occasional network filtering issues when accessing remotely, it’s clear UGOS is heading in a promising direction.

    Real World Use

    Currently, I use the DXP2800 for:

    • Running Home Assistant to manage smart home devices
    • Hosting some personal files and containers

    I also installed Pi hole, but haven’t directed network traffic through it yet due to limitations with my router hardware.

    While I’ve recommended other containers in my previous post like Navidrome, Frigate, WireGuard, and media servers, I’m not using those myself. They’re great options depending on your needs and future plans.

    I’m also exploring PoE camera setups and considering Frigate as part of that project, so the NAS may take on a bigger role in home surveillance later down the line.

    Recent discussions suggest that Frigate does in fact run well on these NASync models. One user reported it handled four IP cameras with total CPU usage sitting around twenty percent. Others have noted ffmpeg can push CPU load higher, especially on older or lower power chips, but the Intel N100 in the DXP2800 should handle light to moderate workloads comfortably. Using a Coral TPU is also being explored in the community to offload object detection, which could be worth looking into if I go that route.

    Protecting Your NAS with the UGREEN US3000 UPS

    After two months of non-stop uptime, it’s clear that stable power is just as important as good hardware. A brief outage can interrupt writes or risk drive corruption — something no NAS owner wants to deal with. That’s why I’ve added the UGREEN US3000 UPS to my setup.

    This compact 120 W DC UPS is designed specifically for NASync devices and integrates directly with UGOS Pro. Once connected via DC and USB-C, it’s detected automatically and lets you configure auto-shutdown or short standby modes under Control Panel → Hardware & Power → UPS. Setup takes just a few minutes and adds complete peace of mind for unattended operation.

    It runs silently, provides around ten minutes of backup for the DXP2800, and ensures a clean, controlled shutdown every time. If you’d like a deeper look at performance, build quality, and teardown details, check out my full UGREEN US3000 UPS Review.

    Would I Still Recommend It?

    Yes, with a few caveats.

    If you want to run Docker apps, manage your own services, and don’t mind using community resources for support, the DXP2800 is a solid deal for the price. If you prefer a more polished software experience, plug and play apps, or long term vendor support, Synology might be a better fit.

    That said, I’ve been impressed by how far UGREEN have come in a short time. Their software updates have been consistent and meaningful, and the platform feels like it’s improving month by month. Compared to Synology’s latest hardware restrictions, like requiring branded drives, UGREEN’s more open approach could be a major draw for anyone looking to build a flexible and affordable home setup.

    For me, it’s hit the sweet spot. Powerful enough to do what I want, flexible enough to grow with me, and affordable enough that I didn’t feel like I was buying into an overkill system.

    What’s Next?

    This will be my last focused post on the DXP2800. Moving forward, I’ll be looking at:

    • Choosing PoE cameras for home security
    • Setting up Frigate properly with Coral or NPU support (if needed)
    • Automating alerts and recordings with Home Assistant
    • Managing local and cloud storage for recordings

    The NAS will still be a part of that, but it’s no longer the star.

    If you’re following along for the self hosting journey, the next few posts should be right up your alley. If you’re curious about camera compatibility, Frigate setups, or how this NAS holds up as an NVR, stay tuned — that’s what’s next.

    Want to stay in the loop? Follow the blog or drop a comment if there’s a specific setup you’re curious about. I’ll be diving into smart security next.

  • 10 Best Docker Containers to Supercharge Your NAS

    10 Best Docker Containers to Supercharge Your NAS

    For Beginners & Tinkerers Alike

    Why Docker on a NAS?

    If you’re running a NAS like the UGREEN NASync DXP2800, Synology, or any other x86-based box, Docker is where things start to get fun. Containers let you run lightweight, modular apps that give your NAS way more functionality — without needing a full-blown VM or extra hardware.

    Docker makes it easy to deploy apps in isolated environments, meaning you can try things out without worrying about breaking your whole system. They’re fast to spin up, easy to update, and work consistently across different systems. And the best part? You don’t need to be a hardcore Linux user to make the most of them.

    Below are ten of the best Docker containers you can run on your NAS — a handpicked mix of essential utilities, media servers, privacy tools, and smart home apps that turn your box into a true home server. that will make your NAS feel more like a full home server.


    1. Home Assistant

    Smart home control on your terms

    If you’ve dipped your toe into smart home automation, you’ve probably already heard of Home Assistant. It’s a powerful, open-source platform that lets you integrate and automate just about every smart device imaginable — lights, sensors, switches, thermostats, and even your TV.

    Running Home Assistant in Docker is a great way to keep it separate from your main system while still enjoying all its features. It supports local control, so you’re not reliant on cloud services (great for privacy), and it’s constantly being improved by a huge community. Whether you’re just starting with a few SwitchBot devices or building a full-blown smart home, Home Assistant is a game-changer.

    Pair it with MQTT and Zigbee2MQTT for even more flexibility — both of which you can also run in Docker.

    Start here with my Smart Home Network Setup Guide.


    2. Mosquitto (MQTT Broker)

    Behind-the-scenes magic for smart homes

    Mosquitto is a lightweight message broker that uses the MQTT protocol — a key part of many smart home setups. If you’re running Home Assistant, Zigbee2MQTT, or any device with Tasmota firmware, you’ll likely need an MQTT broker to allow devices to communicate reliably.

    Mosquitto doesn’t have a fancy interface, but that’s by design. It’s incredibly efficient, fast, and stable. Once set up, it just runs in the background passing messages between your devices and services. You won’t interact with it much, but it’s a critical cog in the machine for those looking to build a local-first automation system.


    3. Plex or Jellyfin

    Your own personal Netflix (and more)

    If you’ve got a library of media — movies, TV shows, home videos — Plex and Jellyfin turn your NAS into a full-fledged streaming platform. Plex offers a polished UI and optional remote streaming features, while Jellyfin is the go-to for open-source purists who want everything self-hosted.

    These containers are easy to get up and running, especially if your media is already well-organised. Plex can pull in metadata, posters, subtitles, and more, and supports nearly every device under the sun. Jellyfin is a bit more hands-on but avoids subscriptions or locked features.


    4. Navidrome

    Spotify vibes, minus the monthly fee

    Have a huge collection of MP3s or FLAC files from back in the day? Navidrome breathes new life into local music libraries by turning your NAS into a private music streaming service. Think of it as Spotify for your own collection.

    The interface is clean and responsive, and it integrates with apps like Substreamer or Symfonium. It supports smart playlists, scrobbling to Last.fm, album art, and more. Plus, it’s extremely lightweight and can run on almost any system — making it a great fit for your NAS.


    5. Pi-hole

    Block ads for your whole network

    If you’ve never used Pi-hole before, prepare to be amazed at how much cleaner the internet can be. It acts as a DNS server that blocks ads, trackers, and malicious domains before they ever reach your devices. Set it once, and every device on your network benefits — phones, tablets, smart TVs, even IoT devices.

    Running Pi-hole in Docker is simple, and the dashboard gives you a detailed look at what’s being blocked. You can also manually whitelist or blacklist domains and pair it with Unbound for encrypted DNS.

    Pi-hole gives you a real-time view of DNS queries and blocked domains.

    6. WireGuard

    Access your home network from anywhere

    WireGuard is a modern VPN protocol designed to be fast, simple, and secure. When run on your NAS, it allows you to create a secure tunnel into your home network — perfect for accessing files, media servers, or smart home dashboards while away.

    It’s incredibly lightweight, quick to set up, and performs well even on modest hardware. Once configured, you can connect from your phone, laptop, or tablet and use your home network as if you were physically there. Whether you’re self-hosting your VPN server or connecting to a cloud-hosted instance, WireGuard offers a great balance between ease of use and strong encryption.


    7. Frigate (Advanced)

    Smart surveillance, powered by AI

    Frigate is an AI-based NVR (Network Video Recorder) that detects people, cars, and more in real time using your cameras — all without relying on the cloud. Unlike most camera apps that flood you with motion alerts for every leaf or shadow, Frigate focuses on what matters.

    It’s designed to work best with Coral AI accelerators for fast detection, but it can also run on CPUs or GPUs. It integrates well with Home Assistant and supports real-time notifications, event clips, and camera dashboards.

    Frigate uses AI to detect people, cars, and more — without the cloud.

    I’m currently researching Reolink’s PoE cameras as part of my own upgrade, so expect a deeper dive soon.


    8. Portainer

    Manage Docker without the command line

    Not everyone enjoys messing with the terminal, and that’s where Portainer shines. It gives you a web-based GUI for managing your Docker containers, volumes, networks, and images. You can see logs, update images, stop/start containers, and even deploy new ones — all from your browser.

    Portainer makes managing Docker containers accessible even for beginners.

    It’s great for beginners and pros alike. Even if you’re comfortable with Docker CLI, Portainer makes managing a growing stack of services way more convenient.


    9. FileBrowser

    A better way to access your NAS files

    Most NAS units have some sort of file management tool, but they’re often basic or clunky. FileBrowser is a slick web app that lets you browse, upload, rename, and share files via your browser. It even works well on mobile.

    You can create user accounts with specific permissions, set up public file shares, and preview images or documents right in the UI. It’s fast, lightweight, and a big improvement over standard Samba or FTP setups for everyday file access.


    10. Uptime Kuma

    Know when things break (before someone else does)

    Whether you’re self-hosting multiple services or just want to make sure your NAS is always online, Uptime Kuma is a must. It’s a beautiful, self-hosted status monitor that pings your apps, websites, or IPs and lets you know if they go down.

    You can customise alerts, set up dashboards, and even monitor services hosted outside your home network. It’s surprisingly feature-rich, and the UI is clean and easy to navigate. Once it’s up and running, it becomes one of those “how did I live without this?” tools.


    Where Should You Start?

    If you’re new to Docker and NAS apps in general, start with Pi-hole, Portainer, and Plex or Jellyfin. They’re easy to install, give immediate results, and don’t require much maintenance.

    When you’re ready to level up, move on to Home Assistant and WireGuard. They’ll open the door to deeper control of your smart home and remote access setup.

    And if you’re serious about home security and privacy, keep an eye on Frigate — especially if you’re considering upgrading to PoE cameras like Reolink.


    💡 New to Docker?
    Start by installing Portainer — it gives you a simple dashboard to deploy and manage containers without the command line.

    Got a favourite container I didn’t mention?
    Whether you’re deep into automation or just starting out, I’d love to hear what you’re running on your NAS. Drop it in the comments — I’m always on the lookout for new setups to try.

    Want to Dive Deeper?

    Here are a few more posts that expand on ideas in this article:

    More tutorials, setup guides, and automation tips are on the way!

  • Automated NAS Backup to Azure with rclone: UGREEN NAS Guide

    Automated NAS Backup to Azure with rclone: UGREEN NAS Guide

    Backing up your NAS is essential to protect against data loss from hardware failure, theft, or natural disasters. In this guide, I’ll walk you through how I set up a backup from my UGREEN NASync DXP2800 to Azure using rclone, based on the exact process I followed. Each step includes context so you understand not just how to do it, but why.

    Why Azure?

    Azure is a robust cloud storage option offering high reliability, excellent redundancy, and flexible access tiers specifically designed for backup and archiving. While Azure doesn’t provide a permanent free tier (unlike services such as Google Drive), it does offer generous trial credits to new users. To minimise ongoing storage costs without these credits, I recommend using the Cool or Archive storage tiers—both ideal for backups that don’t require frequent access.

    Other options: rclone supports a wide range of cloud providers. Here are a few great alternatives:

    • Backblaze B2 – Very affordable, especially for large backups. Well-supported by rclone.
    • Google Drive – Great for personal backups. Offers 15GB free and integrates easily.
    • Wasabi – Flat-rate pricing and no egress fees. A strong S3-compatible choice.
    • Dropbox – Easy to use with good syncing capabilities, though pricing can be high for large storage needs.
    • Amazon S3 – Enterprise-grade option, scalable but more complex to configure and can get expensive.

    You can easily substitute Azure in this guide with one of the above by changing the remote configuration step.

    Step 1: Generate rclone Configuration File

    To make rclone work from Docker, I first created a persistent config file using a temporary container:

    docker run -it --rm \
      -v /mnt/data/rclone-config:/config \
      --env XDG_CONFIG_HOME=/config \
      rclone/rclone config

    Walk through the prompts:

    • Select n to create a new remote.
    • Name it something like myremote (avoid using your NAS or personal name).
    • Select storage type 34 for Azure Blob Storage.
    • Enter your Azure Storage Account Name for account.
    • Enter your Access Key for key.
    • Leave endpoint blank.
    • Skip advanced config and auto config by selecting n.

    Once complete, the config will be saved as /mnt/data/rclone-config/rclone.conf on your NAS, ready for Docker containers to use.

    🛠️ Tip: To test that it works:

    docker run --rm \
      -v /mnt/data/rclone-config:/config \
      --env XDG_CONFIG_HOME=/config \
      rclone/rclone:latest lsd myremote:mycontainer \
      --config="/config/rclone.conf"

    Step 2: Create the Backup Script

    This script is broken into three parts: syncing data, deleting older backups, and emailing on failure. Each part is explained below.

    I wanted versioned backups and automatic cleanup of older ones. Here’s the exact script I used:

    #!/bin/sh
    
    LOG_FILE="/mnt/data/rclone-config/monthly_backup.log"
    CONFIG="/mnt/data/rclone-config/rclone.conf"
    REMOTE="myremote:mycontainer"
    BACKUP_NAME="nas-backup-$(date +%Y-%m)"
    DELETE_DATE=$(date -d "4 months ago" +%Y-%m)
    OLD_BACKUP_NAME="nas-backup-$DELETE_DATE"
    
    # 🔁 Sync Step – Copy /volume1 to a dated backup folder
    docker run --rm \
      -v /volume1:/data \
      -v /mnt/data/rclone-config:/config \
      --env XDG_CONFIG_HOME=/config \
      rclone/rclone:latest sync /data "$REMOTE/$BACKUP_NAME" \
      --config="/config/rclone.conf" \
      --log-file="/config/monthly_backup.log" \
      --log-level INFO \
      --exclude "@tmp/**"
    
    # 🧹 Retention Step – Delete backups older than 4 months
    docker run --rm \
      -v /mnt/data/rclone-config:/config \
      --env XDG_CONFIG_HOME=/config \
      rclone/rclone:latest purge "$REMOTE/$OLD_BACKUP_NAME" \
      --config="/config/rclone.conf"
    
    # 📧 Notification Step – Email if backup fails
    if [ $? -ne 0 ]; then
      echo "NAS Backup failed. See log below:" | mail -s "NAS Backup FAILED" you@example.com < "$LOG_FILE"
    fi

    📌 Note: Replace myremote and mycontainer with your rclone remote and Azure Blob container name. Avoid using identifiable names like your NAS hostname.

    Step 3: Enable Email Reporting on Your NAS

    To enable email alerts for failed backups, I used the built-in mail command entirely through SSH — no GUI or additional packages were needed.

    What I did:

    1. SSH into your NAS:
       ssh your-nas-username@your-nas-ip
    1. Test email functionality:
       echo "Test message" | mail -s "Test Email" you@example.com

    If you receive the test email, your NAS is already configured to send system emails.

    1. Check your mail config (if test mail fails):
      The system uses msmtp under the hood on many embedded NAS environments. Create or edit the config:
       vi /opt/etc/msmtprc

    Example configuration (for Gmail):

       defaults
       auth           on
       tls            on
       tls_trust_file /etc/ssl/certs/ca-certificates.crt
    
       account default
       host smtp.gmail.com
       port 587
       from your.email@gmail.com
       user your.email@gmail.com
       password your_app_password
       logfile /opt/var/log/msmtp.log
    1. Make sure permissions are correct:
       chmod 600 /opt/etc/msmtprc
    1. Export the config path if needed (some systems require this):
       export MSMTP_CONFIG=/opt/etc/msmtprc
    1. Retry your test email:
       echo "Test message" | mail -s "Test Email" you@example.com
    1. Add to your script:
      Make sure your backup script includes:
       if [ $? -ne 0 ]; then
         echo "NAS Backup failed. See log below:" | mail -s "NAS Backup FAILED" you@example.com < "$LOG_FILE"
       fi

    ✅ If your provider uses two-factor authentication, use an app-specific password. Most mail issues come down to wrong SMTP server, port, or missing trusted certs.

    Step 4: Schedule the Script with Cron

    To automate your backups, schedule the script using cron:

    Edit your crontab by running:

    crontab -e

    Then, add the following line:

    30 2 1 * * /volume1/scripts/backup_to_azure.sh

    Here’s what these numbers mean:

    • 30: Minute (0-59)
    • 2: Hour (0-23, where 2 is 2:00 AM)
    • 1: Day of the month (1-31)
    • *: Month (1-12, * means every month)
    • *: Day of the week (0-6, Sunday=0, * means every day)

    In this example, the backup script runs automatically at 2:30 AM on the 1st day of every month. Adjust these numbers according to your preferred backup schedule.

    ✅ Why this schedule? Monthly snapshots avoid daily clutter and keep backups manageable.

    Step 5: Verify Your Backups

    Confirm everything’s working with:

    cat /mnt/data/rclone-config/monthly_backup.log

    And list current backup folders:

    docker run --rm \
      -v /mnt/data/rclone-config:/config \
      --env XDG_CONFIG_HOME=/config \
      rclone/rclone:latest lsd myremote:mycontainer \
      --config="/config/rclone.conf"

    🔄 Optional Enhancements

    🔐 Encrypt Your Backups

    Want extra protection? Add a second rclone remote (type crypt) that wraps your Azure remote:

    rclone config
    • Create new remote myremote-crypt
    • Type: crypt
    • Remote: myremote:mycontainer
    • Set a strong password and salt

    Then replace the backup target in your script with:

    myremote-crypt:$BACKUP_NAME

    🔍 Restore Test

    Try restoring a test file from Azure to confirm you can actually recover data if needed:

    docker run --rm \
      -v /volume1/test-restore:/restore \
      -v /mnt/data/rclone-config:/config \
      --env XDG_CONFIG_HOME=/config \
      rclone/rclone:latest copy myremote:mycontainer/nas-backup-2025-05/testfile.txt /restore \
      --config="/config/rclone.conf"

    🧩 Troubleshooting & FAQ

    Q: My backup failed with a permissions error—how do I fix it?

    A: Make sure your Docker container has read permissions for /volume1 and that the rclone configuration (rclone.conf) is properly mounted. Also, confirm file permissions with chmod 600.

    Q: I received a network error during my backup—what can I do?

    A: Add retry options to your rclone sync command to enhance resilience against temporary network issues:

    --retries 5 --low-level-retries 10

    Q: My email notifications aren’t being sent—how do I troubleshoot this?

    A: Ensure the built-in mail command on your NAS works by testing from SSH:

    echo "Test Email" | mail -s "Test" you@example.com

    If it doesn’t, verify SMTP configuration (see Step 3 above).

    Q: How can I avoid hitting Azure bandwidth or cost limits?

    A: Use bandwidth limiting during uploads with:

    --bwlimit=8M

    Additionally, choose the “Cool” or “Archive” Azure tiers for cost efficiency.

    Q: Can I use another cloud provider instead of Azure?

    A: Absolutely! rclone supports many services like Backblaze B2, Google Drive, Dropbox, Wasabi, and Amazon S3. You simply adjust the remote setup step accordingly.

    Final Thoughts

    You now have automated, secure, and reliable backups ready to protect your valuable data. Have you tried setting this up yourself yet? I’d love to hear your experiences, challenges, or ideas for enhancements in the comments below. Happy backing up!

    If you’re interested in other NAS setups and configurations, you might find these previous posts helpful:

    Let me know if there are other topics you’d like to see covered!

  • How to Install Home Assistant on the UGREEN NASync Series Using Docker

    How to Install Home Assistant on the UGREEN NASync Series Using Docker

    Introduction

    After getting my UGREEN NASync DXP2800 set up, the next logical step was bringing my smart home devices under one roof.
    With its compact size, low power consumption, and full Docker support, the DXP2800 is a perfect hidden powerhouse for running Home Assistant.
    Rather than setting up another Raspberry Pi or a VM, I decided to run Home Assistant directly in Docker on the DXP2800 for a cleaner, more efficient setup.

    Quick Update:
    In my last post, I mentioned setting up lightweight apps like Pi-hole and Plex.
    After exploring it further, I decided to hold off on Plex for now — personally, I don’t need a media server since I’m not storing my own movies or shows.

    I’m planning to try setting up Pi-hole soon as a local DNS blocker. However, since I’m based in Japan, and local ISPs tend to lock down their routers pretty tightly, it might need a few extra workarounds. Either way, I’ll share how it goes — whether it’s a full setup guide or lessons learned trying to get it working.

    I also spent some time working on setting up an OpenVPN tunnel. The original plan was to host an OpenVPN server on Azure and route only my Fire Stick’s traffic through the VPN, without affecting the rest of my home network. After running into some technical hurdles, I decided to simplify things for now — I’m currently connecting my MacBook directly to the TV when needed, and planning to pick up an Apple TV 4K later to streamline streaming even further.

    As always, if you have questions, or there’s a specific setup you want to see covered, drop a comment below — happy to help!

    If you’re completely new to the UGREEN NASync series, you might want to check out my earlier post where I set up the NASync DXP2800 from scratch: Setting up the UGREEN NASync DXP2800 – A Beginner-Friendly Guide.

    Now that you know why Home Assistant is a great choice, let’s get it installed.


    Why Home Assistant?

    • Free, open-source smart home platform.
    • Supports thousands of integrations.
    • Centralises your entire smart home without cloud dependence.
    • Running it on the NAS keeps everything in one place and easy to manage.

    What You’ll Need

    • UGREEN NASync series unit
    • Docker installed (via App Center)
    • Bluetooth dongle (optional but recommended for Bluetooth devices)
    • I used the TP-Link UB500 — Bluetooth 5.0 and works flawlessly
    • Access to your NAS’s IP address and admin account

    Let’s move on to installing Home Assistant on your DXP2800.

    🖥️ The NAS used in this setup:

    💡 Need more bays?

    🧩 Bluetooth adapter I used for Home Assistant:

    These are affiliate links — if you decide to buy through them, it supports the blog at no extra cost to you. Thanks!


    Installing Home Assistant in Docker

    Option 1: Using the UGREEN NAS Interface (Recommended)

    UGREEN’s built-in Docker app makes container setup simple, even for beginners.

    Step 1: Install the Docker App

    • Open the App Center on your NAS.
    • Search for and install Docker.

    Step 2: Download the Home Assistant Image

    • Go to Docker > Image > Image Database.
    • Search for:
      homeassistant/home-assistant
    • Click Download to pull the image onto your NAS.

    Step 3: Create the Home Assistant Container

    • Go to Docker > Container > New Container.
    • Choose the homeassistant/home-assistant image you just downloaded from the Image Database.

    Configure the container:

    • Container Name: homeassistant
    • Network Mode: Host
    • Restart Policy: Always
    • Volume Mapping:
    • Host path: /docker/homeassistant/config (or your preferred location)

    Important: Enable Privileged Mode

    • When setting up the container, scroll down and tick Privileged Mode (this is essential if you want Bluetooth devices like SwitchBot to work).

    ✅ Once created, Home Assistant will launch and you can access it at:

    http://[NAS-IP]:8123

    If you prefer using command line for finer control, here’s how to set it up via SSH.


    Option 2: Installing via SSH (Optional / Advanced)

    Note:
    Depending on your NAS settings, you may need to prefix the following commands with sudo.
    For example, use sudo docker pull homeassistant/home-assistant instead of docker pull homeassistant/home-assistant.

    Prefer full control over your setup? Here’s how to do it manually via SSH.

    Step 1: SSH into Your NAS

    ssh [your-username]@[NAS-IP]

    Step 2: Pull the Home Assistant Image

    docker pull homeassistant/home-assistant

    Step 3: Run Home Assistant with Privileged Mode

    docker run -d \
      --name homeassistant \
      --privileged \
      --network host \
      --restart unless-stopped \
      -v /docker/homeassistant/config:/config \
      homeassistant/home-assistant

    ✅ Same result — Home Assistant running and Bluetooth-ready.


    Quick Comparison

    MethodBest ForProsCons
    NAS InterfaceBeginnersEasy, visual, no command line neededMight not suit users who want full CLI control
    SSH CLIAdvanced usersFull control, scripting flexibilityRequires SSH access and basic Docker knowledge

    Now that Home Assistant is installed and running, let’s move onto adding Bluetooth devices if you need them.


    Setting Up Bluetooth Devices like SwitchBot (Optional)

    If you want to control Bluetooth smart home devices, here’s how to set it up.

    Hardware Used:

    • Bluetooth Dongle: TP-Link UB500 (Bluetooth 5.0)

    How to Enable Bluetooth Support:

    1. Plug in the TP-Link UB500 to one of your NAS’s USB ports.
    2. Verify Bluetooth Detection:
      SSH into your NAS and run:
       lsusb

    Look for something like:

       Bus 002 Device 003: ID 2357:0604 TP-Link UB500 Adapter
    1. Home Assistant Detection:
    • Home Assistant should auto-detect the Bluetooth adapter after restarting.
    • You can then add integrations like SwitchBot easily.

    Pro Tip: If your NAS is tucked away in a cabinet or has weak Bluetooth range, using a short USB extension cable can dramatically improve signal reception.

    Adding SwitchBot Devices:

    • Go to Settings > Devices & Services.
    • Click + Add Integration, search for SwitchBot.
    • Follow the prompts to pair devices.

    First Steps After Installation

    Once Home Assistant was up and running, here’s what I did first:

    • Set up geofencing automations using the Home Assistant mobile app:
    • When I leave the house, my lights automatically turn off.
    • When I arrive home, certain lights turn on.
    • Created a few basic backups (snapshots) of my configuration, just in case anything went wrong.
    • Explored integrations like SwitchBot, lights, and sensors to start building out my smart home.

    Tip: Setting up a simple automation like geofencing is a great way to immediately see the power of Home Assistant in everyday life.


    Quick Troubleshooting Tips (Optional)

    If you run into small issues during setup:

    • Home Assistant can’t find Bluetooth devices?
      ➡️ Make sure Privileged Mode was enabled when creating the container, and confirm the Bluetooth dongle is detected with lsusb.
    • Can’t access Home Assistant web page?
      ➡️ Double-check the network mode was set to Host, and verify the container is running.

    Wrapping Up

    Running Home Assistant on the UGREEN NASync is a perfect way to centralise your smart home — simply and reliably. Thanks to Docker and a small Bluetooth dongle, I was able to control everything from Wi-Fi devices to SwitchBot sensors without needing multiple hubs or additional hardware.

    I’m planning to spend a bit more time exploring Home Assistant properly before posting anything detailed about it. No point rushing into features without understanding them fully.

    In the meantime, I’m looking at setting up a reliable NAS backup system — aiming to use Azure as a cloud destination to protect my data. If all goes well, I’ll share a simple guide on how to back up your NASync to Azure soon.

    As always, feel free to drop a comment if there’s something you’d like to see covered!

  • Setting Up the UGREEN NASync DXP2800: Step-by-Step Initial Configuration Guide

    Setting Up the UGREEN NASync DXP2800: Step-by-Step Initial Configuration Guide

    The UGREEN NASync DXP2800 is one of the most accessible NAS options for first-time users, and setting it up is refreshingly simple. In this post, I’ll walk you through the initial setup steps I took — from powering on to creating a storage pool — with commentary on RAID choices and a few tips I picked up along the way.


    What’s Included in the Box

    • UGREEN NASync DXP2800 unit
    • Power adapter
    • Ethernet cable
    • Screws (for 2.5″ drives)

    The NAS has the following ports:

    • 1x 2.5GbE LAN port (back)
    • 2x USB 3.2 Gen1 ports (back)
    • 1x USB-C 3.2 Gen1 port (front)
    • 2x USB 2.0 ports (back)
    • 1x HDMI (currently not in use)
    • Power button and reset button

    Make sure to connect the NAS using the included Ethernet cable for the most stable setup experience.

    Looking to pick up the NAS I used in this guide?

    💡 Need more bays? UGREEN also offers higher-capacity models:

    These are affiliate links — if you decide to buy through them, it supports the blog at no extra cost to you. Thanks for your support!


    Step 1: Power On and Detect the NAS

    Before you start, make sure your NAS is connected via Ethernet for the most reliable connection. It’s also worth checking for any available system updates once you’re in the dashboard — UGREEN recommends updating UGOS Pro early on to avoid compatibility issues, especially if you plan to use SSD caching or Docker later.

    As soon as the NAS is powered on and connected to your network, it appears in the UGREEN NAS app. It can take a few minutes for the device to be detected. However, if it doesn’t show up automatically, you can register it manually by scanning the QR code located on the bottom of the device.

    If it doesn’t appear straight away, you can scan the QR code on the bottom of the NAS to register it manually.

    Step 2: Name Your NAS & Accept Terms

    Once detected, the app prompts you to name your NAS and accept the standard user agreement and privacy terms.

    Give your device a unique name to help distinguish it on the network.

    Step 3: Register Your Email (Recommended)

    While you can skip this, I recommend linking your email for access to UGREENlink and system alerts.

    Registering your email enables remote access and alerts for any system issues.

    Step 4: Enable Remote Access

    I enabled UGREENlink, which gives you remote access to your NAS — useful if you want to monitor or transfer files while away.

    Remote access lets you securely manage your NAS from anywhere.
    UGREENlink remote access lets you securely manage your NAS over the internet. Your NAS name becomes your UGREENlink ID, which you can use from the web or mobile app.

    Step 5: Create Your Storage Pool

    Before you begin, ensure the NAS is powered off when inserting any drives. The DXP2800 uses a tool-less tray system for 3.5″ drives, which makes installation quick and simple. For M.2 SSDs, be cautious as they slot in internally and require careful handling.

    Here’s where you’ll select the drives you installed. I had two 7.2TB HDDs and two 1TB NVMe SSDs.

    You can mix drive types, but it’s best to separate HDDs and SSDs into different pools.

    I opted to configure my HDDs into a single RAID 1 array for redundancy. RAID 1 mirrors the data between the two drives, so if one fails, the other still has all your files. It’s not the most space-efficient, but it offers peace of mind.

    For the SSDs, I chose a Basic (non-RAID) setup for now — mainly because I plan to use them for apps or caching later. I didn’t see much benefit to mirroring them at this stage, especially since I’m not storing critical data there yet.

    RAID 1 for HDDs and a basic SSD pool gives a good mix of reliability and flexibility.

    Step 6: Format and Create Volume

    Once your storage pool is created, the next step is formatting the drives and setting up a volume. This is where you choose between Btrfs and ext4, the two available file systems.

    I chose Btrfs for my HDDs because it supports advanced features like snapshots, built-in data integrity checks, and efficient storage management — all of which are helpful if you’re storing lots of data or want more control over versioning and recovery. It’s especially useful in a home NAS setup where accidental deletion or corruption is a concern.

    For the SSD pool, I went with ext4. While it lacks the bells and whistles of Btrfs, it’s lighter on resources and has a long-standing reputation for reliability and performance. Since I’m planning to use the SSDs for running apps and temporary data, ext4’s speed and lower overhead made more sense.

    Here’s a quick breakdown:

    • Btrfs Pros: Snapshots, checksums, automatic error correction, efficient disk usage
    • Btrfs Cons: Slightly more system overhead, slower write performance than ext4 in some cases
    • ext4 Pros: Fast, low overhead, extremely stable
    • ext4 Cons: No native snapshots, no checksumming or automatic correction
    Btrfs is great for snapshots and folder-level protection. ext4 is a better fit for app containers or temporary storage.

    Before confirming, the system will warn you that all existing data on the drives will be erased.

    Once confirmed, your drives will be formatted and the volume created.

    Step 7: Review System Usage

    After setup, you’ll be shown a breakdown of how your drives are being used. In my case, the system reserved about 15.2GB on one of the SSDs — this includes operating system files and essential services needed to run UGOS Pro.

    This is completely normal, especially on Btrfs volumes where a bit more space is allocated for things like snapshots, metadata, and system overhead. You may also notice:

    • Slightly less available capacity than expected
    • Reserved space depending on your file system and RAID choice

    This screen is a great checkpoint to understand how your storage will behave moving forward:

    • Btrfs can accumulate snapshots and logs, so it’s worth checking the system status occasionally
    • SSDs used for apps (e.g. Docker) may fill quickly if large containers or image caches build up

    You can always check system usage later under the Storage section of the dashboard for a more detailed view.

    Storage overview shows space used by the system, available space, and reserved capacity.

    Final Thoughts

    The DXP2800 offers one of the smoothest NAS setup experiences I’ve used. From unboxing to configuring storage pools, everything was laid out in a way that’s friendly for first-time users. The guided setup process is clear and surprisingly quick.

    I’d recommend enabling two-factor authentication early on to help secure your admin account — it works with any standard authenticator app, and I opted for Microsoft Authenticator since I already use it elsewhere.

    If you’re planning to share the NAS, take advantage of personal folders or set up user-specific access permissions. It’s an easy way to protect privacy and organise data effectively.

    While RAID 1 is a great way to add redundancy, don’t rely on it as your only backup. It’ll help if a drive fails, but it won’t protect you from accidental deletion or file corruption.

    Finally, take note of the reset button behaviour: a short press restarts the system, while holding it down for 10 seconds resets it to factory settings — useful if you ever run into serious issues.

    Next time, I’ll walk through installing Docker and setting up lightweight apps like Pi-hole and Plex to unlock more potential from the NAS.

    Have questions or planning your own setup? Drop them in the comments — always happy to help!

  • UGREEN NASync DXP2800 First Impressions – Budget NAS Done Right?

    UGREEN NASync DXP2800 First Impressions – Budget NAS Done Right?

    The UGREEN NASync DXP2800 just landed on my doorstep — and ahead of schedule, too. While I haven’t installed the drives yet (I’m picking them up tomorrow), I thought I’d take the chance to give a proper first look at this budget-friendly NAS. This isn’t a full review or setup guide — that’ll come once everything is up and running — but I wanted to cover unboxing, design, build quality, and my reasons for choosing it in the first place.


    Why I Chose the NASync DXP2800

    After months of considering whether to stick with cloud storage or go local, I finally made the move toward a proper NAS setup. I’ve been gradually building a smarter home and backing everything up via iCloud — but that only goes so far, especially with Apple’s subscription costs climbing and storage tiers feeling more like a temporary fix than a long-term solution.

    Enter the UGREEN NASync DXP2800. What caught my eye wasn’t just the price point (though the early crowdfunding deal definitely helped), but the feature set for the price.

    Here’s what stood out:

    • Two drive bays, perfect for running RAID 1 for redundancy
    • M.2 NVMe support, giving me the option to run Docker apps or system files separately from my storage
    • 2.5GbE port, future-proof enough to outpace regular Gigabit
    • HDMI out, which I may or may not use, but still nice to have
    • Compact form factor, designed to run quietly in a living room without sticking out

    For my use case — which is mainly iPhone and MacBook backups, Time Machine, and running lightweight Docker apps like Pi-hole and Home Assistant — it seemed ideal. I didn’t need a powerhouse like Synology’s higher-end models, but I wanted something better than a DIY Pi-based setup.


    Unboxing & Build Quality

    UGREEN has done a great job with the packaging. The NAS arrives in a plain outer box with the product box nested inside, offering an extra layer of protection. Inside, everything is well secured with foam inserts and a clean layout — nothing feels rushed or thrown in. It’s a simple touch, but it sets the tone for a well-thought-out product.

    What’s in the box:

    • The DXP2800 unit itself
    • External power brick with a barrel connector
    • Ethernet cable
    • Screws for 2.5” SSDs
    • Quick start guide

    First impressions? It’s solid. The chassis is mostly metal, giving it a premium feel and decent weight. The only plastic bits appear to be the HDD trays, which are tool-less and slide out cleanly behind the magnetic front cover. For a “budget” NAS, it doesn’t feel cheap at all.

    The front panel is minimal and clean, with a magnetic cover that hides the two SATA bays. These are tool-less for 3.5” drives, with mounting points and screws included for 2.5” drives.

    In terms of ports, you get a surprisingly generous set of options:

    • 3 x USB 3.2 (1 front, 2 rear)
    • 2 x USB 2.0 (rear)
    • 1 x USB-C (front)
    • HDMI (rear)
    • 2.5GbE LAN
    • Power input

    Internally, the M.2 NVMe slots are accessed through the front, behind the HDD trays — a clever design that keeps things compact while allowing SSD expansion without dismantling the case. The DIMM slot is accessible through the bottom panel, making RAM upgrades straightforward.

    Speaking of RAM — the unit comes pre-installed with an 8GB Samsung DDR5 SODIMM (M425R1GB4BB0-CWMOD). For most home users running backups, media streaming, or light Docker workloads, that’s a really strong out-of-the-box configuration.

    Everything about the layout feels well thought out — ports are spaced nicely, airflow is unobstructed, and the whole package is tidy and understated.


    First Impressions (Before Setup)

    Even without drives installed, I’ve had a bit of a poke around the unit and here’s what stands out so far:

    • Very quiet fans: You can barely hear them — a big win since this will be running in my living room, where noise levels matter more than you’d think. I didn’t want something that would whirr away in the background while watching TV or relaxing.
    • Good airflow: Side and rear ventilation seem well placed, and the fan design should keep thermals under control even during longer backup sessions.
    • Solid-feeling trays and front cover: No wobble, no rattling — everything slides and clicks into place properly.
    • Well-planned internals: NVMe access through the drive bays is clever and clean. RAM upgrades are accessible from the underside, which is great for long-term flexibility.

    I haven’t booted the OS yet, since I’m waiting on drives — but once I do, I’ll be checking out how intuitive the setup is, how the app integration works, and how flexible the settings are for things like remote backups and energy-saving modes.


    🔧 What Else Can You Use the DXP2800 For?

    While my focus is on backups and light automation, the DXP2800 is capable of much more. If you’re still deciding how you’ll use a NAS, here are some ideas this model can handle:

    • 📁 Private cloud storage – Replace iCloud or Google Drive with your own self-hosted solution
    • 🎥 Media streaming server – Host your own Plex or Jellyfin library for local streaming
    • 🏠 Smart home hub – Run Docker containers like Home Assistant, MQTT brokers, or automation scripts
    • 📷 PoE security camera storage – Use with NVR software like Frigate or Shinobi (I’m currently considering this over a standalone NVR system)
    • 🧪 Self-hosted tools – Run apps like Pi-hole, Bitwarden, or even a personal blog/server

    Whether you want a quiet companion for daily backups or a multi-purpose home server, there’s plenty of headroom here.


    Final Thoughts (For Now)

    So far, I’m pretty happy with the NASync DXP2800. It doesn’t try to be everything — and that’s exactly why I picked it. For anyone looking for a quiet, simple, and affordable NAS for local backups and some light automation, it’s shaping up to be a strong contender.

    And the fact that it blends into my living room setup without drawing attention or making noise? That’s a huge bonus.

    I’m also weighing up whether to use it as part of a PoE security camera system, with NVR software running in Docker. It’s not set in stone yet — I’m still considering the convenience of a standalone NVR — but the flexibility this NAS offers is one of its biggest strengths. Whether you’re keeping things simple or pushing it further, it feels like a solid platform to build around.

    I’ll be documenting the full setup process once I get the drives installed, so keep an eye out for that. And if you’re considering this model or have any specific questions, feel free to drop them in the comments — I’ll do my best to include the answers in the next post.