Category: NAS

  • Best Security Cameras That Work Seamlessly with Your NAS

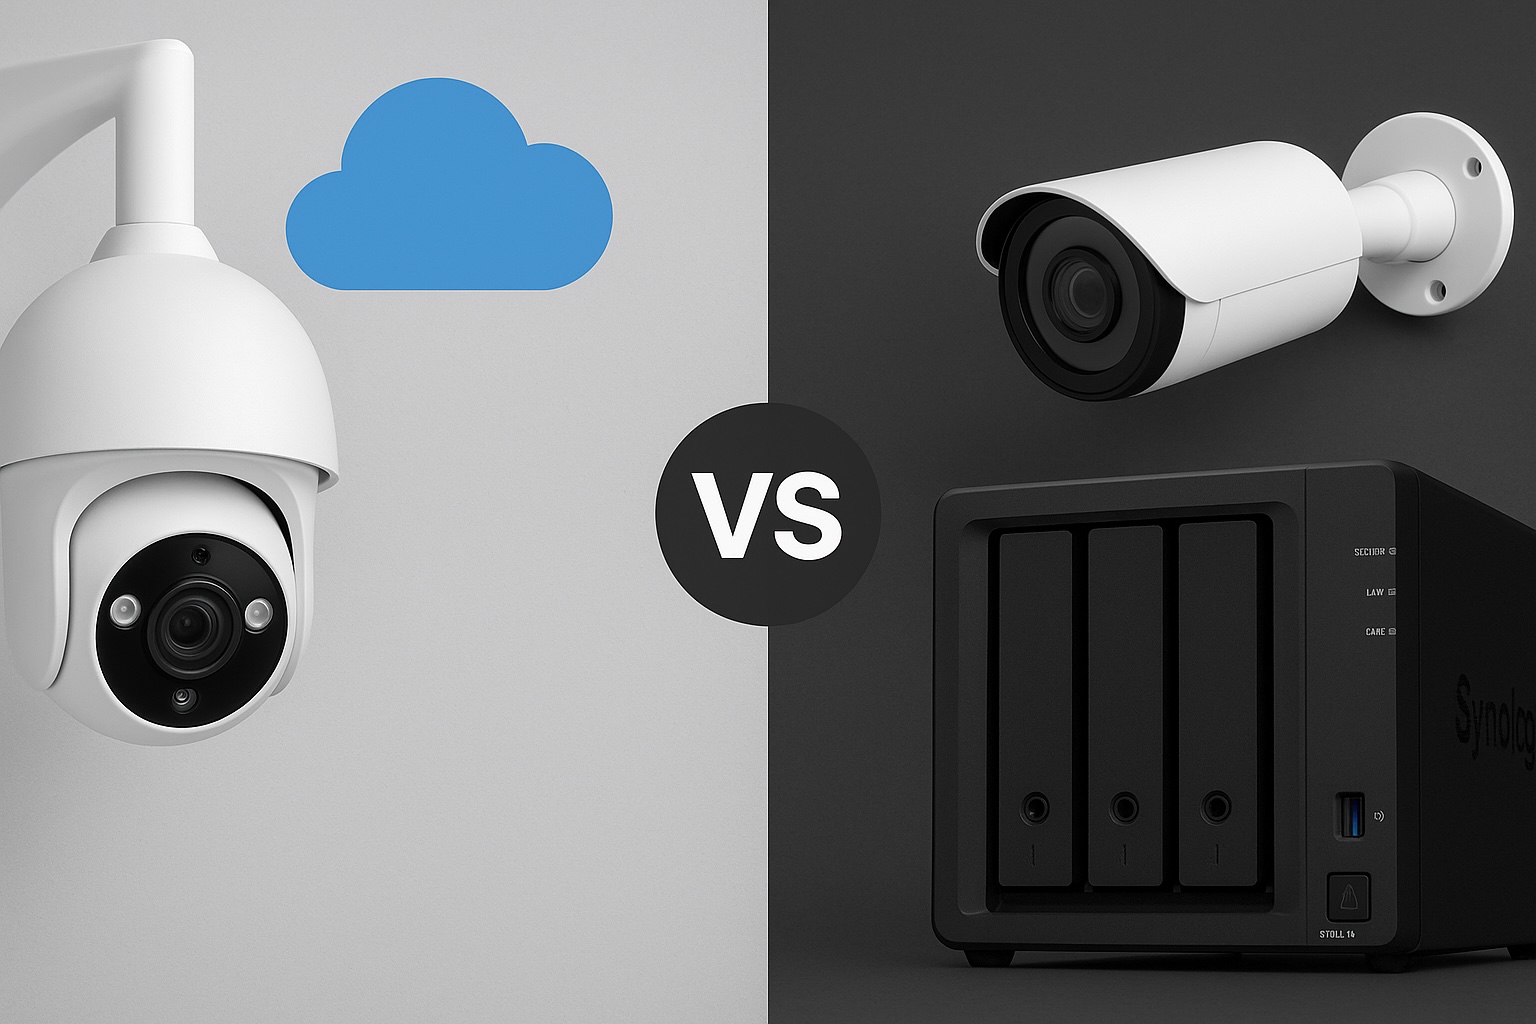
    When it comes to home security, pairing your camera system with your NAS (Network Attached Storage) can offer unbeatable advantages like local recording, improved privacy, and easy video management. If you’ve already invested in a NAS system, it makes sense to choose security cameras that integrate seamlessly. Personally, I use the UGREEN NASync DXP2800, so I’ll be highlighting options that work well with it throughout this guide. This guide covers the best NAS-compatible camera brands and models, highlighting why NAS compatibility matters and how it simplifies your home security setup.

    Why NAS Compatibility Matters

    Having a NAS-compatible security camera means:

    • Enhanced privacy: Videos stored locally mean no subscription fees or worries about cloud privacy. For instance, your home’s front door footage won’t be stored on a remote server, reducing the risk of unauthorized access.
    • Reliable storage: Continuous recording ensures you don’t miss important events, scheduled backups prevent data loss, and easy management helps you quickly review footage in case of incidents.
    • Integration: Cameras that support protocols like RTSP or ONVIF easily integrate with NAS systems, allowing seamless management through third-party apps or direct NAS interfaces, simplifying your overall workflow.

    For example, imagine a scenario where your Wi-Fi temporarily drops. With cloud-dependent cameras, you might lose critical footage. However, NAS-compatible cameras continue recording locally, ensuring continuous surveillance without interruptions.

    Top Camera Brands That Support NAS

    BrandRecommended ModelsResolutionConnectionPrice RangeKey Features
    ReolinkRLC-833A, RLC-511WA4K/5MPPoE/Wi-Fi\$\$Affordable, reliable, excellent NAS support
    HikvisionDS-2CD2043G0-I, DS-2CD2385G1-I4MP/8MPPoE\$\$\$Professional-grade quality, robust build
    Eufy SecurityEufyCam 2C, EufyCam 31080p/2KWi-Fi\$\$User-friendly, wireless convenience

    1. Reolink

    • Strengths: Reliable, excellent NAS compatibility, budget-friendly.
    • Best For: Users looking for excellent video quality, reliability, and easy NAS integration at a good price.

    2. Hikvision

    • Strengths: Professional-grade quality, advanced configuration, robust build.
    • Best For: Advanced users or those with complex setups requiring high-quality professional cameras.

    3. Eufy Security

    • Strengths: User-friendly, high-quality wireless cameras, no subscription required.
    • Best For: Users who prefer wireless flexibility with easy NAS integration and simple mobile app control.

    Quick Setup Experience with UGREEN NASync

    If you’re just getting started with Docker apps on your NAS, check out my post on must-have Docker containers for NAS beginners.

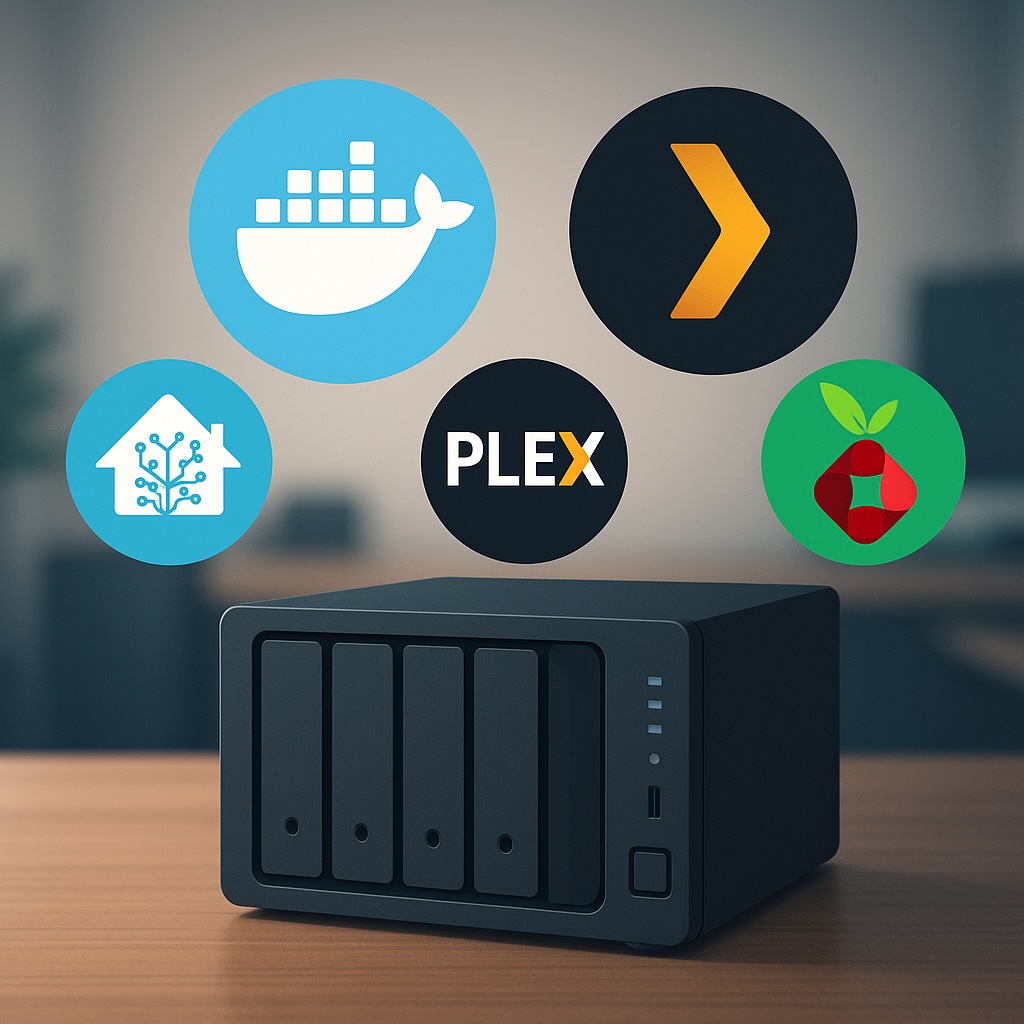
    UGREEN NASync doesn’t offer a native surveillance app like Synology’s Surveillance Station, but it supports Docker, allowing you to easily install lightweight NVR solutions. Here’s a simplified step-by-step overview to help you get started:

    1. Access Docker on your NAS: Open your UGREEN NASync web interface and navigate to the Docker application.
    2. Choose and Deploy Your NVR Solution: Search for “Frigate,” “Shinobi,” or “MotionEye” within Docker Hub and pull the image to your NAS.
    3. Configure Container Settings: Set the container’s environment variables, assign storage volumes for recordings, and map required ports.
    4. Launch and Access the Application: Start the container and access your chosen NVR via your browser using the assigned port (e.g., http://NAS_IP:port).
    5. Integrate Your Camera: Add your camera’s RTSP or ONVIF stream using its IP and login credentials within the app.

    Consider including screenshots of each stage to visually guide readers through the process, especially if they’re new to Docker setups.

    Local Storage vs. Cloud Storage Recap

    Local storage offers several clear advantages over cloud storage, especially in scenarios such as:

    • Network outages: If your internet connection goes down, local storage continues to function normally, recording and storing your footage without interruptions. In contrast, cloud-based systems might lose critical footage during outages.
    • Privacy-sensitive situations: If you’re concerned about data privacy or security breaches, local storage eliminates the risks associated with third-party cloud providers potentially mishandling your footage.
    • Long-term cost savings: While cloud storage often involves recurring subscription fees, investing in local storage via NAS means a one-time expense. For example, a household that runs multiple cameras continuously can save significantly in subscription fees over several years.
    • Customized storage management: You have full control over storage allocation, data retention periods, and backups, allowing for greater flexibility tailored specifically to your personal or business requirements.

    Best Use Cases

    • Home Entrances & Garages: Cameras from Reolink or Hikvision offer exceptional reliability and high-quality footage ideal for entryways and garages. For instance, the Reolink RLC-833A captures clear facial details even in low-light scenarios, significantly aiding in identification if an incident occurs.
    Example top-down layout showing various camera placements, including corridor mode on the side path and wide-angle coverage across driveways and entrances.
    • Baby Monitors & Indoor Surveillance: Eufy’s wireless cameras provide unmatched ease of use with mobile integration, perfect for parents monitoring babies or pets remotely.
    • Outdoor Surveillance: Hikvision and Reolink cameras are known for robust, weather-resistant construction.
    Reolink Standard View vs Corridor Mode: A side-by-side comparison showing how traditional 16:9 viewing (left) wastes vertical space in narrow areas, while corridor mode (right, 9:16) maximises coverage down long hallways or side paths.

    PoE vs. Wi-Fi Cameras: Which Should You Choose?

    • PoE (Power-over-Ethernet): Reliable wired connection, ideal for permanent installations, simpler cable management, highly recommended for outdoor setups.
    • Wi-Fi Cameras: Easier installation, ideal for renters or temporary setups, flexible camera placement but dependent on strong Wi-Fi.

    Choose PoE for reliability and Wi-Fi for flexibility based on your specific setup needs.

    What’s Next for My Setup

    I may also look at integrating object detection with Home Assistant on my NAS in the future. Beyond that, I plan to explore smart alerts, secure remote access, and making the most of corridor mode for tighter, vertical spaces — like a narrow side alley — where traditional wide-angle views aren’t efficient. These refinements aim to build a smart security system that’s both effective and privacy-conscious, without revealing sensitive home layout details.

    Common Mistakes to Avoid

    • Ignoring storage capacity needs.
    • Overlooking camera resolution compatibility with your NAS.
    • Improper network setup leading to bandwidth issues.

    Personal Insight: My Camera Journey

    If you’re not familiar with the UGREEN NASync, I reviewed it in detail here to help you understand what it’s capable of.

    I’m currently using Switchbot Wi-Fi cameras, which have served well for basic home monitoring, but I’ve experienced occasional connectivity drops and limitations in managing footage efficiently. Given my setup, which prioritises reliability, high-quality video, and seamless integration with my UGREEN NASync NAS, I’m strongly considering transitioning to Reolink PoE cameras.

    Specifically, I’m looking at the Reolink RLC-833A for front-facing or driveway monitoring due to its impressive 4K resolution, person and vehicle detection, and spotlight features. For areas like the backyard, where running Ethernet cables might be more difficult, the RLC-511WA seems like a perfect fit. I’ll be documenting this upgrade in future posts, including setup tips, integration steps, and performance insights. I’m also planning to use a camera with corridor mode for the narrow side path of my house — this setting optimises vertical viewing angles, making it ideal for covering long, narrow spaces without wasting frame area on walls or empty ground.


    By choosing NAS-compatible security cameras, you’re taking control of your home’s safety and enjoying seamless integration with your existing NAS setup. I’d love to hear your thoughts and experiences—feel free to comment below!

  • Which Type of Security Camera Is Right for You?

    Which Type of Security Camera Is Right for You?

    I’m currently in the process of upgrading my home security system. Until now, I’ve been using a mix of battery and solar-powered SwitchBot cameras. They seemed ideal at first, but real-world use has been frustrating. I live in an area that doesn’t get consistent sunlight, so the solar panels often fail to keep the cameras charged. Worse, I’ve had to take them down regularly just to recharge them manually. That’s fine once or twice, but it gets annoying fast.

    So I started looking into the most common types of cameras out there. Each has its pros and cons, different storage methods, and a range of features depending on how you want to use them. Here’s a breakdown of what I’ve learned so far, including whether they support local SD cards, cloud backups, or integration with a NAS if that’s something you’re interested in.


    Cloud-Focused Cameras (e.g. Nest, Arlo)

    Best for: Users who want app-based access and minimal setup

    These cameras are designed to work as part of a broader smart home ecosystem. They often come loaded with features like face detection, voice alerts, and smart notifications. If you want a plug-and-play solution that lives inside a polished mobile app, they’re hard to beat. But they also come with limitations.

    Pros:

    • Very easy to set up
    • Smart features are built-in
    • Great mobile app support

    Cons:

    • Most features require a subscription
    • Local storage is limited or unavailable
    • You are locked into a vendor’s ecosystem
    • No support for NAS or open protocols like RTSP or ONVIF

    Storage:

    • Cloud storage is standard, but often limited without a paid plan
    • A few models support local SD or USB via a hub
    • Not compatible with NAS or custom storage solutions
    Hand mounting a Nest cloud-based security camera onto a magnetic wall mount in a modern indoor setting
    A Nest-style cloud camera — polished, app-friendly, but dependent on subscriptions for storage.

    Battery-Powered Cameras

    Best for: Outdoor areas without a nearby power source

    Battery-powered cameras are incredibly flexible. You can mount them anywhere without worrying about outlets or wiring. Most come with SD card support and mobile alerts when motion is detected. But there’s a tradeoff. Because they rely on batteries, they only record on motion and will need recharging — sometimes more often than expected.

    Pros:

    • Completely wireless, easy to install anywhere
    • Most offer SD card recording
    • No cables required

    Cons:

    • Needs to be taken down for recharging
    • Can’t record continuously
    • Limited smart features unless paired with a subscription service
    • No direct NAS support

    Storage:

    • Local SD card recording is common
    • Access through vendor app
    • Not suitable for NAS storage
    Cutaway view of a battery-powered outdoor security camera showing internal battery and circuit components
    Inside a typical battery-powered camera. Easy to install, but recharging gets old fast.

    Solar-Powered Cameras

    Best for: Remote areas where recharging manually isn’t an option

    These are essentially battery-powered cameras paired with solar panels. In the right environment, they can keep running for months without manual charging. In the wrong environment — like my home with limited sunlight — they become unreliable and frustrating.

    Pros:

    • Self-recharging in sunny areas
    • Great for off-grid setups
    • Flexible placement

    Cons:

    • Performance depends heavily on sunlight exposure
    • Still motion-only recording
    • Same SD and cloud storage limitations as battery models
    • Not compatible with NAS

    Storage:

    • SD card storage is usually included
    • Some brands offer optional cloud storage
    • NAS integration is not supported
    Outdoor solar-powered security camera mounted under an eave, connected to a solar panel with a visible cable
    A wall-mounted outdoor camera connected to a small solar panel for continuous charging.

    Wi-Fi Cameras (Plug-In)

    Best for: Indoor or sheltered outdoor locations with power access

    Wi-Fi cameras that plug into a wall are a nice middle ground. They remove the battery hassle and, depending on the model, may support RTSP or ONVIF, which opens the door to NAS use. They’re still dependent on your Wi-Fi network, though, so placement and signal strength matter.

    Pros:

    • Easy setup with permanent power
    • Many support smart features like motion zones
    • Some are compatible with NAS via RTSP or ONVIF

    Cons:

    • Needs to be placed near a power outlet
    • Wi-Fi interruptions can affect performance
    • Not all support local recording or open protocols

    Storage:

    • Often includes SD card support
    • Optional cloud storage
    • Limited NAS support depending on the model
    Indoor plug-in Wi-Fi security camera on a kitchen counter with visible power cable
    An indoor plug-in camera setup — simple to install but needs to stay near a socket.

    PoE (Power over Ethernet) Cameras

    Best for: Long-term, reliable setups with full storage control

    This is the route I’m planning to take. PoE cameras use a single Ethernet cable to provide both power and data, making them ideal for stable connections and continuous recording. They work extremely well with NAS systems like Frigate, MotionEye, or Synology Surveillance Station. While installation takes more effort, the reliability and flexibility are worth it.

    I’m currently exploring how to integrate a PoE camera system into my NAS setup to enable local recording and give me full control over my footage without relying on the cloud.

    Pros:

    • One cable for power and data
    • Stable connection with no Wi-Fi dropouts
    • Usually support RTSP and ONVIF
    • Perfect for NAS and continuous recording

    Cons:

    • Installation can be time-consuming
    • Requires PoE switch or injector
    • You’ll need to run Ethernet cables through your home

    Storage:

    • Full NAS integration supported
    • Local SD card or cloud may also be available
    • Excellent for 24-hour recording with alerts
    Diagram of Reolink PoE and Wi-Fi security camera system connected to a PoE switch, router, and NVR
    A look at a full PoE camera system setup — reliable, scalable, and ideal for NAS integration

    Storage Options at a Glance

    Storage TypeProsCons
    CloudAccessible from anywhere, simple to set upPrivacy concerns, recurring subscription fees
    SD CardLocal and private, no subscription requiredLimited capacity, footage only accessible via device
    NASCentralised, scalable, privateRequires setup and compatible hardware

    Quick Checklist: What’s Best for You?

    ✅ I want something easy to set up, no cables, and don’t care much about recording control

    → Cloud-Focused Camera

    ✅ I don’t have outdoor power and want flexibility

    → Battery Camera (but be ready to recharge it)

    ✅ I live in a sunny area and don’t want to climb a ladder to recharge

    → Solar Camera

    ✅ I have power outlets near the camera and want better reliability

    → Wi-Fi Camera

    ✅ I want full control, 24/7 recording, and local storage through NAS

    → PoE Camera


    Final Thoughts

    Every camera type has its place. If you just want to keep an eye on your front door and get notifications on your phone, a cloud-first model or SD card camera might be enough. But if you’re tired of recharging batteries or you want more control over your footage, it might be time to think bigger.

    For me, the tipping point was having to regularly take down cameras just to recharge them and not being able to rely on solar panels. I’m moving to PoE to get a more stable, scalable solution.

    Next time, I’ll be comparing different camera brands and what each one does well, so you can choose the right fit for your setup.

  • UGREEN NASync DXP2800 Review After 2 Months of Daily Use

    UGREEN NASync DXP2800 Review After 2 Months of Daily Use

    When I first picked up the UGREEN NASync DXP2800, I was looking for a cost effective, quiet, and beginner friendly way to run containers and back up devices around the house. Two months later, it’s fair to say this NAS has earned its place in my setup, but it’s also time to move on.

    This will be my last post dedicated to the DXP2800. Not because it’s failed me, but because I’ve reached a point where the NAS is no longer the centrepiece. It’s now just one part of a much larger smart home and self hosting ecosystem. So before I pivot to new topics, here’s my final verdict on the DXP2800.

    Key Specs (Quick Overview)

    • CPU: Intel N100 (4 cores)
    • RAM: 8GB DDR5 (upgradeable)
    • Drive Bays: 2 (3.5/2.5 inch)
    • Networking: 2.5GbE
    • Expansion: Dual M.2 NVMe slots
    • Video Output: HDMI
    • OS: UGOS (Linux based)

    🛒 Looking to buy the NAS featured in this review?

    💡 Need more bays?

    These are affiliate links — if you purchase through them, I may earn a small commission at no extra cost to you. Thanks for supporting the blog!

    Build Quality and Noise

    The DXP2800 is solidly built and looks great on a desk. It runs quietly if you’re using SSDs instead of HDDs, but when using spinning drives, the noise is noticeable, though not awful. All NAS systems will face the same reality with HDDs, so it’s not a unique issue to this model.

    Reviewers across several tech sites have praised the DXP2800’s design. The aluminium alloy chassis gives it a premium feel, and the magnetic dust filter and tool less drive bays are practical and appreciated. For a 2 bay system, it punches above its weight in design quality.

    Performance

    I’ve tested a range of Docker containers like Home Assistant, Pi hole, and others, and the NAS handled everything I tried smoothly. The Intel N100 and 8GB of DDR5 RAM offer more than enough headroom for most home lab needs, especially if you’re not using heavy VM workloads.

    While I don’t run Portainer, Plex, or Jellyfin myself, I recommended them in a previous post based on community feedback and ease of use. Docker itself runs reliably, and containers have been easy enough to deploy manually without needing a GUI.

    The inclusion of a 2.5GbE port and dual M.2 NVMe slots is another bonus, especially for users who want SSD caching or faster read/write operations. Some reviewers noted the lack of a second Ethernet port, but for most home users, it’s not a dealbreaker.

    Software (UGOS)

    UGOS is still developing, but I’ve personally had no issues with it. Everything works as expected. While some reviewers have pointed out that it’s not as polished as Synology’s DSM or QNAP’s QTS, I’ve found it stable and reliable for my needs.

    Once Docker was installed and configured, I rarely needed to interact with UGOS directly. It stays out of the way and hasn’t caused any crashes, slowdowns, or compatibility issues.

    Interestingly, users of the larger DXP4800+ model have echoed this sentiment. One community member reported using it to run Home Assistant in a VM, stream music and video, back up mobile photos automatically, and edit documents via ONLYOFFICE. They were particularly impressed with the unified web portal and mobile app, which simplified access and syncing across devices. They also noted that UGOS receives frequent updates and has continued to evolve, with features like object recognition, OCR, and AI tagging in the photo app.

    While there are still some gaps like limited mobile document editing and occasional network filtering issues when accessing remotely, it’s clear UGOS is heading in a promising direction.

    Real World Use

    Currently, I use the DXP2800 for:

    • Running Home Assistant to manage smart home devices
    • Hosting some personal files and containers

    I also installed Pi hole, but haven’t directed network traffic through it yet due to limitations with my router hardware.

    While I’ve recommended other containers in my previous post like Navidrome, Frigate, WireGuard, and media servers, I’m not using those myself. They’re great options depending on your needs and future plans.

    I’m also exploring PoE camera setups and considering Frigate as part of that project, so the NAS may take on a bigger role in home surveillance later down the line.

    Recent discussions suggest that Frigate does in fact run well on these NASync models. One user reported it handled four IP cameras with total CPU usage sitting around twenty percent. Others have noted ffmpeg can push CPU load higher, especially on older or lower power chips, but the Intel N100 in the DXP2800 should handle light to moderate workloads comfortably. Using a Coral TPU is also being explored in the community to offload object detection, which could be worth looking into if I go that route.

    Protecting Your NAS with the UGREEN US3000 UPS

    After two months of non-stop uptime, it’s clear that stable power is just as important as good hardware. A brief outage can interrupt writes or risk drive corruption — something no NAS owner wants to deal with. That’s why I’ve added the UGREEN US3000 UPS to my setup.

    This compact 120 W DC UPS is designed specifically for NASync devices and integrates directly with UGOS Pro. Once connected via DC and USB-C, it’s detected automatically and lets you configure auto-shutdown or short standby modes under Control Panel → Hardware & Power → UPS. Setup takes just a few minutes and adds complete peace of mind for unattended operation.

    It runs silently, provides around ten minutes of backup for the DXP2800, and ensures a clean, controlled shutdown every time. If you’d like a deeper look at performance, build quality, and teardown details, check out my full UGREEN US3000 UPS Review.

    Would I Still Recommend It?

    Yes, with a few caveats.

    If you want to run Docker apps, manage your own services, and don’t mind using community resources for support, the DXP2800 is a solid deal for the price. If you prefer a more polished software experience, plug and play apps, or long term vendor support, Synology might be a better fit.

    That said, I’ve been impressed by how far UGREEN have come in a short time. Their software updates have been consistent and meaningful, and the platform feels like it’s improving month by month. Compared to Synology’s latest hardware restrictions, like requiring branded drives, UGREEN’s more open approach could be a major draw for anyone looking to build a flexible and affordable home setup.

    For me, it’s hit the sweet spot. Powerful enough to do what I want, flexible enough to grow with me, and affordable enough that I didn’t feel like I was buying into an overkill system.

    What’s Next?

    This will be my last focused post on the DXP2800. Moving forward, I’ll be looking at:

    • Choosing PoE cameras for home security
    • Setting up Frigate properly with Coral or NPU support (if needed)
    • Automating alerts and recordings with Home Assistant
    • Managing local and cloud storage for recordings

    The NAS will still be a part of that, but it’s no longer the star.

    If you’re following along for the self hosting journey, the next few posts should be right up your alley. If you’re curious about camera compatibility, Frigate setups, or how this NAS holds up as an NVR, stay tuned — that’s what’s next.

    Want to stay in the loop? Follow the blog or drop a comment if there’s a specific setup you’re curious about. I’ll be diving into smart security next.

  • 10 Best Docker Containers to Supercharge Your NAS

    10 Best Docker Containers to Supercharge Your NAS

    For Beginners & Tinkerers Alike

    Why Docker on a NAS?

    If you’re running a NAS like the UGREEN NASync DXP2800, Synology, or any other x86-based box, Docker is where things start to get fun. Containers let you run lightweight, modular apps that give your NAS way more functionality — without needing a full-blown VM or extra hardware.

    Docker makes it easy to deploy apps in isolated environments, meaning you can try things out without worrying about breaking your whole system. They’re fast to spin up, easy to update, and work consistently across different systems. And the best part? You don’t need to be a hardcore Linux user to make the most of them.

    Below are ten of the best Docker containers you can run on your NAS — a handpicked mix of essential utilities, media servers, privacy tools, and smart home apps that turn your box into a true home server. that will make your NAS feel more like a full home server.


    1. Home Assistant

    Smart home control on your terms

    If you’ve dipped your toe into smart home automation, you’ve probably already heard of Home Assistant. It’s a powerful, open-source platform that lets you integrate and automate just about every smart device imaginable — lights, sensors, switches, thermostats, and even your TV.

    Running Home Assistant in Docker is a great way to keep it separate from your main system while still enjoying all its features. It supports local control, so you’re not reliant on cloud services (great for privacy), and it’s constantly being improved by a huge community. Whether you’re just starting with a few SwitchBot devices or building a full-blown smart home, Home Assistant is a game-changer.

    Pair it with MQTT and Zigbee2MQTT for even more flexibility — both of which you can also run in Docker.

    Start here with my Smart Home Network Setup Guide.


    2. Mosquitto (MQTT Broker)

    Behind-the-scenes magic for smart homes

    Mosquitto is a lightweight message broker that uses the MQTT protocol — a key part of many smart home setups. If you’re running Home Assistant, Zigbee2MQTT, or any device with Tasmota firmware, you’ll likely need an MQTT broker to allow devices to communicate reliably.

    Mosquitto doesn’t have a fancy interface, but that’s by design. It’s incredibly efficient, fast, and stable. Once set up, it just runs in the background passing messages between your devices and services. You won’t interact with it much, but it’s a critical cog in the machine for those looking to build a local-first automation system.


    3. Plex or Jellyfin

    Your own personal Netflix (and more)

    If you’ve got a library of media — movies, TV shows, home videos — Plex and Jellyfin turn your NAS into a full-fledged streaming platform. Plex offers a polished UI and optional remote streaming features, while Jellyfin is the go-to for open-source purists who want everything self-hosted.

    These containers are easy to get up and running, especially if your media is already well-organised. Plex can pull in metadata, posters, subtitles, and more, and supports nearly every device under the sun. Jellyfin is a bit more hands-on but avoids subscriptions or locked features.


    4. Navidrome

    Spotify vibes, minus the monthly fee

    Have a huge collection of MP3s or FLAC files from back in the day? Navidrome breathes new life into local music libraries by turning your NAS into a private music streaming service. Think of it as Spotify for your own collection.

    The interface is clean and responsive, and it integrates with apps like Substreamer or Symfonium. It supports smart playlists, scrobbling to Last.fm, album art, and more. Plus, it’s extremely lightweight and can run on almost any system — making it a great fit for your NAS.


    5. Pi-hole

    Block ads for your whole network

    If you’ve never used Pi-hole before, prepare to be amazed at how much cleaner the internet can be. It acts as a DNS server that blocks ads, trackers, and malicious domains before they ever reach your devices. Set it once, and every device on your network benefits — phones, tablets, smart TVs, even IoT devices.

    Running Pi-hole in Docker is simple, and the dashboard gives you a detailed look at what’s being blocked. You can also manually whitelist or blacklist domains and pair it with Unbound for encrypted DNS.

    Pi-hole gives you a real-time view of DNS queries and blocked domains.

    6. WireGuard

    Access your home network from anywhere

    WireGuard is a modern VPN protocol designed to be fast, simple, and secure. When run on your NAS, it allows you to create a secure tunnel into your home network — perfect for accessing files, media servers, or smart home dashboards while away.

    It’s incredibly lightweight, quick to set up, and performs well even on modest hardware. Once configured, you can connect from your phone, laptop, or tablet and use your home network as if you were physically there. Whether you’re self-hosting your VPN server or connecting to a cloud-hosted instance, WireGuard offers a great balance between ease of use and strong encryption.


    7. Frigate (Advanced)

    Smart surveillance, powered by AI

    Frigate is an AI-based NVR (Network Video Recorder) that detects people, cars, and more in real time using your cameras — all without relying on the cloud. Unlike most camera apps that flood you with motion alerts for every leaf or shadow, Frigate focuses on what matters.

    It’s designed to work best with Coral AI accelerators for fast detection, but it can also run on CPUs or GPUs. It integrates well with Home Assistant and supports real-time notifications, event clips, and camera dashboards.

    Frigate uses AI to detect people, cars, and more — without the cloud.

    I’m currently researching Reolink’s PoE cameras as part of my own upgrade, so expect a deeper dive soon.


    8. Portainer

    Manage Docker without the command line

    Not everyone enjoys messing with the terminal, and that’s where Portainer shines. It gives you a web-based GUI for managing your Docker containers, volumes, networks, and images. You can see logs, update images, stop/start containers, and even deploy new ones — all from your browser.

    Portainer makes managing Docker containers accessible even for beginners.

    It’s great for beginners and pros alike. Even if you’re comfortable with Docker CLI, Portainer makes managing a growing stack of services way more convenient.


    9. FileBrowser

    A better way to access your NAS files

    Most NAS units have some sort of file management tool, but they’re often basic or clunky. FileBrowser is a slick web app that lets you browse, upload, rename, and share files via your browser. It even works well on mobile.

    You can create user accounts with specific permissions, set up public file shares, and preview images or documents right in the UI. It’s fast, lightweight, and a big improvement over standard Samba or FTP setups for everyday file access.


    10. Uptime Kuma

    Know when things break (before someone else does)

    Whether you’re self-hosting multiple services or just want to make sure your NAS is always online, Uptime Kuma is a must. It’s a beautiful, self-hosted status monitor that pings your apps, websites, or IPs and lets you know if they go down.

    You can customise alerts, set up dashboards, and even monitor services hosted outside your home network. It’s surprisingly feature-rich, and the UI is clean and easy to navigate. Once it’s up and running, it becomes one of those “how did I live without this?” tools.


    Where Should You Start?

    If you’re new to Docker and NAS apps in general, start with Pi-hole, Portainer, and Plex or Jellyfin. They’re easy to install, give immediate results, and don’t require much maintenance.

    When you’re ready to level up, move on to Home Assistant and WireGuard. They’ll open the door to deeper control of your smart home and remote access setup.

    And if you’re serious about home security and privacy, keep an eye on Frigate — especially if you’re considering upgrading to PoE cameras like Reolink.


    💡 New to Docker?
    Start by installing Portainer — it gives you a simple dashboard to deploy and manage containers without the command line.

    Got a favourite container I didn’t mention?
    Whether you’re deep into automation or just starting out, I’d love to hear what you’re running on your NAS. Drop it in the comments — I’m always on the lookout for new setups to try.

    Want to Dive Deeper?

    Here are a few more posts that expand on ideas in this article:

    More tutorials, setup guides, and automation tips are on the way!

  • Automated NAS Backup to Azure with rclone: UGREEN NAS Guide

    Automated NAS Backup to Azure with rclone: UGREEN NAS Guide

    Backing up your NAS is essential to protect against data loss from hardware failure, theft, or natural disasters. In this guide, I’ll walk you through how I set up a backup from my UGREEN NASync DXP2800 to Azure using rclone, based on the exact process I followed. Each step includes context so you understand not just how to do it, but why.

    Why Azure?

    Azure is a robust cloud storage option offering high reliability, excellent redundancy, and flexible access tiers specifically designed for backup and archiving. While Azure doesn’t provide a permanent free tier (unlike services such as Google Drive), it does offer generous trial credits to new users. To minimise ongoing storage costs without these credits, I recommend using the Cool or Archive storage tiers—both ideal for backups that don’t require frequent access.

    Other options: rclone supports a wide range of cloud providers. Here are a few great alternatives:

    • Backblaze B2 – Very affordable, especially for large backups. Well-supported by rclone.
    • Google Drive – Great for personal backups. Offers 15GB free and integrates easily.
    • Wasabi – Flat-rate pricing and no egress fees. A strong S3-compatible choice.
    • Dropbox – Easy to use with good syncing capabilities, though pricing can be high for large storage needs.
    • Amazon S3 – Enterprise-grade option, scalable but more complex to configure and can get expensive.

    You can easily substitute Azure in this guide with one of the above by changing the remote configuration step.

    Step 1: Generate rclone Configuration File

    To make rclone work from Docker, I first created a persistent config file using a temporary container:

    docker run -it --rm \
      -v /mnt/data/rclone-config:/config \
      --env XDG_CONFIG_HOME=/config \
      rclone/rclone config

    Walk through the prompts:

    • Select n to create a new remote.
    • Name it something like myremote (avoid using your NAS or personal name).
    • Select storage type 34 for Azure Blob Storage.
    • Enter your Azure Storage Account Name for account.
    • Enter your Access Key for key.
    • Leave endpoint blank.
    • Skip advanced config and auto config by selecting n.

    Once complete, the config will be saved as /mnt/data/rclone-config/rclone.conf on your NAS, ready for Docker containers to use.

    🛠️ Tip: To test that it works:

    docker run --rm \
      -v /mnt/data/rclone-config:/config \
      --env XDG_CONFIG_HOME=/config \
      rclone/rclone:latest lsd myremote:mycontainer \
      --config="/config/rclone.conf"

    Step 2: Create the Backup Script

    This script is broken into three parts: syncing data, deleting older backups, and emailing on failure. Each part is explained below.

    I wanted versioned backups and automatic cleanup of older ones. Here’s the exact script I used:

    #!/bin/sh
    
    LOG_FILE="/mnt/data/rclone-config/monthly_backup.log"
    CONFIG="/mnt/data/rclone-config/rclone.conf"
    REMOTE="myremote:mycontainer"
    BACKUP_NAME="nas-backup-$(date +%Y-%m)"
    DELETE_DATE=$(date -d "4 months ago" +%Y-%m)
    OLD_BACKUP_NAME="nas-backup-$DELETE_DATE"
    
    # 🔁 Sync Step – Copy /volume1 to a dated backup folder
    docker run --rm \
      -v /volume1:/data \
      -v /mnt/data/rclone-config:/config \
      --env XDG_CONFIG_HOME=/config \
      rclone/rclone:latest sync /data "$REMOTE/$BACKUP_NAME" \
      --config="/config/rclone.conf" \
      --log-file="/config/monthly_backup.log" \
      --log-level INFO \
      --exclude "@tmp/**"
    
    # 🧹 Retention Step – Delete backups older than 4 months
    docker run --rm \
      -v /mnt/data/rclone-config:/config \
      --env XDG_CONFIG_HOME=/config \
      rclone/rclone:latest purge "$REMOTE/$OLD_BACKUP_NAME" \
      --config="/config/rclone.conf"
    
    # 📧 Notification Step – Email if backup fails
    if [ $? -ne 0 ]; then
      echo "NAS Backup failed. See log below:" | mail -s "NAS Backup FAILED" you@example.com < "$LOG_FILE"
    fi

    📌 Note: Replace myremote and mycontainer with your rclone remote and Azure Blob container name. Avoid using identifiable names like your NAS hostname.

    Step 3: Enable Email Reporting on Your NAS

    To enable email alerts for failed backups, I used the built-in mail command entirely through SSH — no GUI or additional packages were needed.

    What I did:

    1. SSH into your NAS:
       ssh your-nas-username@your-nas-ip
    1. Test email functionality:
       echo "Test message" | mail -s "Test Email" you@example.com

    If you receive the test email, your NAS is already configured to send system emails.

    1. Check your mail config (if test mail fails):
      The system uses msmtp under the hood on many embedded NAS environments. Create or edit the config:
       vi /opt/etc/msmtprc

    Example configuration (for Gmail):

       defaults
       auth           on
       tls            on
       tls_trust_file /etc/ssl/certs/ca-certificates.crt
    
       account default
       host smtp.gmail.com
       port 587
       from your.email@gmail.com
       user your.email@gmail.com
       password your_app_password
       logfile /opt/var/log/msmtp.log
    1. Make sure permissions are correct:
       chmod 600 /opt/etc/msmtprc
    1. Export the config path if needed (some systems require this):
       export MSMTP_CONFIG=/opt/etc/msmtprc
    1. Retry your test email:
       echo "Test message" | mail -s "Test Email" you@example.com
    1. Add to your script:
      Make sure your backup script includes:
       if [ $? -ne 0 ]; then
         echo "NAS Backup failed. See log below:" | mail -s "NAS Backup FAILED" you@example.com < "$LOG_FILE"
       fi

    ✅ If your provider uses two-factor authentication, use an app-specific password. Most mail issues come down to wrong SMTP server, port, or missing trusted certs.

    Step 4: Schedule the Script with Cron

    To automate your backups, schedule the script using cron:

    Edit your crontab by running:

    crontab -e

    Then, add the following line:

    30 2 1 * * /volume1/scripts/backup_to_azure.sh

    Here’s what these numbers mean:

    • 30: Minute (0-59)
    • 2: Hour (0-23, where 2 is 2:00 AM)
    • 1: Day of the month (1-31)
    • *: Month (1-12, * means every month)
    • *: Day of the week (0-6, Sunday=0, * means every day)

    In this example, the backup script runs automatically at 2:30 AM on the 1st day of every month. Adjust these numbers according to your preferred backup schedule.

    ✅ Why this schedule? Monthly snapshots avoid daily clutter and keep backups manageable.

    Step 5: Verify Your Backups

    Confirm everything’s working with:

    cat /mnt/data/rclone-config/monthly_backup.log

    And list current backup folders:

    docker run --rm \
      -v /mnt/data/rclone-config:/config \
      --env XDG_CONFIG_HOME=/config \
      rclone/rclone:latest lsd myremote:mycontainer \
      --config="/config/rclone.conf"

    🔄 Optional Enhancements

    🔐 Encrypt Your Backups

    Want extra protection? Add a second rclone remote (type crypt) that wraps your Azure remote:

    rclone config
    • Create new remote myremote-crypt
    • Type: crypt
    • Remote: myremote:mycontainer
    • Set a strong password and salt

    Then replace the backup target in your script with:

    myremote-crypt:$BACKUP_NAME

    🔍 Restore Test

    Try restoring a test file from Azure to confirm you can actually recover data if needed:

    docker run --rm \
      -v /volume1/test-restore:/restore \
      -v /mnt/data/rclone-config:/config \
      --env XDG_CONFIG_HOME=/config \
      rclone/rclone:latest copy myremote:mycontainer/nas-backup-2025-05/testfile.txt /restore \
      --config="/config/rclone.conf"

    🧩 Troubleshooting & FAQ

    Q: My backup failed with a permissions error—how do I fix it?

    A: Make sure your Docker container has read permissions for /volume1 and that the rclone configuration (rclone.conf) is properly mounted. Also, confirm file permissions with chmod 600.

    Q: I received a network error during my backup—what can I do?

    A: Add retry options to your rclone sync command to enhance resilience against temporary network issues:

    --retries 5 --low-level-retries 10

    Q: My email notifications aren’t being sent—how do I troubleshoot this?

    A: Ensure the built-in mail command on your NAS works by testing from SSH:

    echo "Test Email" | mail -s "Test" you@example.com

    If it doesn’t, verify SMTP configuration (see Step 3 above).

    Q: How can I avoid hitting Azure bandwidth or cost limits?

    A: Use bandwidth limiting during uploads with:

    --bwlimit=8M

    Additionally, choose the “Cool” or “Archive” Azure tiers for cost efficiency.

    Q: Can I use another cloud provider instead of Azure?

    A: Absolutely! rclone supports many services like Backblaze B2, Google Drive, Dropbox, Wasabi, and Amazon S3. You simply adjust the remote setup step accordingly.

    Final Thoughts

    You now have automated, secure, and reliable backups ready to protect your valuable data. Have you tried setting this up yourself yet? I’d love to hear your experiences, challenges, or ideas for enhancements in the comments below. Happy backing up!

    If you’re interested in other NAS setups and configurations, you might find these previous posts helpful:

    Let me know if there are other topics you’d like to see covered!

  • How to Install Home Assistant on the UGREEN NASync Series Using Docker

    How to Install Home Assistant on the UGREEN NASync Series Using Docker

    Introduction

    After getting my UGREEN NASync DXP2800 set up, the next logical step was bringing my smart home devices under one roof.
    With its compact size, low power consumption, and full Docker support, the DXP2800 is a perfect hidden powerhouse for running Home Assistant.
    Rather than setting up another Raspberry Pi or a VM, I decided to run Home Assistant directly in Docker on the DXP2800 for a cleaner, more efficient setup.

    Quick Update:
    In my last post, I mentioned setting up lightweight apps like Pi-hole and Plex.
    After exploring it further, I decided to hold off on Plex for now — personally, I don’t need a media server since I’m not storing my own movies or shows.

    I’m planning to try setting up Pi-hole soon as a local DNS blocker. However, since I’m based in Japan, and local ISPs tend to lock down their routers pretty tightly, it might need a few extra workarounds. Either way, I’ll share how it goes — whether it’s a full setup guide or lessons learned trying to get it working.

    I also spent some time working on setting up an OpenVPN tunnel. The original plan was to host an OpenVPN server on Azure and route only my Fire Stick’s traffic through the VPN, without affecting the rest of my home network. After running into some technical hurdles, I decided to simplify things for now — I’m currently connecting my MacBook directly to the TV when needed, and planning to pick up an Apple TV 4K later to streamline streaming even further.

    As always, if you have questions, or there’s a specific setup you want to see covered, drop a comment below — happy to help!

    If you’re completely new to the UGREEN NASync series, you might want to check out my earlier post where I set up the NASync DXP2800 from scratch: Setting up the UGREEN NASync DXP2800 – A Beginner-Friendly Guide.

    Now that you know why Home Assistant is a great choice, let’s get it installed.


    Why Home Assistant?

    • Free, open-source smart home platform.
    • Supports thousands of integrations.
    • Centralises your entire smart home without cloud dependence.
    • Running it on the NAS keeps everything in one place and easy to manage.

    What You’ll Need

    • UGREEN NASync series unit
    • Docker installed (via App Center)
    • Bluetooth dongle (optional but recommended for Bluetooth devices)
    • I used the TP-Link UB500 — Bluetooth 5.0 and works flawlessly
    • Access to your NAS’s IP address and admin account

    Let’s move on to installing Home Assistant on your DXP2800.

    🖥️ The NAS used in this setup:

    💡 Need more bays?

    🧩 Bluetooth adapter I used for Home Assistant:

    These are affiliate links — if you decide to buy through them, it supports the blog at no extra cost to you. Thanks!


    Installing Home Assistant in Docker

    Option 1: Using the UGREEN NAS Interface (Recommended)

    UGREEN’s built-in Docker app makes container setup simple, even for beginners.

    Step 1: Install the Docker App

    • Open the App Center on your NAS.
    • Search for and install Docker.

    Step 2: Download the Home Assistant Image

    • Go to Docker > Image > Image Database.
    • Search for:
      homeassistant/home-assistant
    • Click Download to pull the image onto your NAS.

    Step 3: Create the Home Assistant Container

    • Go to Docker > Container > New Container.
    • Choose the homeassistant/home-assistant image you just downloaded from the Image Database.

    Configure the container:

    • Container Name: homeassistant
    • Network Mode: Host
    • Restart Policy: Always
    • Volume Mapping:
    • Host path: /docker/homeassistant/config (or your preferred location)

    Important: Enable Privileged Mode

    • When setting up the container, scroll down and tick Privileged Mode (this is essential if you want Bluetooth devices like SwitchBot to work).

    ✅ Once created, Home Assistant will launch and you can access it at:

    http://[NAS-IP]:8123

    If you prefer using command line for finer control, here’s how to set it up via SSH.


    Option 2: Installing via SSH (Optional / Advanced)

    Note:
    Depending on your NAS settings, you may need to prefix the following commands with sudo.
    For example, use sudo docker pull homeassistant/home-assistant instead of docker pull homeassistant/home-assistant.

    Prefer full control over your setup? Here’s how to do it manually via SSH.

    Step 1: SSH into Your NAS

    ssh [your-username]@[NAS-IP]

    Step 2: Pull the Home Assistant Image

    docker pull homeassistant/home-assistant

    Step 3: Run Home Assistant with Privileged Mode

    docker run -d \
      --name homeassistant \
      --privileged \
      --network host \
      --restart unless-stopped \
      -v /docker/homeassistant/config:/config \
      homeassistant/home-assistant

    ✅ Same result — Home Assistant running and Bluetooth-ready.


    Quick Comparison

    MethodBest ForProsCons
    NAS InterfaceBeginnersEasy, visual, no command line neededMight not suit users who want full CLI control
    SSH CLIAdvanced usersFull control, scripting flexibilityRequires SSH access and basic Docker knowledge

    Now that Home Assistant is installed and running, let’s move onto adding Bluetooth devices if you need them.


    Setting Up Bluetooth Devices like SwitchBot (Optional)

    If you want to control Bluetooth smart home devices, here’s how to set it up.

    Hardware Used:

    • Bluetooth Dongle: TP-Link UB500 (Bluetooth 5.0)

    How to Enable Bluetooth Support:

    1. Plug in the TP-Link UB500 to one of your NAS’s USB ports.
    2. Verify Bluetooth Detection:
      SSH into your NAS and run:
       lsusb

    Look for something like:

       Bus 002 Device 003: ID 2357:0604 TP-Link UB500 Adapter
    1. Home Assistant Detection:
    • Home Assistant should auto-detect the Bluetooth adapter after restarting.
    • You can then add integrations like SwitchBot easily.

    Pro Tip: If your NAS is tucked away in a cabinet or has weak Bluetooth range, using a short USB extension cable can dramatically improve signal reception.

    Adding SwitchBot Devices:

    • Go to Settings > Devices & Services.
    • Click + Add Integration, search for SwitchBot.
    • Follow the prompts to pair devices.

    First Steps After Installation

    Once Home Assistant was up and running, here’s what I did first:

    • Set up geofencing automations using the Home Assistant mobile app:
    • When I leave the house, my lights automatically turn off.
    • When I arrive home, certain lights turn on.
    • Created a few basic backups (snapshots) of my configuration, just in case anything went wrong.
    • Explored integrations like SwitchBot, lights, and sensors to start building out my smart home.

    Tip: Setting up a simple automation like geofencing is a great way to immediately see the power of Home Assistant in everyday life.


    Quick Troubleshooting Tips (Optional)

    If you run into small issues during setup:

    • Home Assistant can’t find Bluetooth devices?
      ➡️ Make sure Privileged Mode was enabled when creating the container, and confirm the Bluetooth dongle is detected with lsusb.
    • Can’t access Home Assistant web page?
      ➡️ Double-check the network mode was set to Host, and verify the container is running.

    Wrapping Up

    Running Home Assistant on the UGREEN NASync is a perfect way to centralise your smart home — simply and reliably. Thanks to Docker and a small Bluetooth dongle, I was able to control everything from Wi-Fi devices to SwitchBot sensors without needing multiple hubs or additional hardware.

    I’m planning to spend a bit more time exploring Home Assistant properly before posting anything detailed about it. No point rushing into features without understanding them fully.

    In the meantime, I’m looking at setting up a reliable NAS backup system — aiming to use Azure as a cloud destination to protect my data. If all goes well, I’ll share a simple guide on how to back up your NASync to Azure soon.

    As always, feel free to drop a comment if there’s something you’d like to see covered!

  • Setting Up the UGREEN NASync DXP2800: Step-by-Step Initial Configuration Guide

    Setting Up the UGREEN NASync DXP2800: Step-by-Step Initial Configuration Guide

    The UGREEN NASync DXP2800 is one of the most accessible NAS options for first-time users, and setting it up is refreshingly simple. In this post, I’ll walk you through the initial setup steps I took — from powering on to creating a storage pool — with commentary on RAID choices and a few tips I picked up along the way.


    What’s Included in the Box

    • UGREEN NASync DXP2800 unit
    • Power adapter
    • Ethernet cable
    • Screws (for 2.5″ drives)

    The NAS has the following ports:

    • 1x 2.5GbE LAN port (back)
    • 2x USB 3.2 Gen1 ports (back)
    • 1x USB-C 3.2 Gen1 port (front)
    • 2x USB 2.0 ports (back)
    • 1x HDMI (currently not in use)
    • Power button and reset button

    Make sure to connect the NAS using the included Ethernet cable for the most stable setup experience.

    Looking to pick up the NAS I used in this guide?

    💡 Need more bays? UGREEN also offers higher-capacity models:

    These are affiliate links — if you decide to buy through them, it supports the blog at no extra cost to you. Thanks for your support!


    Step 1: Power On and Detect the NAS

    Before you start, make sure your NAS is connected via Ethernet for the most reliable connection. It’s also worth checking for any available system updates once you’re in the dashboard — UGREEN recommends updating UGOS Pro early on to avoid compatibility issues, especially if you plan to use SSD caching or Docker later.

    As soon as the NAS is powered on and connected to your network, it appears in the UGREEN NAS app. It can take a few minutes for the device to be detected. However, if it doesn’t show up automatically, you can register it manually by scanning the QR code located on the bottom of the device.

    If it doesn’t appear straight away, you can scan the QR code on the bottom of the NAS to register it manually.

    Step 2: Name Your NAS & Accept Terms

    Once detected, the app prompts you to name your NAS and accept the standard user agreement and privacy terms.

    Give your device a unique name to help distinguish it on the network.

    Step 3: Register Your Email (Recommended)

    While you can skip this, I recommend linking your email for access to UGREENlink and system alerts.

    Registering your email enables remote access and alerts for any system issues.

    Step 4: Enable Remote Access

    I enabled UGREENlink, which gives you remote access to your NAS — useful if you want to monitor or transfer files while away.

    Remote access lets you securely manage your NAS from anywhere.
    UGREENlink remote access lets you securely manage your NAS over the internet. Your NAS name becomes your UGREENlink ID, which you can use from the web or mobile app.

    Step 5: Create Your Storage Pool

    Before you begin, ensure the NAS is powered off when inserting any drives. The DXP2800 uses a tool-less tray system for 3.5″ drives, which makes installation quick and simple. For M.2 SSDs, be cautious as they slot in internally and require careful handling.

    Here’s where you’ll select the drives you installed. I had two 7.2TB HDDs and two 1TB NVMe SSDs.

    You can mix drive types, but it’s best to separate HDDs and SSDs into different pools.

    I opted to configure my HDDs into a single RAID 1 array for redundancy. RAID 1 mirrors the data between the two drives, so if one fails, the other still has all your files. It’s not the most space-efficient, but it offers peace of mind.

    For the SSDs, I chose a Basic (non-RAID) setup for now — mainly because I plan to use them for apps or caching later. I didn’t see much benefit to mirroring them at this stage, especially since I’m not storing critical data there yet.

    RAID 1 for HDDs and a basic SSD pool gives a good mix of reliability and flexibility.

    Step 6: Format and Create Volume

    Once your storage pool is created, the next step is formatting the drives and setting up a volume. This is where you choose between Btrfs and ext4, the two available file systems.

    I chose Btrfs for my HDDs because it supports advanced features like snapshots, built-in data integrity checks, and efficient storage management — all of which are helpful if you’re storing lots of data or want more control over versioning and recovery. It’s especially useful in a home NAS setup where accidental deletion or corruption is a concern.

    For the SSD pool, I went with ext4. While it lacks the bells and whistles of Btrfs, it’s lighter on resources and has a long-standing reputation for reliability and performance. Since I’m planning to use the SSDs for running apps and temporary data, ext4’s speed and lower overhead made more sense.

    Here’s a quick breakdown:

    • Btrfs Pros: Snapshots, checksums, automatic error correction, efficient disk usage
    • Btrfs Cons: Slightly more system overhead, slower write performance than ext4 in some cases
    • ext4 Pros: Fast, low overhead, extremely stable
    • ext4 Cons: No native snapshots, no checksumming or automatic correction
    Btrfs is great for snapshots and folder-level protection. ext4 is a better fit for app containers or temporary storage.

    Before confirming, the system will warn you that all existing data on the drives will be erased.

    Once confirmed, your drives will be formatted and the volume created.

    Step 7: Review System Usage

    After setup, you’ll be shown a breakdown of how your drives are being used. In my case, the system reserved about 15.2GB on one of the SSDs — this includes operating system files and essential services needed to run UGOS Pro.

    This is completely normal, especially on Btrfs volumes where a bit more space is allocated for things like snapshots, metadata, and system overhead. You may also notice:

    • Slightly less available capacity than expected
    • Reserved space depending on your file system and RAID choice

    This screen is a great checkpoint to understand how your storage will behave moving forward:

    • Btrfs can accumulate snapshots and logs, so it’s worth checking the system status occasionally
    • SSDs used for apps (e.g. Docker) may fill quickly if large containers or image caches build up

    You can always check system usage later under the Storage section of the dashboard for a more detailed view.

    Storage overview shows space used by the system, available space, and reserved capacity.

    Final Thoughts

    The DXP2800 offers one of the smoothest NAS setup experiences I’ve used. From unboxing to configuring storage pools, everything was laid out in a way that’s friendly for first-time users. The guided setup process is clear and surprisingly quick.

    I’d recommend enabling two-factor authentication early on to help secure your admin account — it works with any standard authenticator app, and I opted for Microsoft Authenticator since I already use it elsewhere.

    If you’re planning to share the NAS, take advantage of personal folders or set up user-specific access permissions. It’s an easy way to protect privacy and organise data effectively.

    While RAID 1 is a great way to add redundancy, don’t rely on it as your only backup. It’ll help if a drive fails, but it won’t protect you from accidental deletion or file corruption.

    Finally, take note of the reset button behaviour: a short press restarts the system, while holding it down for 10 seconds resets it to factory settings — useful if you ever run into serious issues.

    Next time, I’ll walk through installing Docker and setting up lightweight apps like Pi-hole and Plex to unlock more potential from the NAS.

    Have questions or planning your own setup? Drop them in the comments — always happy to help!

  • UGREEN NASync DXP2800 First Impressions – Budget NAS Done Right?

    UGREEN NASync DXP2800 First Impressions – Budget NAS Done Right?

    The UGREEN NASync DXP2800 just landed on my doorstep — and ahead of schedule, too. While I haven’t installed the drives yet (I’m picking them up tomorrow), I thought I’d take the chance to give a proper first look at this budget-friendly NAS. This isn’t a full review or setup guide — that’ll come once everything is up and running — but I wanted to cover unboxing, design, build quality, and my reasons for choosing it in the first place.


    Why I Chose the NASync DXP2800

    After months of considering whether to stick with cloud storage or go local, I finally made the move toward a proper NAS setup. I’ve been gradually building a smarter home and backing everything up via iCloud — but that only goes so far, especially with Apple’s subscription costs climbing and storage tiers feeling more like a temporary fix than a long-term solution.

    Enter the UGREEN NASync DXP2800. What caught my eye wasn’t just the price point (though the early crowdfunding deal definitely helped), but the feature set for the price.

    Here’s what stood out:

    • Two drive bays, perfect for running RAID 1 for redundancy
    • M.2 NVMe support, giving me the option to run Docker apps or system files separately from my storage
    • 2.5GbE port, future-proof enough to outpace regular Gigabit
    • HDMI out, which I may or may not use, but still nice to have
    • Compact form factor, designed to run quietly in a living room without sticking out

    For my use case — which is mainly iPhone and MacBook backups, Time Machine, and running lightweight Docker apps like Pi-hole and Home Assistant — it seemed ideal. I didn’t need a powerhouse like Synology’s higher-end models, but I wanted something better than a DIY Pi-based setup.


    Unboxing & Build Quality

    UGREEN has done a great job with the packaging. The NAS arrives in a plain outer box with the product box nested inside, offering an extra layer of protection. Inside, everything is well secured with foam inserts and a clean layout — nothing feels rushed or thrown in. It’s a simple touch, but it sets the tone for a well-thought-out product.

    What’s in the box:

    • The DXP2800 unit itself
    • External power brick with a barrel connector
    • Ethernet cable
    • Screws for 2.5” SSDs
    • Quick start guide

    First impressions? It’s solid. The chassis is mostly metal, giving it a premium feel and decent weight. The only plastic bits appear to be the HDD trays, which are tool-less and slide out cleanly behind the magnetic front cover. For a “budget” NAS, it doesn’t feel cheap at all.

    The front panel is minimal and clean, with a magnetic cover that hides the two SATA bays. These are tool-less for 3.5” drives, with mounting points and screws included for 2.5” drives.

    In terms of ports, you get a surprisingly generous set of options:

    • 3 x USB 3.2 (1 front, 2 rear)
    • 2 x USB 2.0 (rear)
    • 1 x USB-C (front)
    • HDMI (rear)
    • 2.5GbE LAN
    • Power input

    Internally, the M.2 NVMe slots are accessed through the front, behind the HDD trays — a clever design that keeps things compact while allowing SSD expansion without dismantling the case. The DIMM slot is accessible through the bottom panel, making RAM upgrades straightforward.

    Speaking of RAM — the unit comes pre-installed with an 8GB Samsung DDR5 SODIMM (M425R1GB4BB0-CWMOD). For most home users running backups, media streaming, or light Docker workloads, that’s a really strong out-of-the-box configuration.

    Everything about the layout feels well thought out — ports are spaced nicely, airflow is unobstructed, and the whole package is tidy and understated.


    First Impressions (Before Setup)

    Even without drives installed, I’ve had a bit of a poke around the unit and here’s what stands out so far:

    • Very quiet fans: You can barely hear them — a big win since this will be running in my living room, where noise levels matter more than you’d think. I didn’t want something that would whirr away in the background while watching TV or relaxing.
    • Good airflow: Side and rear ventilation seem well placed, and the fan design should keep thermals under control even during longer backup sessions.
    • Solid-feeling trays and front cover: No wobble, no rattling — everything slides and clicks into place properly.
    • Well-planned internals: NVMe access through the drive bays is clever and clean. RAM upgrades are accessible from the underside, which is great for long-term flexibility.

    I haven’t booted the OS yet, since I’m waiting on drives — but once I do, I’ll be checking out how intuitive the setup is, how the app integration works, and how flexible the settings are for things like remote backups and energy-saving modes.


    🔧 What Else Can You Use the DXP2800 For?

    While my focus is on backups and light automation, the DXP2800 is capable of much more. If you’re still deciding how you’ll use a NAS, here are some ideas this model can handle:

    • 📁 Private cloud storage – Replace iCloud or Google Drive with your own self-hosted solution
    • 🎥 Media streaming server – Host your own Plex or Jellyfin library for local streaming
    • 🏠 Smart home hub – Run Docker containers like Home Assistant, MQTT brokers, or automation scripts
    • 📷 PoE security camera storage – Use with NVR software like Frigate or Shinobi (I’m currently considering this over a standalone NVR system)
    • 🧪 Self-hosted tools – Run apps like Pi-hole, Bitwarden, or even a personal blog/server

    Whether you want a quiet companion for daily backups or a multi-purpose home server, there’s plenty of headroom here.


    Final Thoughts (For Now)

    So far, I’m pretty happy with the NASync DXP2800. It doesn’t try to be everything — and that’s exactly why I picked it. For anyone looking for a quiet, simple, and affordable NAS for local backups and some light automation, it’s shaping up to be a strong contender.

    And the fact that it blends into my living room setup without drawing attention or making noise? That’s a huge bonus.

    I’m also weighing up whether to use it as part of a PoE security camera system, with NVR software running in Docker. It’s not set in stone yet — I’m still considering the convenience of a standalone NVR — but the flexibility this NAS offers is one of its biggest strengths. Whether you’re keeping things simple or pushing it further, it feels like a solid platform to build around.

    I’ll be documenting the full setup process once I get the drives installed, so keep an eye out for that. And if you’re considering this model or have any specific questions, feel free to drop them in the comments — I’ll do my best to include the answers in the next post.

  • Top 5 NAS Mistakes Beginners Make (And How to Avoid Them)

    Top 5 NAS Mistakes Beginners Make (And How to Avoid Them)

    Introduction

    Setting up your first Network-Attached Storage (NAS) can dramatically enhance your home network by centralising your data, improving security, and streamlining access. However, beginners frequently make mistakes that cause frustration, unexpected costs, or even critical data loss. This comprehensive guide addresses these common pitfalls with practical advice, real-world scenarios, and visual resources to help ensure a successful NAS setup experience.


    Mistake #1: Choosing Incompatible or Unreliable Drives

    Selecting inappropriate drives can severely compromise your NAS’s reliability and performance. For example, in data centres, it’s not uncommon for entire batches of drives to fail simultaneously due to manufacturing defects. While rare, this highlights the value of using drives from different production batches to mitigate simultaneous failure risks.

    • Advice:
      • Always consult your NAS manufacturer’s compatibility list.
      • Opt for NAS-specific drives like Western Digital Red or Seagate IronWolf, which are designed for continuous operation.
      • Using identical drives (same manufacturer, model, capacity, and speed) is the recommended best practice to ensure compatibility and optimal RAID performance.
      • While mixing drives from different manufacturers is possible, it’s essential that drives have identical capacity, speed, and specifications to utilise RAID effectively. However, this approach isn’t generally recommended due to potential compatibility or performance issues.
    Two WD Red Plus NAS hard drives side-by-side with different serial numbers, illustrating best practice of using drives from different batches to reduce risk of simultaneous failure in RAID setups.

    Related Guide: HDD vs SSD for Your NAS


    Mistake #2: Overestimating or Underestimating Storage Needs

    Miscalculating your storage needs can result in wasted money or insufficient capacity. For instance, purchasing lower-capacity SSDs simply because they’re cheaper may initially seem like a smart choice, but this often leads to storage shortages down the line, forcing you to upgrade prematurely, as you experienced with your personal PC setup.

    • Advice:
      • Carefully evaluate your current usage and anticipate future growth.
      • Factor in media consumption, regular backups, and future data accumulation.
      • Consider investing in slightly more storage than you initially think you’ll need to avoid frequent upgrades.
    Table showing recommended HDD and SSD storage sizes based on use cases including gaming, media servers, content creation, backups, and professional workstations.

    Related Guide: Beginner’s Guide to Choosing a NAS


    Mistake #3: Neglecting Proper Network Configuration

    Improper network setup can significantly limit NAS performance, leading to slow data transfers and frustrating buffering during media streaming. For example, upgrading from an older Wi-Fi 5 router to a modern Wi-Fi 7 system like the TP-Link BE85 dramatically improved file transfer speeds, streaming quality, and overall responsiveness of your NAS setup.

    • Advice:
      • Upgrade to modern networking standards (Gigabit Ethernet, Wi-Fi 6/7) to prevent bottlenecks.
      • Use high-quality Ethernet cables (Cat 6 or higher).
      • Properly configure network settings, including IP addresses and DNS, to optimise performance.
    Comparison chart showing Wi-Fi 5, Wi-Fi 6, and Wi-Fi 7 speeds in Mbps, highlighting significant improvements in wireless performance for modern networking.

    Related Guide: Understanding Wi-Fi 6 and Wi-Fi 7


    Mistake #4: Overlooking Security and Backup Measures

    Underestimating security risks or misunderstanding RAID’s role can leave your NAS vulnerable to severe data loss or breaches. For example, numerous reports highlight how ransomware attacks exploit poorly secured NAS devices, encrypting valuable data and demanding hefty ransoms, leading to significant financial and personal distress for affected users.

    • Advice:
      • Disable default admin accounts and always use strong, unique passwords.
      • Implement robust firewall settings and VPN access for secure remote connections.
      • Recognise RAID’s limitations—use RAID alongside separate, regular external or cloud-based backups.
      • Regularly test your backup restorations to verify reliability.

    Table: RAID Setups and Recommended Backup Strategies

    RAID Level Protection Provided Recommended Backup Strategy
    RAID 0 No redundancy — performance only Not suitable alone. Always pair with full external or cloud backups.
    RAID 1 Mirroring — protects from 1 drive failure Backup to cloud or external storage to recover from accidental deletion or corruption.
    RAID 5 Striping with parity — protects from 1 drive failure Use the 3-2-1 backup rule: 3 copies, 2 types of media, 1 offsite. Include cloud backup.
    RAID 6 Double parity — protects from 2 drive failures Add versioned backups (e.g., cloud storage with file history) to protect against corruption.
    RAID 10 Striping + mirroring — fast and fault-tolerant Add incremental or differential backups for quick recovery and long-term protection.

    Mistake #5: Ignoring Firmware and Software Updates

    Skipping firmware or software updates exposes your NAS to critical vulnerabilities that can lead to ransomware, instability, or total data loss. A major example was the Qlocker ransomware attack, where QNAP NAS devices with outdated firmware were targeted. Attackers exploited unpatched weaknesses, encrypted users’ files, and demanded ransom payments in Bitcoin.

    Staying current with firmware isn’t just about security — it also unlocks performance improvements, new features, and bug fixes.

    Comparison Table: Why Timely Updates Matter

    Outdated FirmwareUpdated Firmware
    Exposed to known vulnerabilitiesPatched against known threats
    High risk of ransomware and malwareEnhanced security and firewall protections
    Possible performance bugs or system crashesStability improvements and optimisations
    Compatibility issues with newer devices/appsImproved device and software compatibility
    • Advice:
      • Enable automatic firmware and software updates where possible.
      • Regularly review release notes to understand what’s changed.
      • Always back up your data before applying major updates.
      • Schedule routine checks for firmware across all connected devices.

    Quick Summary Checklist

    • Select NAS-specific and compatible drives
    • Accurately estimate and plan for future storage requirements
    • Upgrade and optimise your home network infrastructure
    • Prioritise security measures and regular backups
    • Keep firmware and software updated regularly

    Frequently Asked Questions (FAQ)

    • What NAS brand should beginners choose?
      Synology and QNAP are user-friendly and highly recommended for beginners due to their intuitive interfaces and reliable hardware.
    • Is RAID necessary for a beginner NAS setup?
      While not strictly necessary, RAID is strongly recommended to protect against drive failures and data loss.
    • How often should I backup my NAS data?
      Weekly backups are a good standard, though important data might require daily backups.

    Conclusion

    By proactively avoiding these common beginner mistakes, you’ll ensure your NAS system is reliable, secure, and meets your long-term needs. Are you ready to take the next step?

    • Explore More: Check out our comprehensive guides to further your understanding and optimise your NAS setup.
    • Stay Updated: Subscribe to our newsletter for the latest tips, guides, and updates in home networking and NAS technologies.
    • Share Your Experience: We’d love to hear your NAS setup experiences or questions in the comments below—your insights help our community grow!

    Ready to dive deeper? Explore our additional beginner-friendly guides:

    💬 Have you made any of these NAS mistakes?
    Whether you’re just getting started or refining your setup, I’d love to hear from you. Share your experience in the comments — or let me know what you’d like to see covered next!

  • Choosing the Best Drives for Your NAS Setup: HDD vs. SSD Recommendations

    Choosing the Best Drives for Your NAS Setup: HDD vs. SSD Recommendations

    Choosing the right drives for your NAS can significantly impact reliability, performance, and data safety. This comprehensive guide explores HDDs versus SSDs, recommended drive capacities, specific drive recommendations for various use-cases, and even enterprise and surveillance drive options, helping you make the best-informed decision for your NAS setup.

    Some of the links in this post are affiliate links. If you buy something through them, I may earn a small commission — it doesn’t cost you anything extra, and it helps support the site.

    HDD vs. SSD: What’s Best for Your NAS?

    • HDD (Hard Disk Drive): Ideal for bulk storage, affordable, high capacities. Drawbacks include noise, slower performance, and higher power consumption.
    • SSD (Solid State Drive): Faster, quieter, energy-efficient, and perfect for applications like Docker, VMs, and intensive tasks. However, they are pricier per GB.

    Recommended Drive Capacities

    • General Home & Media Storage: HDD (4-8TB), SSD (1-2TB)
    • Small Business & Critical Data: HDD (8-16TB), SSD (2-4TB)
    • Docker & Applications: NVMe SSD (1-2TB)
    • Virtual Machines & Intensive Use: NVMe SSD (2-4TB)
    • Security Camera Systems: HDD (2-10TB)

    HDD Manufacturers: WD Red vs. Seagate IronWolf

    Both Western Digital (WD) Red and Seagate IronWolf drives are NAS-optimized for reliability and continuous operation. Differences include:

    • WD Red Series: Quieter and cooler, ideal for home setups.
    • Seagate IronWolf Series: Slightly higher performance and built-in IronWolf Health Management (IHM), beneficial in critical NAS environments.

    Both are excellent—pick whichever is priced better during sales unless you have specific performance or noise requirements.

    Specific Drive Recommendations & Detailed Insights

    General Storage/Home NAS

    • Western Digital Red Plus (4-6TB): Quiet, efficient, and cost-effective.
    • Seagate IronWolf (4-6TB): Reliable with optimized firmware, slightly higher performance.

    Data Security & Critical Storage

    • Western Digital Red Pro (8-16TB): High RPM, extended warranty, robust reliability.
    • Seagate IronWolf Pro (8-16TB): Excellent reliability, includes data recovery service.

    Security Camera Systems

    • Western Digital Purple (2-10TB): Optimized for continuous video recording, reliable for CCTV setups.
    • Seagate SkyHawk (2-10TB): Built for surveillance, robust performance, supports multiple HD cameras.

    Docker Containers & Application Servers

    • Samsung 980 Pro NVMe (1-2TB): High speeds, great for Docker responsiveness.
    • Crucial MX500 SATA SSD (1-2TB): Solid performance, budget-friendly.

    Virtual Machines & Heavy Docker Usage

    • Samsung 990 Pro NVMe (2TB): Excellent for demanding workloads.
    • Western Digital Black SN850X NVMe (2TB): Superior speed and durability.
    • Crucial P3 Plus NVMe (2TB): Great balance of price and performance.

    Enterprise Drives: Cost-Effective Alternatives & Enhanced Reliability

    Enterprise drives such as WD Ultrastar, Seagate Exos, Toshiba MG Series, and HGST Ultrastar are designed for heavy use, offering high reliability and performance. Reconditioned drives available on platforms like eBay can offer excellent value.

    • WD Ultrastar DC HC550/HC560 (14-20TB): Data center grade performance.
    • Seagate Exos X16/X18 (14-18TB): Enterprise reliability at great prices.
    • Toshiba MG Series (12-18TB): Excellent performance and competitive pricing.
    • HGST Ultrastar He Series (10-14TB): Industry-leading durability, helium-filled for efficiency.

    Benefits of Helium-Filled Drives

    • Lower power and heat, extended lifespan
    • Higher drive density, ideal for multi-drive setups

    My Personal NAS Setup and Drive Choices

    I’ve chosen the UGreen DXP2800, attracted by its powerful hardware, competitive price via crowdfunding, and flexibility to run either its own OS or alternatives without voiding warranty. It serves as a backup solution for photos, phones, and laptops, and can also integrate seamlessly with cloud storage.

    I’m opting for Western Digital Red HDDs (6-8TB) in RAID 1 due to their excellent value, reliability, and retailer bundle discounts. RAID 1 specifically meets my needs by:

    • Ensuring data redundancy and easy recovery
    • Offering improved read performance
    • Being simple to manage, ideal for first-time NAS users

    Additionally, I’m exploring Docker, particularly Home Assistant for smart home management. For Docker and potential applications like Pi-Hole, I’ve selected two 1TB WD Black SN850X NVMe SSDs for their exceptional speed and reliability.

    FAQ: Quick Answers for Common NAS Drive Questions

    • What’s the difference between WD Red and WD Purple?
      WD Red drives are optimized for NAS environments (general data storage), while WD Purple drives are optimized specifically for continuous video recording in surveillance systems.
    • Should I buy new or reconditioned enterprise drives?
      Reconditioned enterprise drives offer substantial cost savings and excellent reliability, provided you buy from reputable sellers and thoroughly check drive health upon delivery.
    • Can I mix different brands or sizes in RAID?
      It’s best practice to keep drives identical in RAID setups for optimal performance and reliability.

    Looking for the drives mentioned?

    Here are quick links to everything I covered above:

    HGST Ultrastar He Series (10–14TB)

    WD Red Plus (4–6TB)

    Seagate IronWolf (4–6TB)

    WD Red Pro (8–16TB)

    Seagate IronWolf Pro (8–16TB)

    WD Purple (2–10TB, Surveillance)

    Seagate SkyHawk (2–10TB, Surveillance)

    Samsung 980 Pro NVMe (1–2TB)

    Crucial MX500 SATA SSD (1–2TB)

    Samsung 990 Pro NVMe (2TB)

    WD Black SN850X NVMe (2TB)

    Crucial P3 Plus NVMe (2TB)

    WD Ultrastar DC HC550/HC560 (14–20TB)

    Seagate Exos X16/X18 (14–18TB)

    Toshiba MG Series (12–18TB)

    Conclusion

    Selecting drives involves considering your specific storage requirements, budget, and performance needs. HDDs are ideal for bulk storage, SSDs excel at performance-intensive tasks, and enterprise drives offer unmatched reliability, particularly when purchased reconditioned.

    Have insights or further questions? I’d love to hear about your own NAS experiences in the comments!

    Check out my other posts on setting up your NAS and smart home networking essentials.