Category: smart home

  • How to Install Home Assistant on the UGREEN NASync Series Using Docker

    How to Install Home Assistant on the UGREEN NASync Series Using Docker

    Introduction

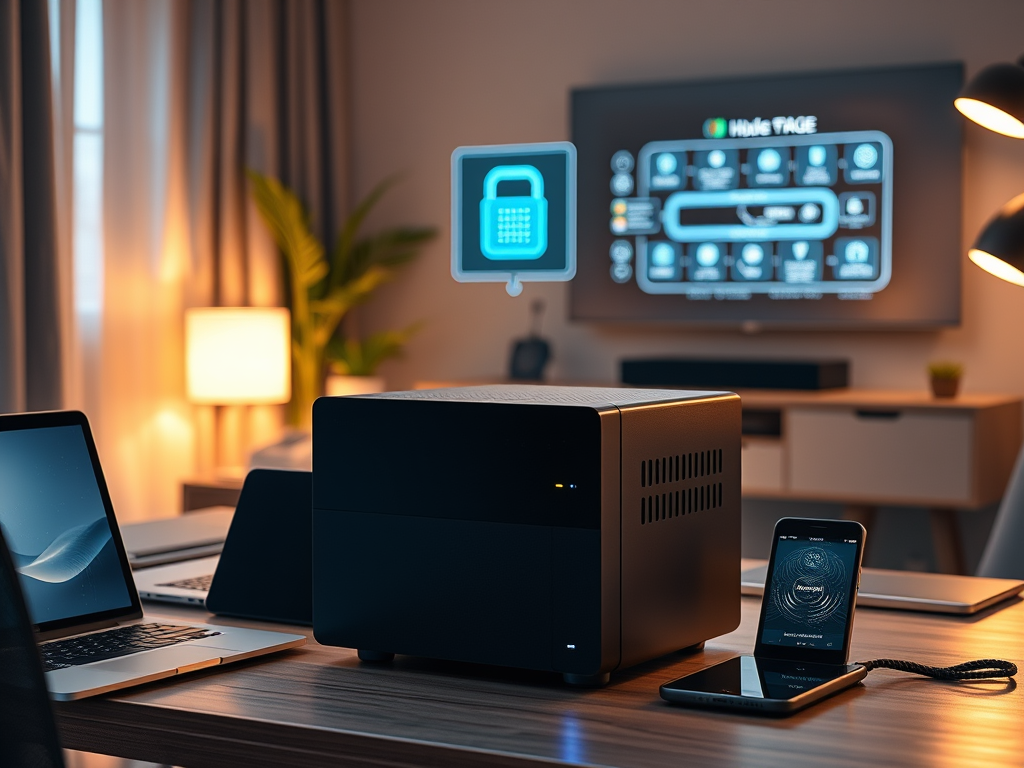
    After getting my UGREEN NASync DXP2800 set up, the next logical step was bringing my smart home devices under one roof.
    With its compact size, low power consumption, and full Docker support, the DXP2800 is a perfect hidden powerhouse for running Home Assistant.
    Rather than setting up another Raspberry Pi or a VM, I decided to run Home Assistant directly in Docker on the DXP2800 for a cleaner, more efficient setup.

    Quick Update:
    In my last post, I mentioned setting up lightweight apps like Pi-hole and Plex.
    After exploring it further, I decided to hold off on Plex for now — personally, I don’t need a media server since I’m not storing my own movies or shows.

    I’m planning to try setting up Pi-hole soon as a local DNS blocker. However, since I’m based in Japan, and local ISPs tend to lock down their routers pretty tightly, it might need a few extra workarounds. Either way, I’ll share how it goes — whether it’s a full setup guide or lessons learned trying to get it working.

    I also spent some time working on setting up an OpenVPN tunnel. The original plan was to host an OpenVPN server on Azure and route only my Fire Stick’s traffic through the VPN, without affecting the rest of my home network. After running into some technical hurdles, I decided to simplify things for now — I’m currently connecting my MacBook directly to the TV when needed, and planning to pick up an Apple TV 4K later to streamline streaming even further.

    As always, if you have questions, or there’s a specific setup you want to see covered, drop a comment below — happy to help!

    If you’re completely new to the UGREEN NASync series, you might want to check out my earlier post where I set up the NASync DXP2800 from scratch: Setting up the UGREEN NASync DXP2800 – A Beginner-Friendly Guide.

    Now that you know why Home Assistant is a great choice, let’s get it installed.
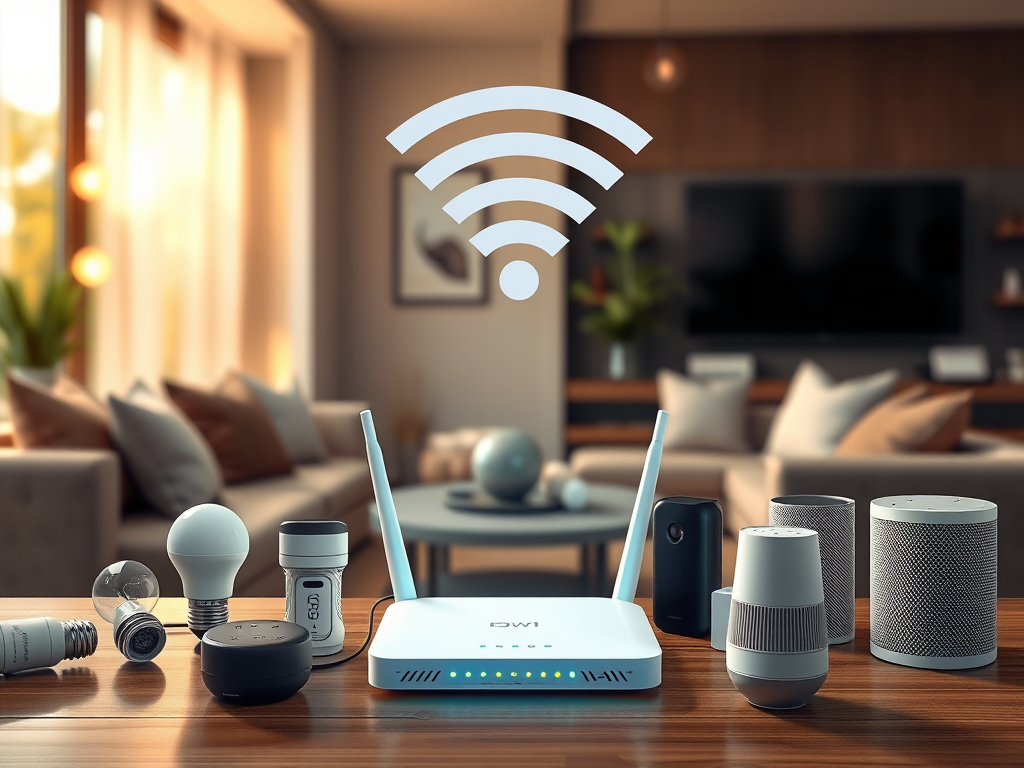

    Why Home Assistant?

    • Free, open-source smart home platform.
    • Supports thousands of integrations.
    • Centralises your entire smart home without cloud dependence.
    • Running it on the NAS keeps everything in one place and easy to manage.

    What You’ll Need

    • UGREEN NASync series unit
    • Docker installed (via App Center)
    • Bluetooth dongle (optional but recommended for Bluetooth devices)
    • I used the TP-Link UB500 — Bluetooth 5.0 and works flawlessly
    • Access to your NAS’s IP address and admin account

    Let’s move on to installing Home Assistant on your DXP2800.

    🖥️ The NAS used in this setup:

    💡 Need more bays?

    🧩 Bluetooth adapter I used for Home Assistant:

    These are affiliate links — if you decide to buy through them, it supports the blog at no extra cost to you. Thanks!


    Installing Home Assistant in Docker

    Option 1: Using the UGREEN NAS Interface (Recommended)

    UGREEN’s built-in Docker app makes container setup simple, even for beginners.

    Step 1: Install the Docker App

    • Open the App Center on your NAS.
    • Search for and install Docker.

    Step 2: Download the Home Assistant Image

    • Go to Docker > Image > Image Database.
    • Search for:
      homeassistant/home-assistant
    • Click Download to pull the image onto your NAS.

    Step 3: Create the Home Assistant Container

    • Go to Docker > Container > New Container.
    • Choose the homeassistant/home-assistant image you just downloaded from the Image Database.

    Configure the container:

    • Container Name: homeassistant
    • Network Mode: Host
    • Restart Policy: Always
    • Volume Mapping:
    • Host path: /docker/homeassistant/config (or your preferred location)

    Important: Enable Privileged Mode

    • When setting up the container, scroll down and tick Privileged Mode (this is essential if you want Bluetooth devices like SwitchBot to work).

    ✅ Once created, Home Assistant will launch and you can access it at:

    http://[NAS-IP]:8123

    If you prefer using command line for finer control, here’s how to set it up via SSH.


    Option 2: Installing via SSH (Optional / Advanced)

    Note:
    Depending on your NAS settings, you may need to prefix the following commands with sudo.
    For example, use sudo docker pull homeassistant/home-assistant instead of docker pull homeassistant/home-assistant.

    Prefer full control over your setup? Here’s how to do it manually via SSH.

    Step 1: SSH into Your NAS

    ssh [your-username]@[NAS-IP]

    Step 2: Pull the Home Assistant Image

    docker pull homeassistant/home-assistant

    Step 3: Run Home Assistant with Privileged Mode

    docker run -d \
      --name homeassistant \
      --privileged \
      --network host \
      --restart unless-stopped \
      -v /docker/homeassistant/config:/config \
      homeassistant/home-assistant

    ✅ Same result — Home Assistant running and Bluetooth-ready.


    Quick Comparison

    MethodBest ForProsCons
    NAS InterfaceBeginnersEasy, visual, no command line neededMight not suit users who want full CLI control
    SSH CLIAdvanced usersFull control, scripting flexibilityRequires SSH access and basic Docker knowledge

    Now that Home Assistant is installed and running, let’s move onto adding Bluetooth devices if you need them.


    Setting Up Bluetooth Devices like SwitchBot (Optional)

    If you want to control Bluetooth smart home devices, here’s how to set it up.

    Hardware Used:

    • Bluetooth Dongle: TP-Link UB500 (Bluetooth 5.0)

    How to Enable Bluetooth Support:

    1. Plug in the TP-Link UB500 to one of your NAS’s USB ports.
    2. Verify Bluetooth Detection:
      SSH into your NAS and run:
       lsusb

    Look for something like:

       Bus 002 Device 003: ID 2357:0604 TP-Link UB500 Adapter
    1. Home Assistant Detection:
    • Home Assistant should auto-detect the Bluetooth adapter after restarting.
    • You can then add integrations like SwitchBot easily.

    Pro Tip: If your NAS is tucked away in a cabinet or has weak Bluetooth range, using a short USB extension cable can dramatically improve signal reception.

    Adding SwitchBot Devices:

    • Go to Settings > Devices & Services.
    • Click + Add Integration, search for SwitchBot.
    • Follow the prompts to pair devices.

    First Steps After Installation

    Once Home Assistant was up and running, here’s what I did first:

    • Set up geofencing automations using the Home Assistant mobile app:
    • When I leave the house, my lights automatically turn off.
    • When I arrive home, certain lights turn on.
    • Created a few basic backups (snapshots) of my configuration, just in case anything went wrong.
    • Explored integrations like SwitchBot, lights, and sensors to start building out my smart home.

    Tip: Setting up a simple automation like geofencing is a great way to immediately see the power of Home Assistant in everyday life.


    Quick Troubleshooting Tips (Optional)

    If you run into small issues during setup:

    • Home Assistant can’t find Bluetooth devices?
      ➡️ Make sure Privileged Mode was enabled when creating the container, and confirm the Bluetooth dongle is detected with lsusb.
    • Can’t access Home Assistant web page?
      ➡️ Double-check the network mode was set to Host, and verify the container is running.

    Wrapping Up

    Running Home Assistant on the UGREEN NASync is a perfect way to centralise your smart home — simply and reliably. Thanks to Docker and a small Bluetooth dongle, I was able to control everything from Wi-Fi devices to SwitchBot sensors without needing multiple hubs or additional hardware.

    I’m planning to spend a bit more time exploring Home Assistant properly before posting anything detailed about it. No point rushing into features without understanding them fully.

    In the meantime, I’m looking at setting up a reliable NAS backup system — aiming to use Azure as a cloud destination to protect my data. If all goes well, I’ll share a simple guide on how to back up your NASync to Azure soon.

    As always, feel free to drop a comment if there’s something you’d like to see covered!

  • UGREEN NASync DXP2800 First Impressions – Budget NAS Done Right?

    UGREEN NASync DXP2800 First Impressions – Budget NAS Done Right?

    The UGREEN NASync DXP2800 just landed on my doorstep — and ahead of schedule, too. While I haven’t installed the drives yet (I’m picking them up tomorrow), I thought I’d take the chance to give a proper first look at this budget-friendly NAS. This isn’t a full review or setup guide — that’ll come once everything is up and running — but I wanted to cover unboxing, design, build quality, and my reasons for choosing it in the first place.


    Why I Chose the NASync DXP2800

    After months of considering whether to stick with cloud storage or go local, I finally made the move toward a proper NAS setup. I’ve been gradually building a smarter home and backing everything up via iCloud — but that only goes so far, especially with Apple’s subscription costs climbing and storage tiers feeling more like a temporary fix than a long-term solution.

    Enter the UGREEN NASync DXP2800. What caught my eye wasn’t just the price point (though the early crowdfunding deal definitely helped), but the feature set for the price.

    Here’s what stood out:

    • Two drive bays, perfect for running RAID 1 for redundancy
    • M.2 NVMe support, giving me the option to run Docker apps or system files separately from my storage
    • 2.5GbE port, future-proof enough to outpace regular Gigabit
    • HDMI out, which I may or may not use, but still nice to have
    • Compact form factor, designed to run quietly in a living room without sticking out

    For my use case — which is mainly iPhone and MacBook backups, Time Machine, and running lightweight Docker apps like Pi-hole and Home Assistant — it seemed ideal. I didn’t need a powerhouse like Synology’s higher-end models, but I wanted something better than a DIY Pi-based setup.


    Unboxing & Build Quality

    UGREEN has done a great job with the packaging. The NAS arrives in a plain outer box with the product box nested inside, offering an extra layer of protection. Inside, everything is well secured with foam inserts and a clean layout — nothing feels rushed or thrown in. It’s a simple touch, but it sets the tone for a well-thought-out product.

    What’s in the box:

    • The DXP2800 unit itself
    • External power brick with a barrel connector
    • Ethernet cable
    • Screws for 2.5” SSDs
    • Quick start guide

    First impressions? It’s solid. The chassis is mostly metal, giving it a premium feel and decent weight. The only plastic bits appear to be the HDD trays, which are tool-less and slide out cleanly behind the magnetic front cover. For a “budget” NAS, it doesn’t feel cheap at all.

    The front panel is minimal and clean, with a magnetic cover that hides the two SATA bays. These are tool-less for 3.5” drives, with mounting points and screws included for 2.5” drives.

    In terms of ports, you get a surprisingly generous set of options:

    • 3 x USB 3.2 (1 front, 2 rear)
    • 2 x USB 2.0 (rear)
    • 1 x USB-C (front)
    • HDMI (rear)
    • 2.5GbE LAN
    • Power input

    Internally, the M.2 NVMe slots are accessed through the front, behind the HDD trays — a clever design that keeps things compact while allowing SSD expansion without dismantling the case. The DIMM slot is accessible through the bottom panel, making RAM upgrades straightforward.

    Speaking of RAM — the unit comes pre-installed with an 8GB Samsung DDR5 SODIMM (M425R1GB4BB0-CWMOD). For most home users running backups, media streaming, or light Docker workloads, that’s a really strong out-of-the-box configuration.

    Everything about the layout feels well thought out — ports are spaced nicely, airflow is unobstructed, and the whole package is tidy and understated.


    First Impressions (Before Setup)

    Even without drives installed, I’ve had a bit of a poke around the unit and here’s what stands out so far:

    • Very quiet fans: You can barely hear them — a big win since this will be running in my living room, where noise levels matter more than you’d think. I didn’t want something that would whirr away in the background while watching TV or relaxing.
    • Good airflow: Side and rear ventilation seem well placed, and the fan design should keep thermals under control even during longer backup sessions.
    • Solid-feeling trays and front cover: No wobble, no rattling — everything slides and clicks into place properly.
    • Well-planned internals: NVMe access through the drive bays is clever and clean. RAM upgrades are accessible from the underside, which is great for long-term flexibility.

    I haven’t booted the OS yet, since I’m waiting on drives — but once I do, I’ll be checking out how intuitive the setup is, how the app integration works, and how flexible the settings are for things like remote backups and energy-saving modes.


    🔧 What Else Can You Use the DXP2800 For?

    While my focus is on backups and light automation, the DXP2800 is capable of much more. If you’re still deciding how you’ll use a NAS, here are some ideas this model can handle:

    • 📁 Private cloud storage – Replace iCloud or Google Drive with your own self-hosted solution
    • 🎥 Media streaming server – Host your own Plex or Jellyfin library for local streaming
    • 🏠 Smart home hub – Run Docker containers like Home Assistant, MQTT brokers, or automation scripts
    • 📷 PoE security camera storage – Use with NVR software like Frigate or Shinobi (I’m currently considering this over a standalone NVR system)
    • 🧪 Self-hosted tools – Run apps like Pi-hole, Bitwarden, or even a personal blog/server

    Whether you want a quiet companion for daily backups or a multi-purpose home server, there’s plenty of headroom here.


    Final Thoughts (For Now)

    So far, I’m pretty happy with the NASync DXP2800. It doesn’t try to be everything — and that’s exactly why I picked it. For anyone looking for a quiet, simple, and affordable NAS for local backups and some light automation, it’s shaping up to be a strong contender.

    And the fact that it blends into my living room setup without drawing attention or making noise? That’s a huge bonus.

    I’m also weighing up whether to use it as part of a PoE security camera system, with NVR software running in Docker. It’s not set in stone yet — I’m still considering the convenience of a standalone NVR — but the flexibility this NAS offers is one of its biggest strengths. Whether you’re keeping things simple or pushing it further, it feels like a solid platform to build around.

    I’ll be documenting the full setup process once I get the drives installed, so keep an eye out for that. And if you’re considering this model or have any specific questions, feel free to drop them in the comments — I’ll do my best to include the answers in the next post.

  • NAS & Network Storage Explained: Why You Should Consider One for Your Home

    NAS & Network Storage Explained: Why You Should Consider One for Your Home

    Introduction: Why NAS?

    Running out of storage on your devices? Tired of juggling multiple external drives?

    Whether you’re dealing with photos, videos, smart home backups, or business documents, traditional storage options like external hard drives or cloud services have limitations. What if you could have a private, secure, and expandable cloud—accessible from all your devices?

    This is where Network Attached Storage (NAS) comes in. NAS is more than just an external hard drive; it’s a smart storage solution that allows you to back up, share, and access data across multiple devices—anytime, anywhere. But is a NAS right for you? Let’s break it down.

    Synology NAS setup page displaying device discovery and network details.

    1. What Is NAS?

    NAS (Network Attached Storage) is a device that connects to your home network, allowing multiple devices to store, access, and manage files from anywhere on your local network (and remotely, if configured).

    Unlike a regular external hard drive, NAS is always on, accessible from multiple devices, and can have RAID (Redundant Array of Independent Disks) for data protection.

    How NAS Works in a Home Network

    • Connects to your router via Ethernet.
    • Acts as a central storage hub for computers, phones, smart TVs, game consoles, and even security cameras.
    • Allows for automated backups, media streaming, and private cloud hosting.

    2. NAS vs. DAS vs. External Drives vs. Cloud Storage

    Choosing the right storage option depends on how you use your data. Here’s how NAS compares to Direct-Attached Storage (DAS), external drives, and cloud storage.

    FeatureNAS (Network Storage)DAS (Direct-Attached Storage)External DriveCloud Storage
    Accessibility✔ Remote & Local❌ Local Only❌ Local Only✔ Remote Access
    Multiple Device Access✔ Yes❌ No❌ No✔ Yes
    Expandable Storage✔ Yes✔ Some models❌ No✔ Paid Tiers
    Reliability & Backup✔ RAID Options❌ No RAID (unless RAID enclosure)❌ Single Drive Failure✔ Managed Backups
    Security & Privacy✔ Private, self-hosted✔ Private✔ Private❌ Relies on 3rd Party
    Best ForHome network, automation, backupsFast external storage for one deviceSimple personal storageRemote, multi-device sync

    When Should You Use Each?

    NAS: You need a centralized, multi-device storage solution with remote access and automated backups.
    DAS: You want faster, direct storage for a single computer (e.g., video editing, gaming, or workstation backups).
    External Drive: You need simple, portable storage and don’t require multi-device access.
    Cloud Storage: You want convenience and don’t mind subscription costs & third-party control.


    3. Key Benefits of Using a NAS

    ✅ Private Cloud Storage

    A NAS allows you to host your own cloud, meaning you can store, access, and sync files without relying on Google Drive, Dropbox, or OneDrive.

    ✅ Automated Backups

    • Set up scheduled backups for all your devices.
    • Redundancy with RAID prevents data loss in case of drive failure.

    ✅ Media Streaming (Plex, Kodi, etc.)

    • Store and stream movies, music, and photos directly from your NAS.
    • Works with smart TVs, tablets, and game consoles.

    ✅ Security & Control

    • Your data stays with you—no third-party access.
    • Encrypted storage and user permissions provide extra security.

    ✅ Smart Home & Surveillance Support

    • Store security camera footage instead of paying for cloud subscriptions.
    • Keep smart home automation logs for later review.

    4. Do You Need a NAS?

    You work with large files and need reliable backups.
    You want your own private cloud instead of paying for cloud storage.
    You have multiple devices and need centralized storage.
    You want to stream movies, music, and photos locally.
    You have a smart home setup or security cameras.

    🚫 You might not need a NAS if:

    • You only need basic file storage (a USB drive may be enough).
    • You don’t mind using Google Drive, Dropbox, or OneDrive.
    • You prefer a cheaper, simpler storage option.
    A professional NAS setup in a modern home office, connected to a router for seamless data access.

    5. Next Steps: What’s Coming Next?

    Now that you understand why a NAS is useful, the next step is learning how to set one up.

    📌 Coming Soon: “Beginner’s Guide to Setting Up a NAS – Choosing the Right Storage Configuration.” 🚀


    Do you use a NAS, or are you considering one? Let me know in the comments!

  • Smart Home Network Setup: 7 Best Practices for Connectivity & Security

    Smart Home Network Setup: 7 Best Practices for Connectivity & Security

    Introduction

    Ever had your smart light take ages to turn on? Or your security camera lose connection at the worst time? A poorly optimized smart home network is the hidden culprit behind these daily frustrations.

    A smart home setup can make life more convenient, energy-efficient, and secure, but only if your network is built to handle the demands of multiple connected devices. A poorly configured network can lead to slow performance, security vulnerabilities, and connectivity issues.

    This guide walks you through how to set up a smart home network, ensuring reliable connectivity, security, and efficiency—without needing expensive upgrades.


    1. Planning Your Smart Home Network

    Before connecting devices, it’s important to assess your network’s capabilities:

    • How many devices will be connected? Smart homes can range from a single device to an entire ecosystem of interconnected gadgets.
    • What are your bandwidth needs? Streaming 4K content or running security cameras requires more bandwidth than smart lights and sensors.
    • Where will devices be placed? Some devices (e.g., outdoor cameras) may struggle with weak Wi-Fi signals.

    Action Steps:
    ✅ Check your router’s device limit and bandwidth capabilities.
    ✅ Consider a separate network for smart devices (more on this below).
    ✅ Identify Wi-Fi dead zones that may need signal improvements.


    2. Smart Home Devices & Network Requirements

    Not all smart devices have the same network needs:

    • Low-bandwidth devices (e.g., smart bulbs, plugs, sensors) work fine on 2.4 GHz Wi-Fi.
    • High-bandwidth devices (e.g., cameras, smart speakers, streaming devices) benefit from 5 GHz or wired connections.
    • Latency-sensitive devices (e.g., video doorbells, smart locks) require strong, stable signals to work instantly.

    Action Steps:
    Use 5 GHz Wi-Fi for devices that need fast data transfer (smart TVs, security cameras).
    Use wired Ethernet for mission-critical devices like home security hubs and smart speakers.
    Place routers or mesh Wi-Fi nodes near bandwidth-heavy devices.

    Comparison of 2.4 GHz and 5 GHz Wi-Fi bands, showing ideal device connections.

    3. Setting Up a Dedicated Smart Home Network

    Many routers allow you to create a separate network just for smart devices. Why?

    • Prevents smart home devices from interfering with personal computers and smartphones.
    • Improves security by isolating smart devices from sensitive data.

    Best Options:

    • Guest Network: If your router has this feature, enable it and connect all smart devices to it.
    • VLAN (for Advanced Users): If your router supports VLANs, you can segment smart home traffic from personal devices.

    Action Steps:
    ✅ Create a separate SSID (Wi-Fi name) for smart home devices.
    Disable remote access for devices that don’t need it.
    ✅ Set up static IPs for key smart home devices (ensures a stable connection).

    A segmented home network with IoT devices isolated from personal devices for security.

    4. Securing Your Smart Home Network

    Since smart home devices are common hacking targets, it’s crucial to secure them properly.

    Key Security Measures:

    • Change Default Passwords – Many smart devices ship with weak, easy-to-guess passwords.
    • Enable WPA3 Encryption – If your router supports WPA3, use it for better security (otherwise, use WPA2).
    • Regularly Update Firmware – Many vulnerabilities come from outdated firmware.
    • Disable Unused Features – Turn off WPS (Wi-Fi Protected Setup) and UPnP (Universal Plug and Play), as they can be security risks.
    • Use Two-Factor Authentication (2FA) – Many smart home platforms offer 2FA for added protection.
    A checklist of essential cybersecurity steps to secure home networks and smart devices.

    Action Steps:
    Rename SSIDs (avoid using your last name or home address).
    Update device passwords to something unique and strong.
    Enable automatic firmware updates for all devices.
    ✅ Set up 2FA for smart home apps (Google Home, Alexa, etc.).


    5. Optimizing Smart Home Performance

    Even with a strong network, smart home devices can sometimes experience lag or disconnections. Here’s how to improve performance:

    • Reduce Wi-Fi Interference – Use router settings to switch to less crowded channels.
    Wi-Fi coverage heatmap before and after optimizing network with an access point.
    • Use Mesh Wi-Fi or Wi-Fi Extenders – For large homes, a mesh system can help eliminate dead zones.
    • Monitor Your Network – Use router admin tools or apps to see which devices are using the most bandwidth.

    Action Steps:
    ✅ Run a Wi-Fi analysis tool (like NetSpot or your router’s app) to find congestion.
    Reposition smart home hubs and routers for better signal strength.
    Limit background bandwidth use on streaming devices during peak hours.


    6. Smart Home Automation & Integration

    Now that your network is optimized for speed and security, let’s explore how to maximize your smart home’s potential with automation.

    Infographic depicting smart home automation routines with geofencing and scheduling.

    Examples of Smart Home Automation:

    • Geofencing: Lights and thermostat adjust when you leave home.
    • Schedules & Routines: Automate lights, blinds, and coffee makers.
    • Voice Commands: Control devices using Google Assistant, Alexa, or Apple HomeKit.
    • Sensor-Based Automation: Motion sensors trigger lights or security cameras.

    Action Steps:
    ✅ Set up routines in Alexa, Google Home, or Apple HomeKit.
    ✅ Enable geofencing for smart lights & thermostats.
    ✅ Experiment with motion-based triggers for security.


    Conclusion: Building a Smart & Secure Home Network

    Your smart home is only as good as the network it runs on. With these steps, you’ll enjoy faster connections, better security, and smoother automation. Ready to take the next step? Stay tuned for my guide on smart home automation!


    📌 Coming Soon: “Intro to NAS & Network Storage: Why You Should Consider It” 🚀